How To Get There
Simply select Codes from the side menu.
In this section, you can add new codes to your platform and configure the appearance of code stickers.
Creating Codes
- Select Codes from the platform side menu.
- On the Overview tab, click on the the + Create Code button.
- Go through the creation flow providing fitting information for each step of the flow including Related Departments, Labels, Code Status, PIN and Batch Settings. Some of these steps are optional.
Note: In the Batch Settings step, you can select from the - Amount of codes to create dropdown the number of codes you want to create (up to 1000 at a time). And by checking the Download code as file checkbox, you can download the generated codes in PDF, CSV and JSON file formats.
Creating Codes from the Device Context
Select a Device from the Device Overview
Option 1: Click Create Code and on the pop-up, click Create And Pair Code
Option 2: Navigate to the Codes tab on the Device details view
- If no unpaired codes are available, you can create individual codes directly from an unpaired device (picture):
- Click + Pair With Code. A pop-up will appear stating that no unpaired codes are available.
- Click + Create Code to generate a new code and pair it with the device.
- If there are already generated and used codes:
- Click + Pair With Code. A pop-up will appear stating that no unpaired codes are available.
- Select a code from the dropdown list or use the search box to find a specific code.
- Click the desired code to pair it.
Configuring the Appearance of Code Stickers
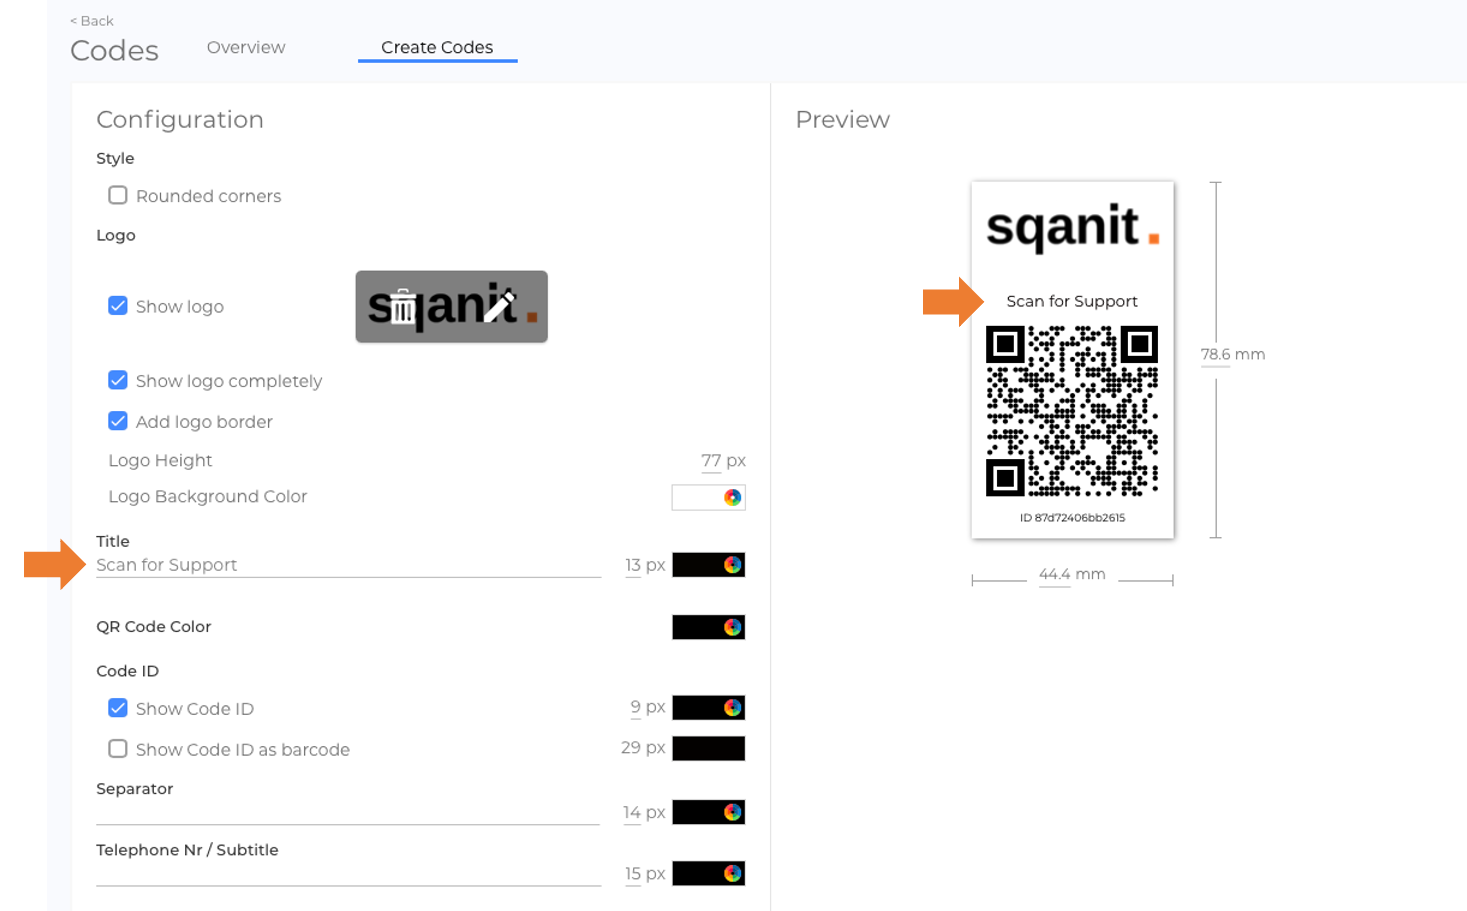
You can customize the appearance of your code stickers in the Code Designer tab to align with your corporate identity. The live preview allows you to see changes in real time.
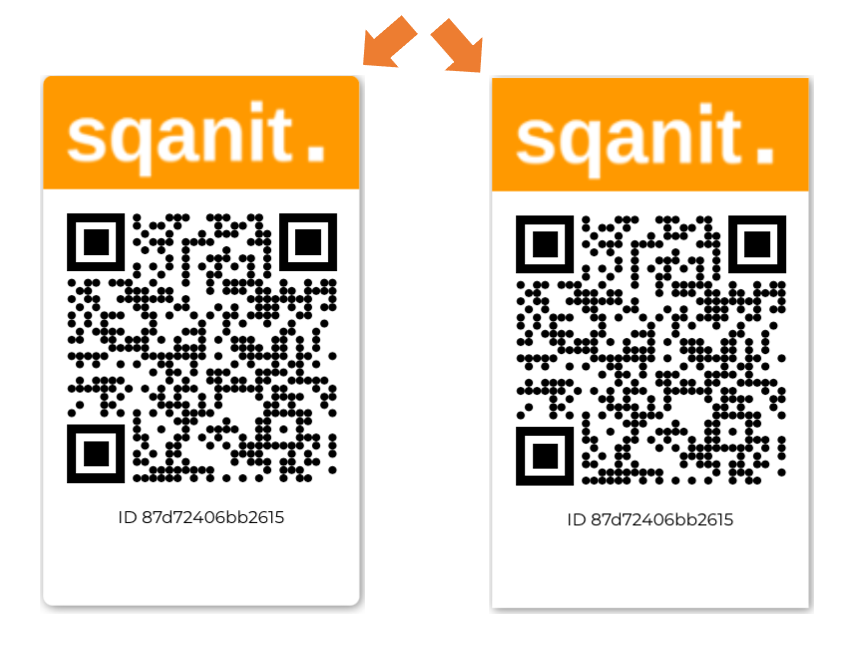
Note: All code stickers share the same layout and design, except for their unique QR codes and IDs.

Style
- Rounded Corners: Choose between rounded or pointed corners. (picture)
Logo
- Show Logo: Choose whether to display a logo on the code sticker.
- Upload a logo by dragging and dropping it into the upload field or selecting it from your computer.
- Click the pencil icon to edit and select a section of the logo. (video) - Show Logo Completely: Ensures that the entire selected section of the logo is displayed. (video)
- Add Logo Border: Adds a border around the logo.
- Logo Height: Adjust the logo height using the input field or keyboard arrows.
- Logo Background Color: Choose a background color for your logo. (video)
Note: Background color works only if your logo is a PNG file with a transparent background.
Title
- Call to Action: Add custom text to encourage users to scan the code. (picture)
QR Code Color
- Change the color of the QR code using the color picker.
Code ID
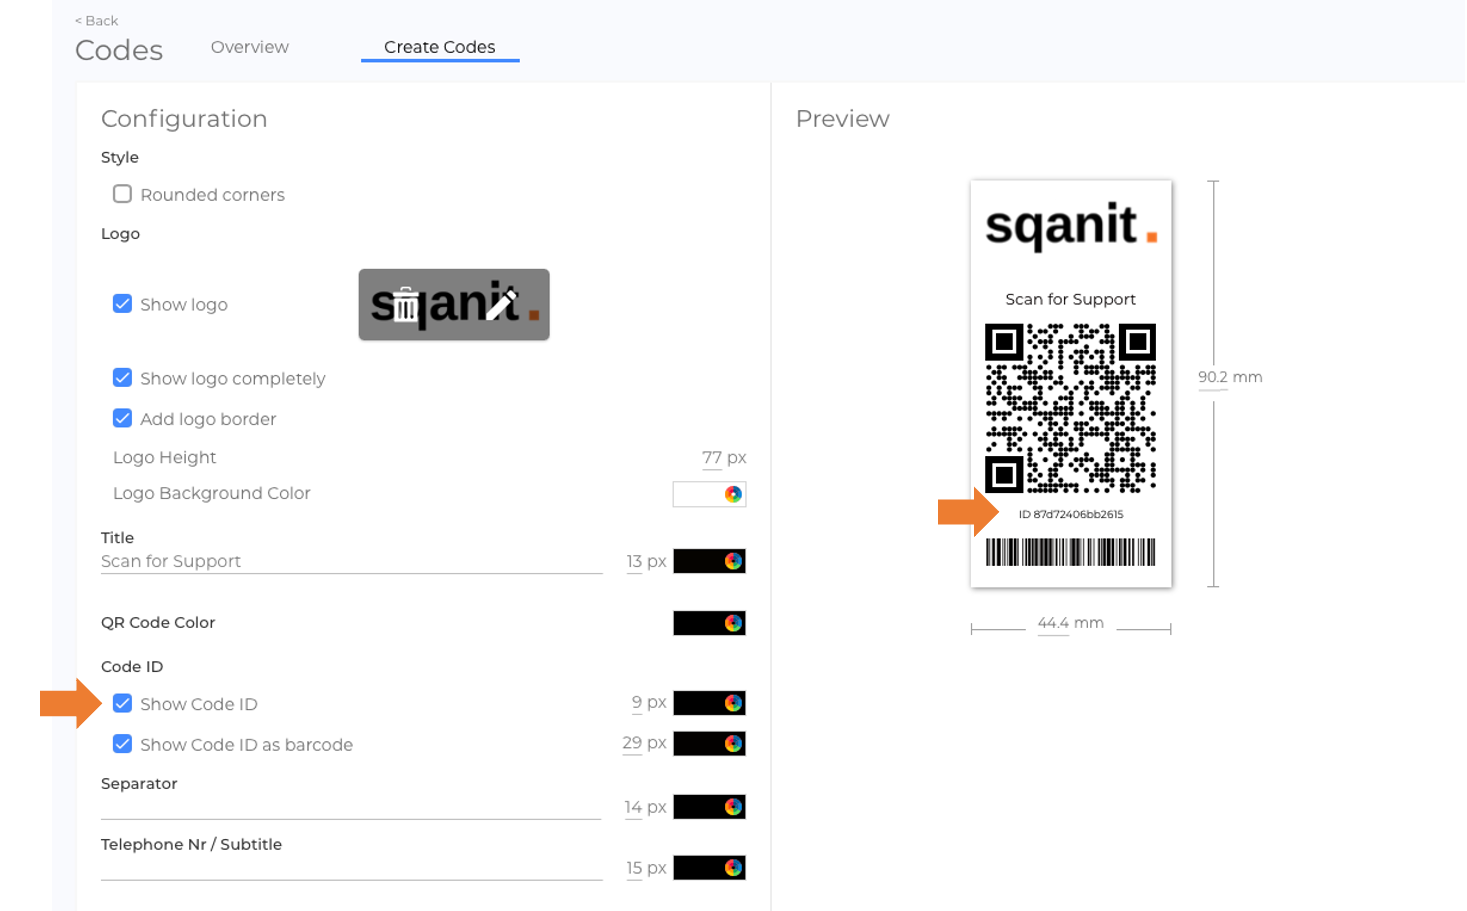
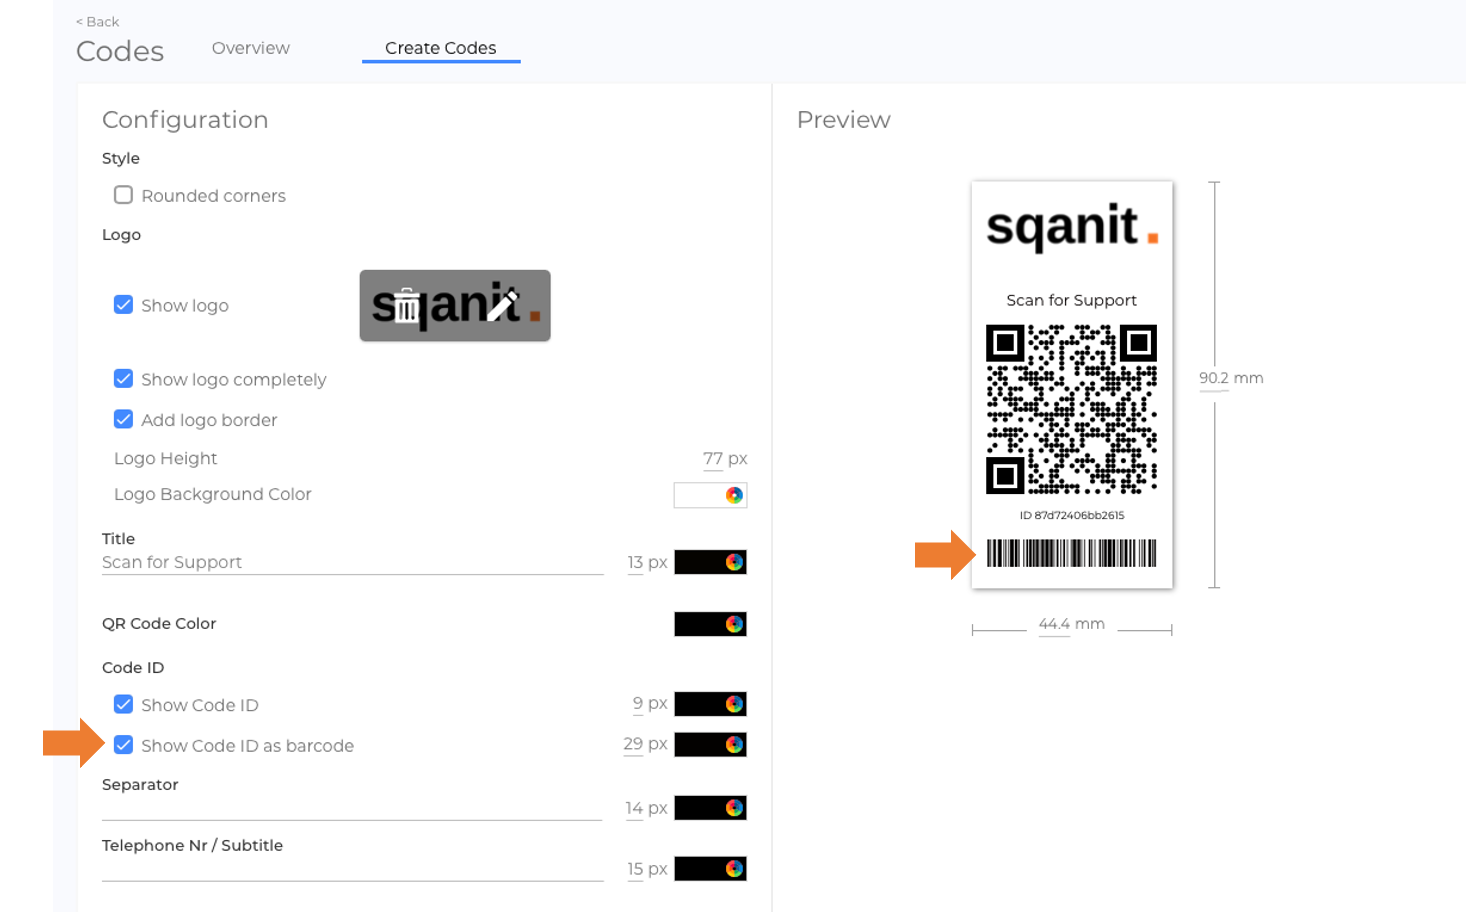
- Show Code ID: Choose whether to display the short ID of the code and customize its size and color. (picture)
- Show Code ID as Barcode: Choose whether to display a barcode of the short ID and customize its size and color. (picture)
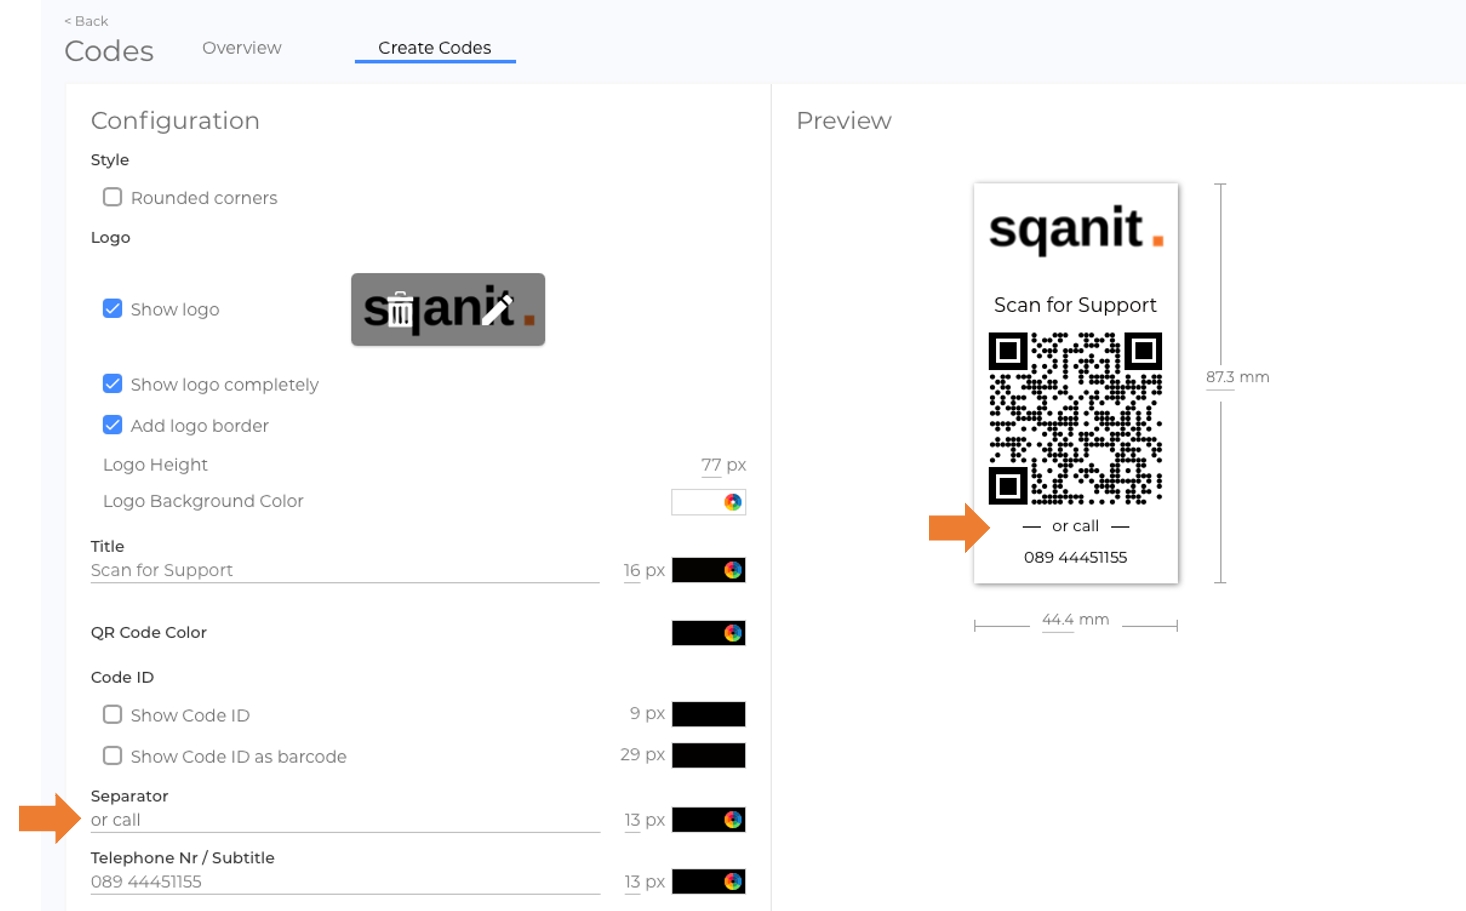
- Separator: Add a separator to divide sections of information. (picture)
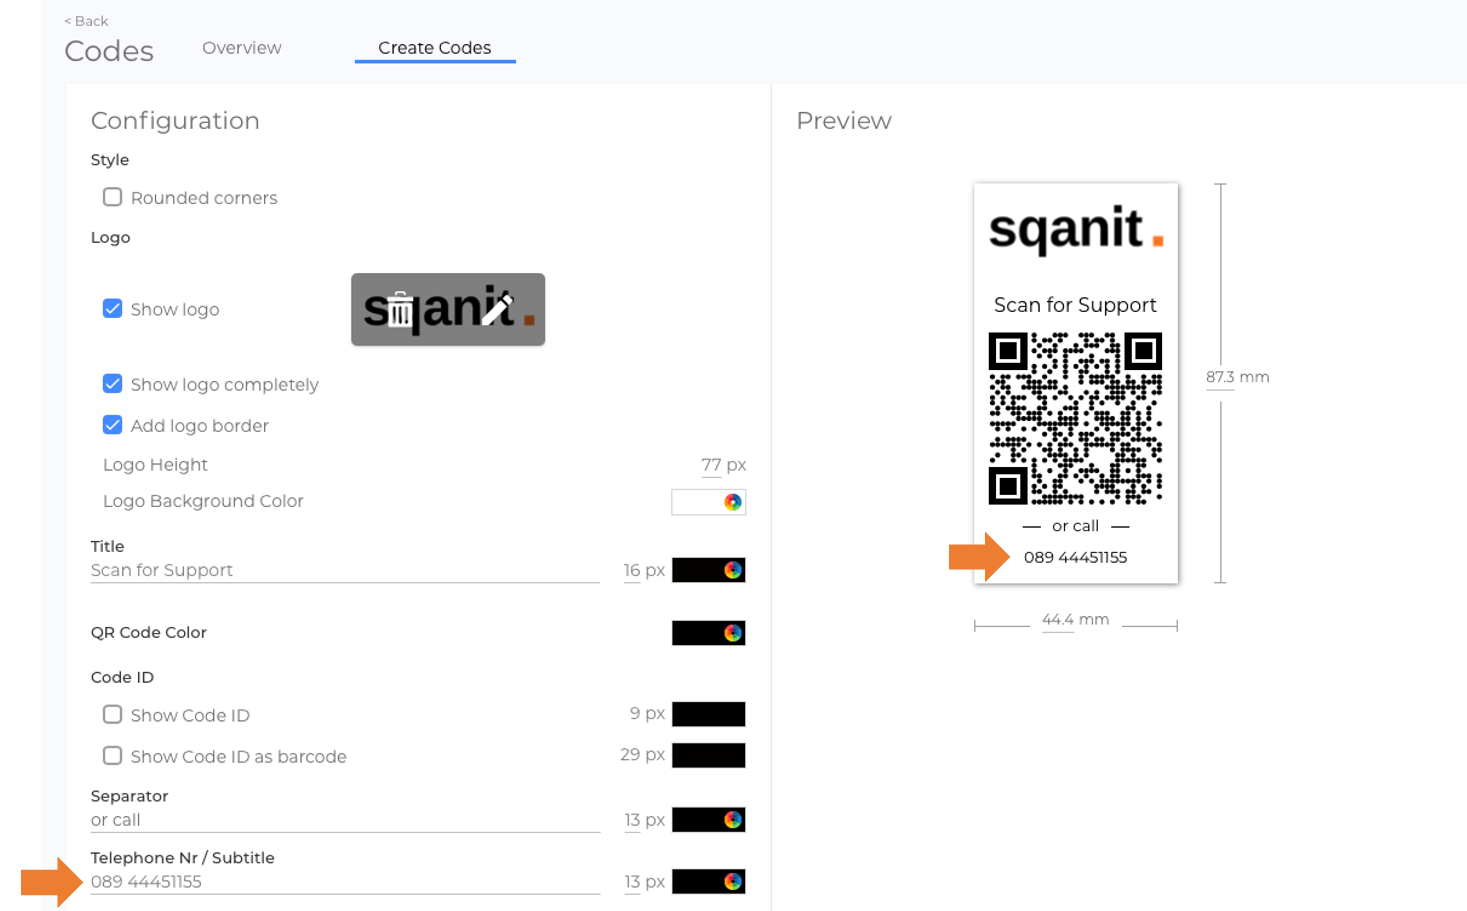
- Telephone Number / Subtitle: Add additional information such as a phone number. (picture)
Code Dimensions
- The size of the code sticker is shown in the preview. Adjust dimensions by entering custom values in the input fields.
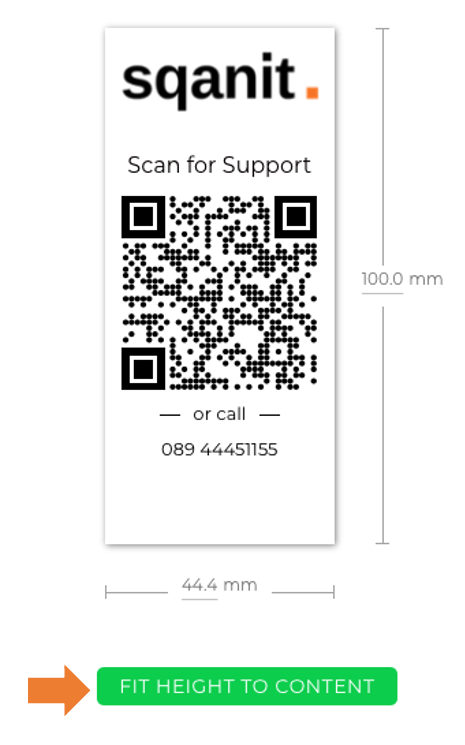
- Fit Height to Content: Use this button to automatically adjust the sticker height if it is too big or too small. (picture)
Note: This button only appears when adjustments are needed.
Good to Know
- Codes can be created in bulk and exported as a file if needed.
- Codes can be generated from an unpaired device if no unpaired codes are available.
- Customising code stickers helps align them with your branding and improves user engagement.
 We use cookies on our website to give you the most relevant experience by remembering your preferences and repeat visits. By clicking “Accept All”, you consent to the use of ALL the cookies. However, you may visit "Cookie Settings" to provide a controlled consent.
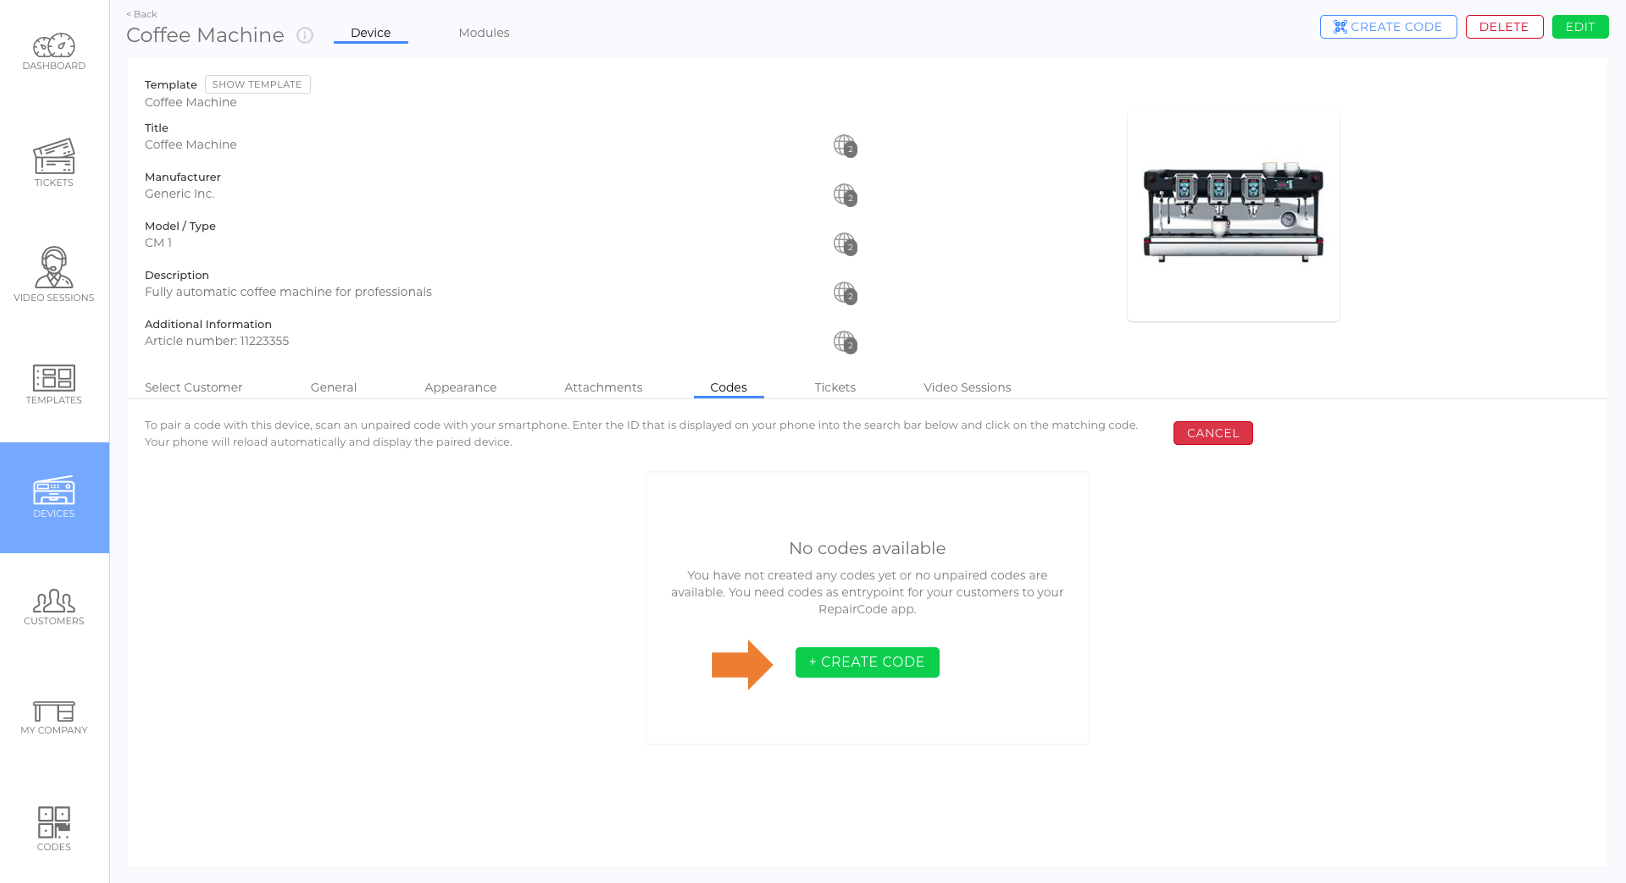