Introduction
The Appearance settings allow you to align the platform's look and feel with your company's corporate identity. By customizing various visual elements, you can ensure a seamless and professional experience for code users.
What Can Be Customized?

Preview
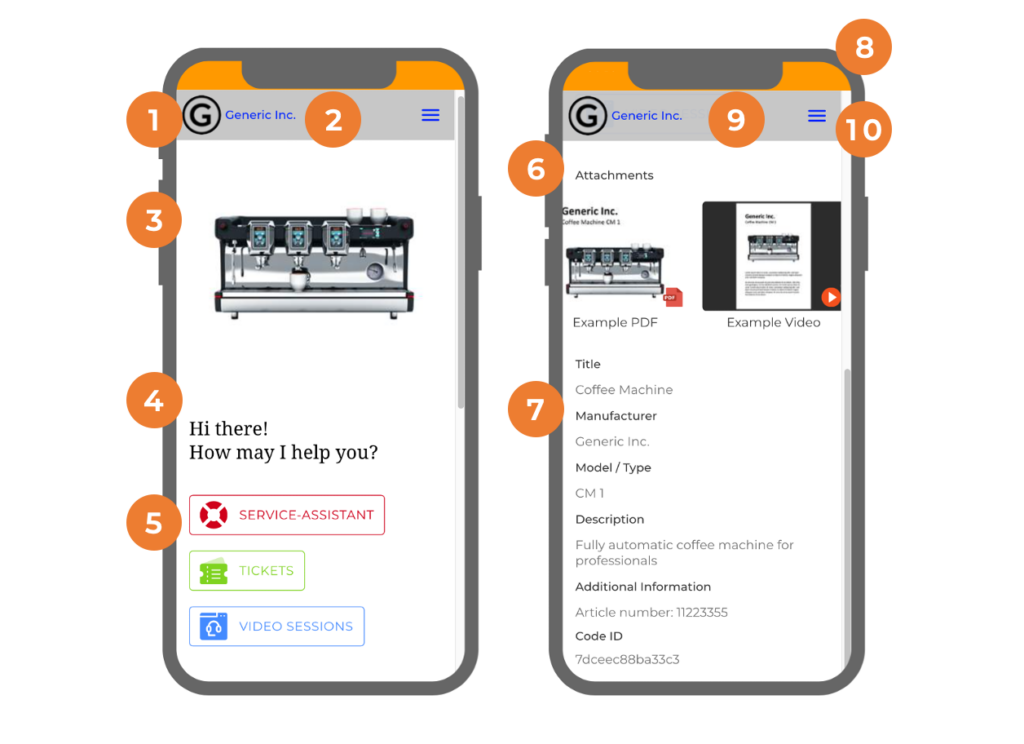
Use the Appearance Preview to adjust and visualize the following elements:
| Element | Description |
|---|---|
| (1) Logo | Upload your company's logo to represent your brand. |
| (2) Name | Customize the name displayed to code users. |
| (3) Picture | Add an image that reflects the purpose of the template or brand identity. |
| (4) Introductory Message | Provide a welcome message to greet code users. |
| (5) Module Buttons | Customize the buttons leading users to the respective modules. |
| (6) Attachments | Include files or resources like manuals or user guides. |
| (7) General Information | Display details like contact information or operational notes. |
| (8) Main Color | Highlight icons and backgrounds with a color that matches your corporate identity. |
| (9) Topbar Color | Adjust the top bar's background color for consistency. |
| (10) Topbar Contrast Color | Ensure text and symbols on the top bar remain legible by customizing their contrast color. |
How to Edit the Appearance
General Information, Picture, and Attachments
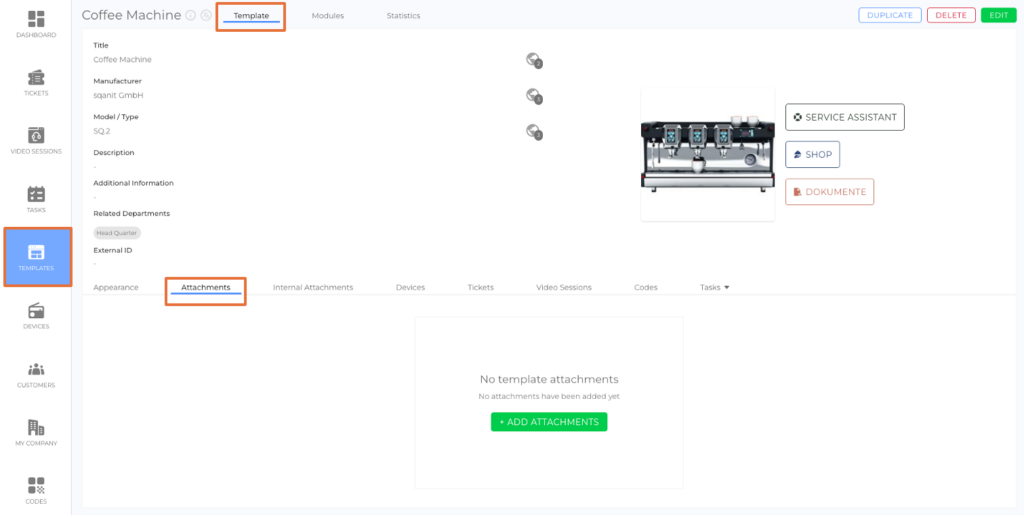
- Select Templates from the side menu.
- Choose the template you want to edit.
- Navigate to the Template Tab.
- Click edit to make changes to general information, pictures, and attachments.

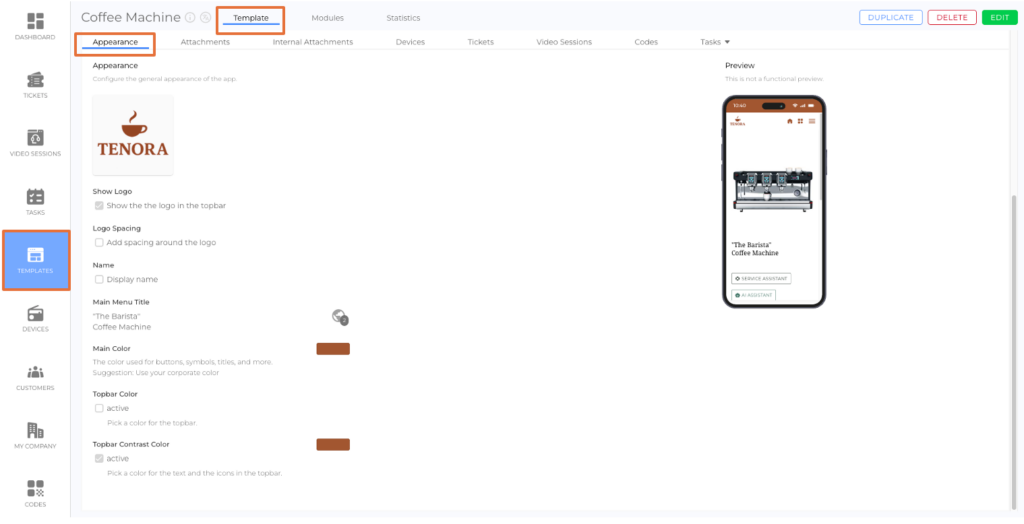
Logo, Name, Introductory Message, and Colors
- Select Templates from the side menu.
- Choose the template you want to edit.
- Click the Modules Tab.
- Select Appearance from the side menu.
- Click edit to adjust:
- Logo
- Name
- Introductory Message
- Main Color and Topbar Colors
- Use the Preview on the right side to visualize changes in real time.
Notes:
- The Main Color highlights elements like icons and backgrounds. If left unchanged, the Corporate Identity Color is used by default. (picture)
- The Topbar Contrast Color ensures text and symbols on the top bar are clearly legible.
Editing Module Buttons
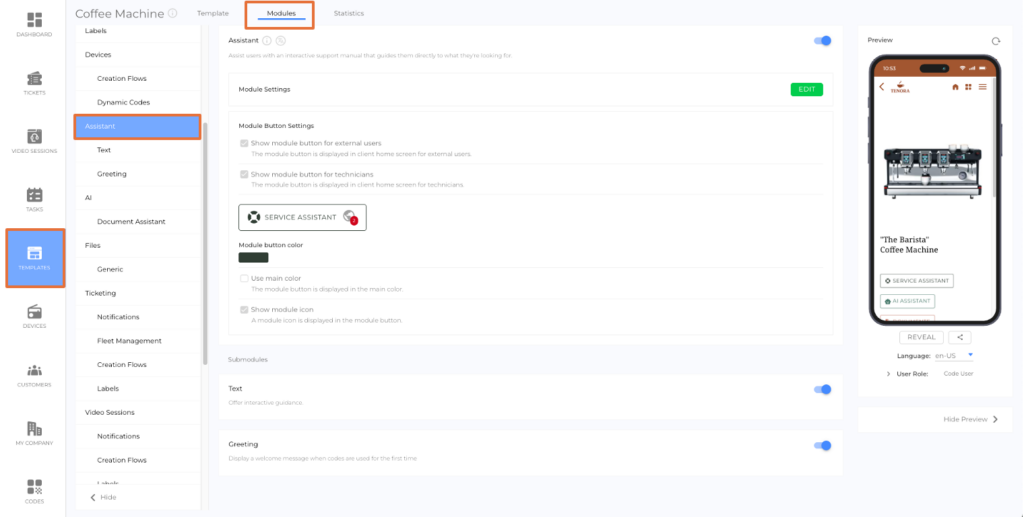
- Select Templates from the side menu.
- Choose the template you want to edit.
- Click the Modules Tab.
- Select the module for which you want to edit the module button.
- Click the pencil icon next to the module button to switch to edit mode.
Tip: The module buttons are an essential part of the user interface, so ensure their appearance aligns with your overall design.
Was this article helpful?
YesNo


