How to Get There
- Select Tickets from the side menu.
- Click on a ticket to open its details view, where the Messenger is located.
Introduction
The Messenger enables employees to communicate directly with code users, facilitating customer service and problem resolution. Designed for clarity and precision, the Messenger includes a variety of tools to streamline remote troubleshooting and collaboration.

Messenger Features
Resize the Messenger Window
- To change the size of the Messenger window, click the arrow in the top-right corner. (picture)
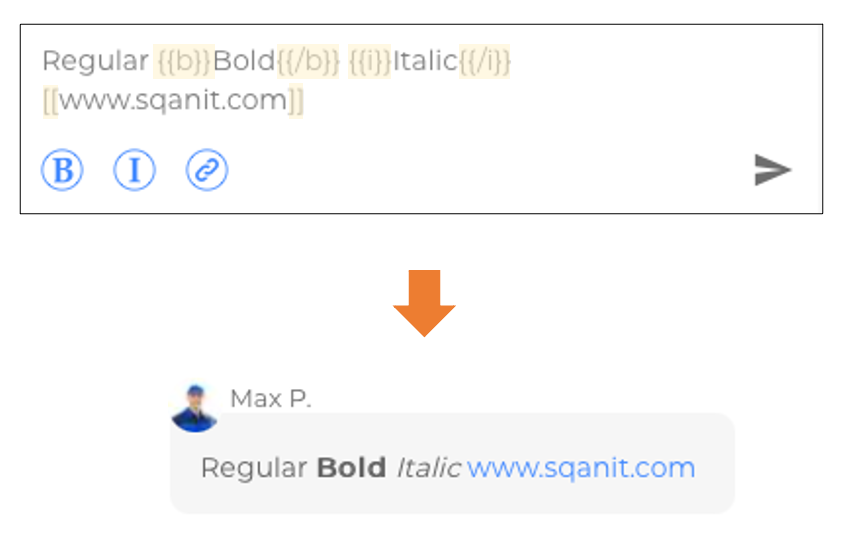
Text Messages
- Use the text tools to format text as bold or italic and insert links. (picture)
- Text formatting appears in Markdown until the message is sent. (picture)
- URLs and email addresses are automatically recognized. (video)
Voice Messages
- Click and hold the microphone icon to record a voice message. (video)
Attachments
- To upload attachments, click the paper clip icon.
- Alternatively, drag and drop files directly into the Messenger to upload them.
- Supported file types include: AAC, AVI, DOCX, FLAC, GIF, JPEG, M4A, MATROSKA, MP3, MP4, MSVIDEO, ODT, OGG, OPUS, PDF, PNG, PPT, PPTX, QUICKTIME, TXT, VORBIS, WAV, WEBM, WMV, XLS, XLSX.
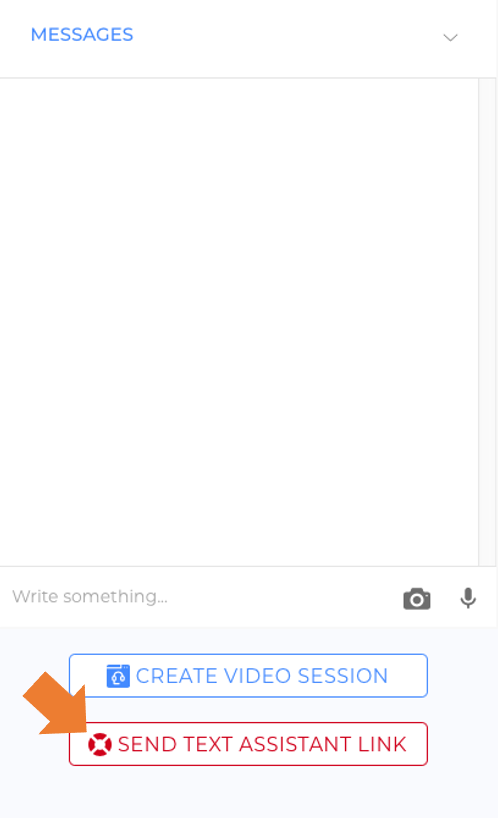
Text Assistant Links
- Send links to guide code users to specific elements within the Text Assistant.
Steps to send Text Assistant links:
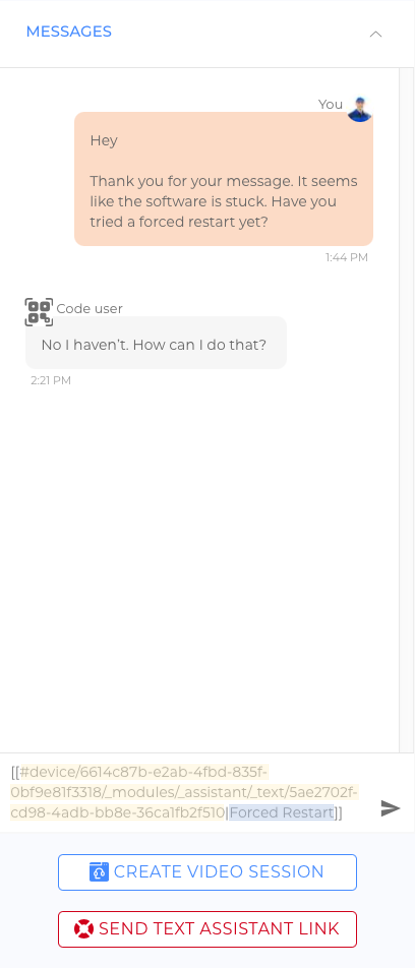
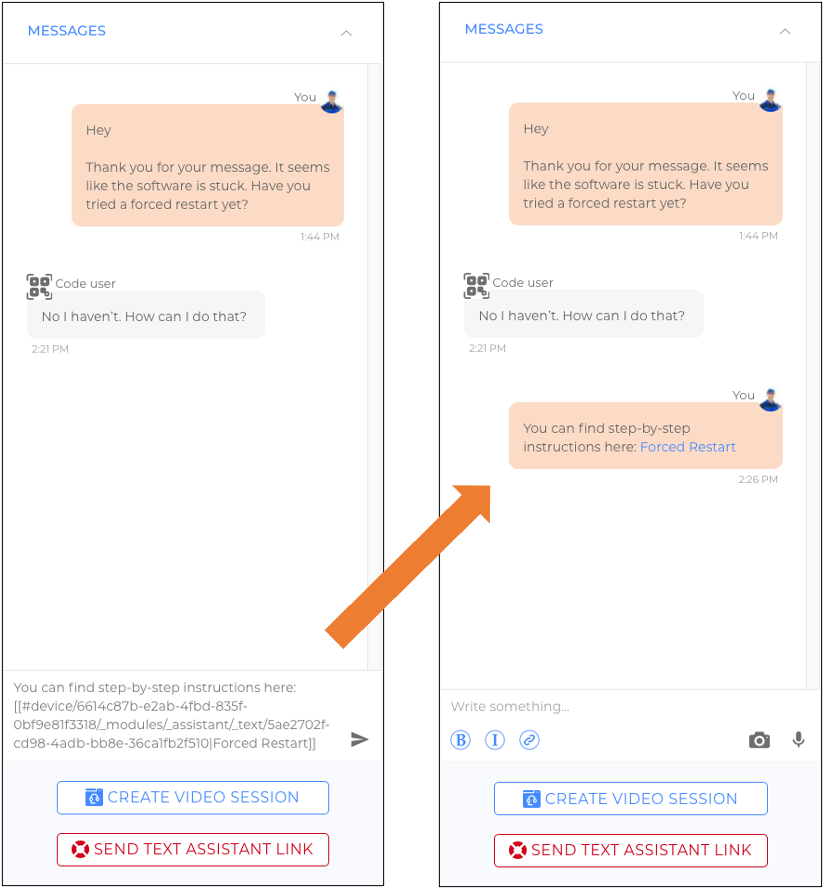
- Click Send Text Assistant Link. (picture)
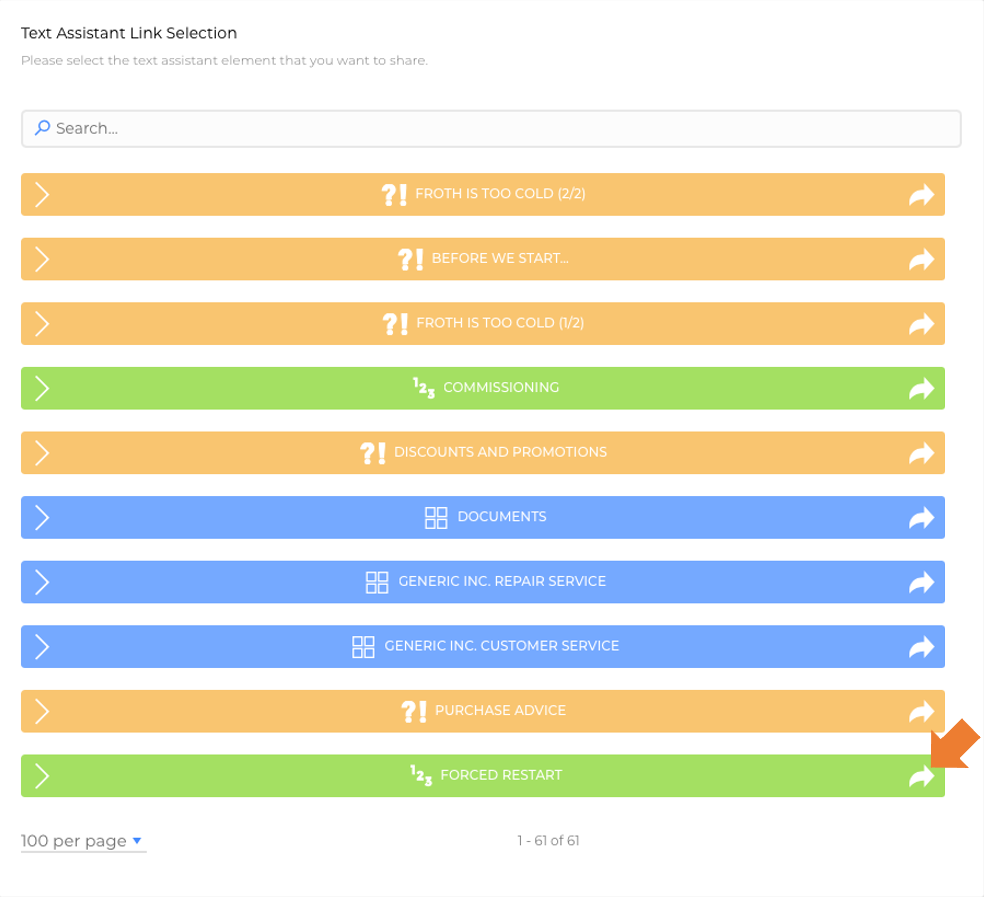
- Select the desired element from the list. (picture)
- A link in the format
[[URL | link text]]will be added to the input field. (picture)
Note: The link text, which defaults to the Text Assistant element’s title, can be edited. (video) - Add any additional text and click the Send icon. (picture)
Create a Video Session
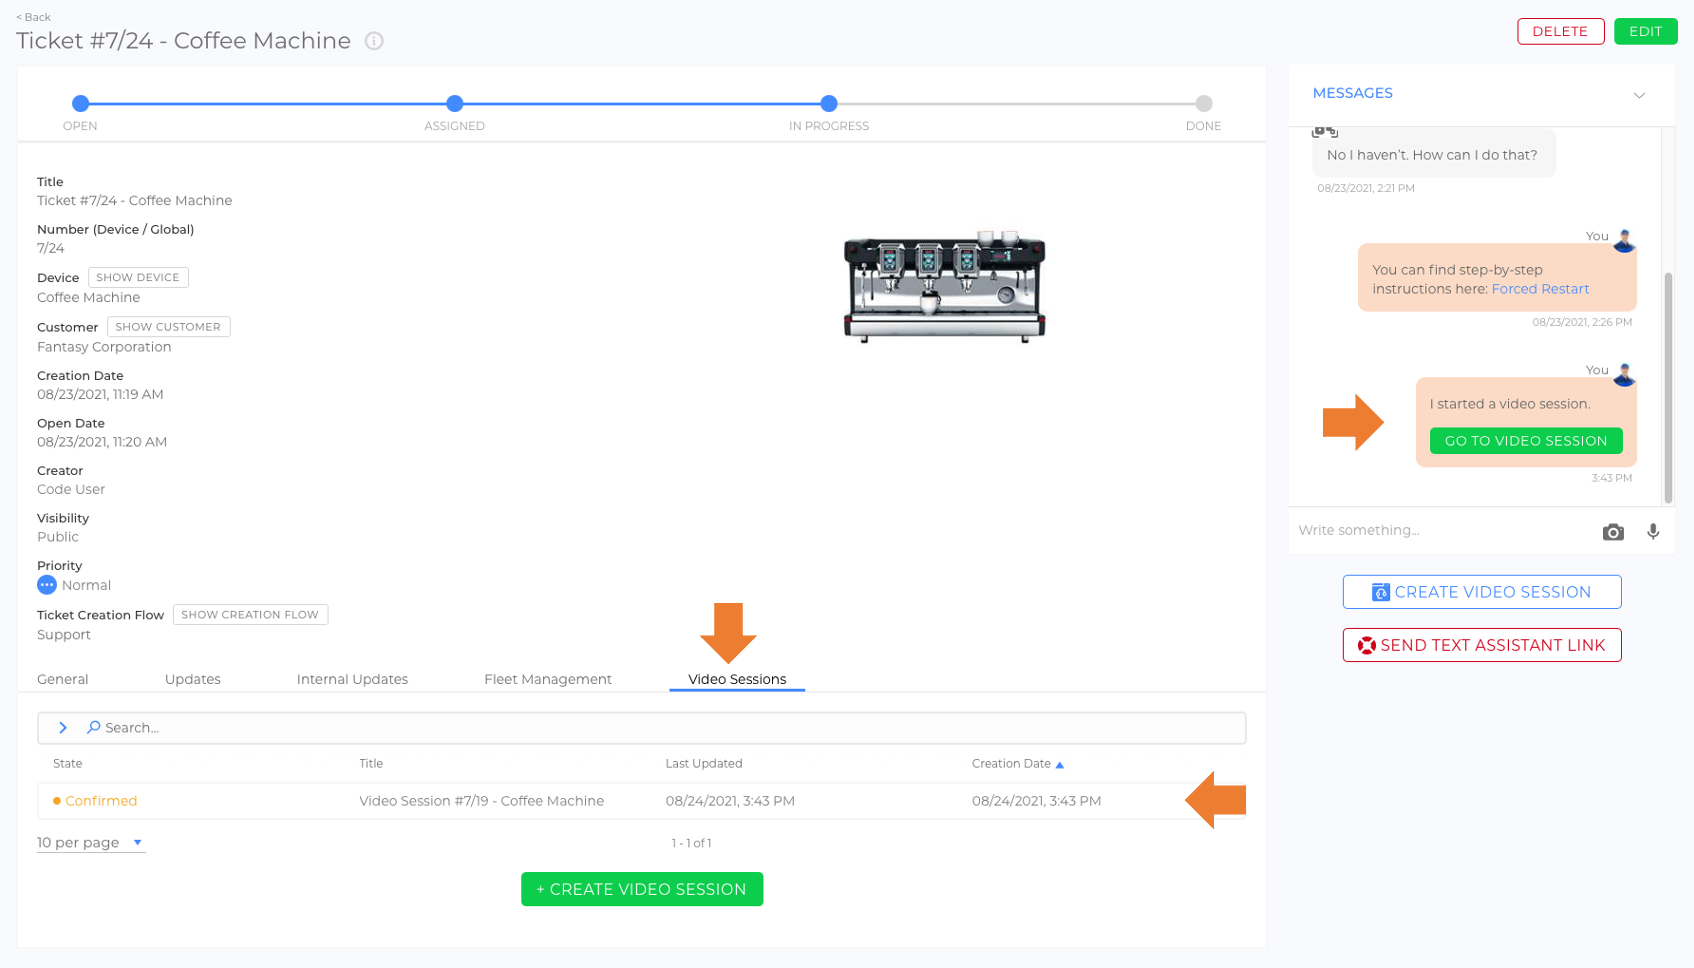
- Click Create Video Session to send the code user a link to join a Video Session through the Messenger.
Notes:
- The Video Session will automatically be set to Open allowing both sides to join immediately. (video)
- The new Video Session will be linked to the ticket. (picture)
- If Video Sessions are deactivated for your organization, template, or device, the Create Video Session button will not appear.
For more details, refer to the article How to Use Video Sessions (article).
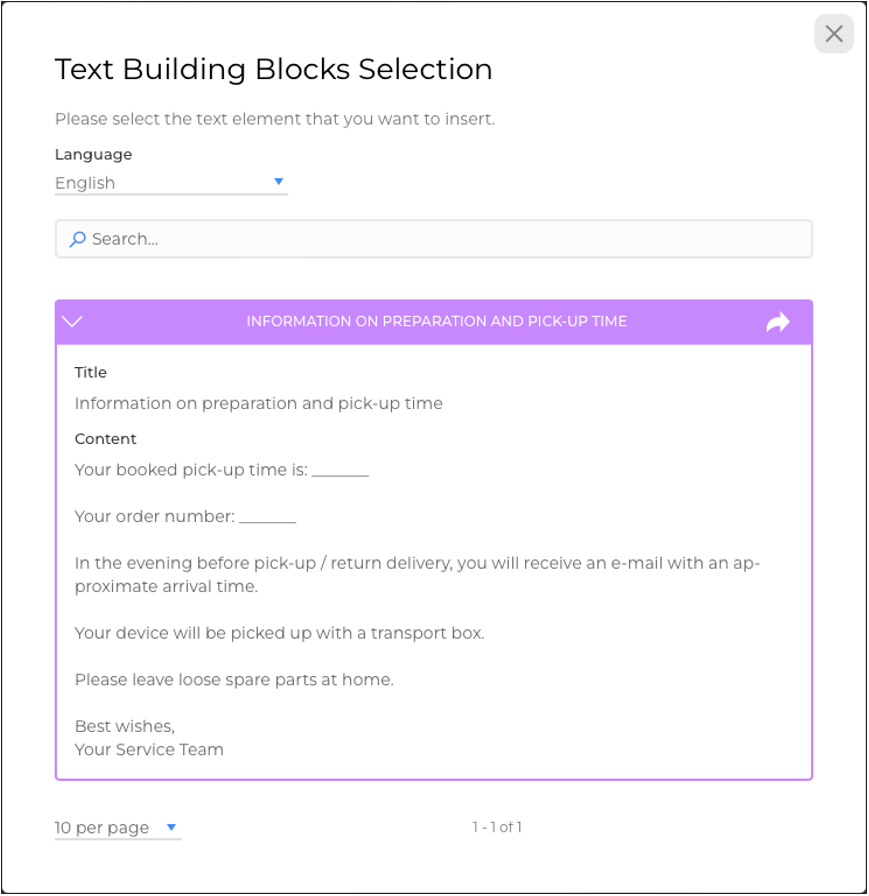
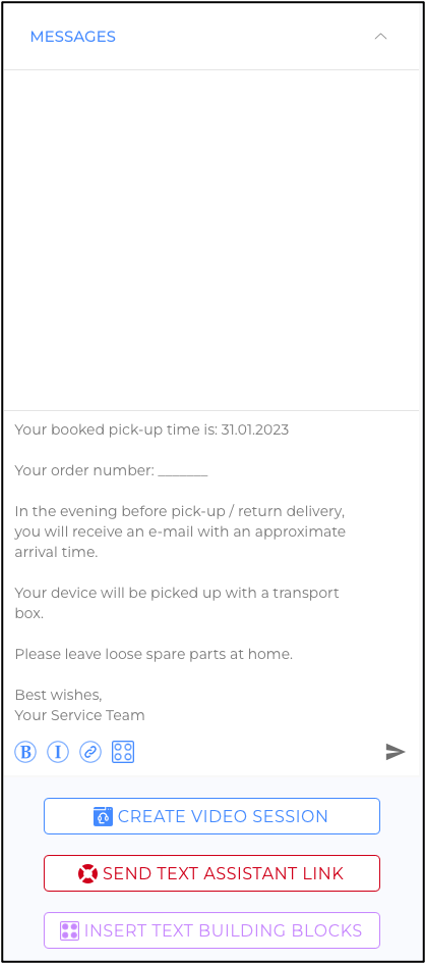
Insert Text Building Blocks
- Save frequently used text as text building blocks for quick insertion into messages.
Steps to use text building blocks:
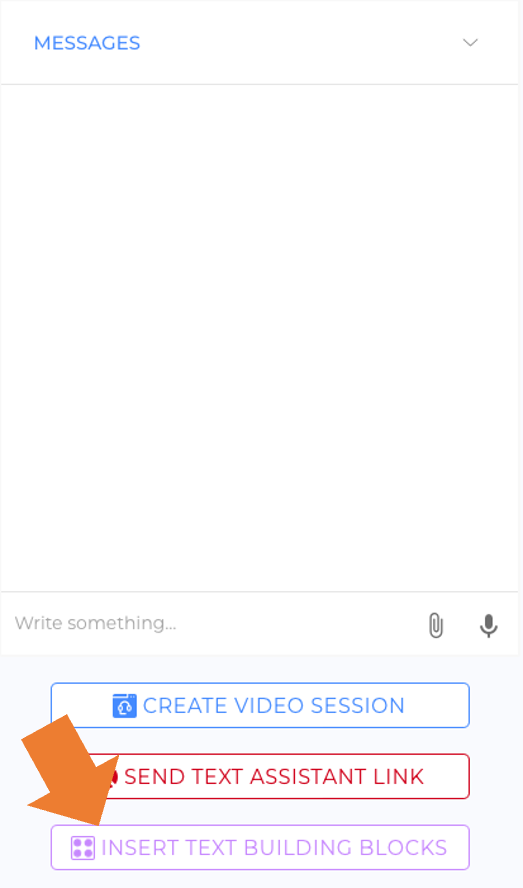
- Click Insert Text Building Blocks. (picture)
- Select the desired element from the list. (picture)
- The selected text will appear in the input field and can be edited before sending. (picture)
Good to Know
- Employees can only use the Messenger after accepting the ticket offer or being assigned to the ticket. (video)
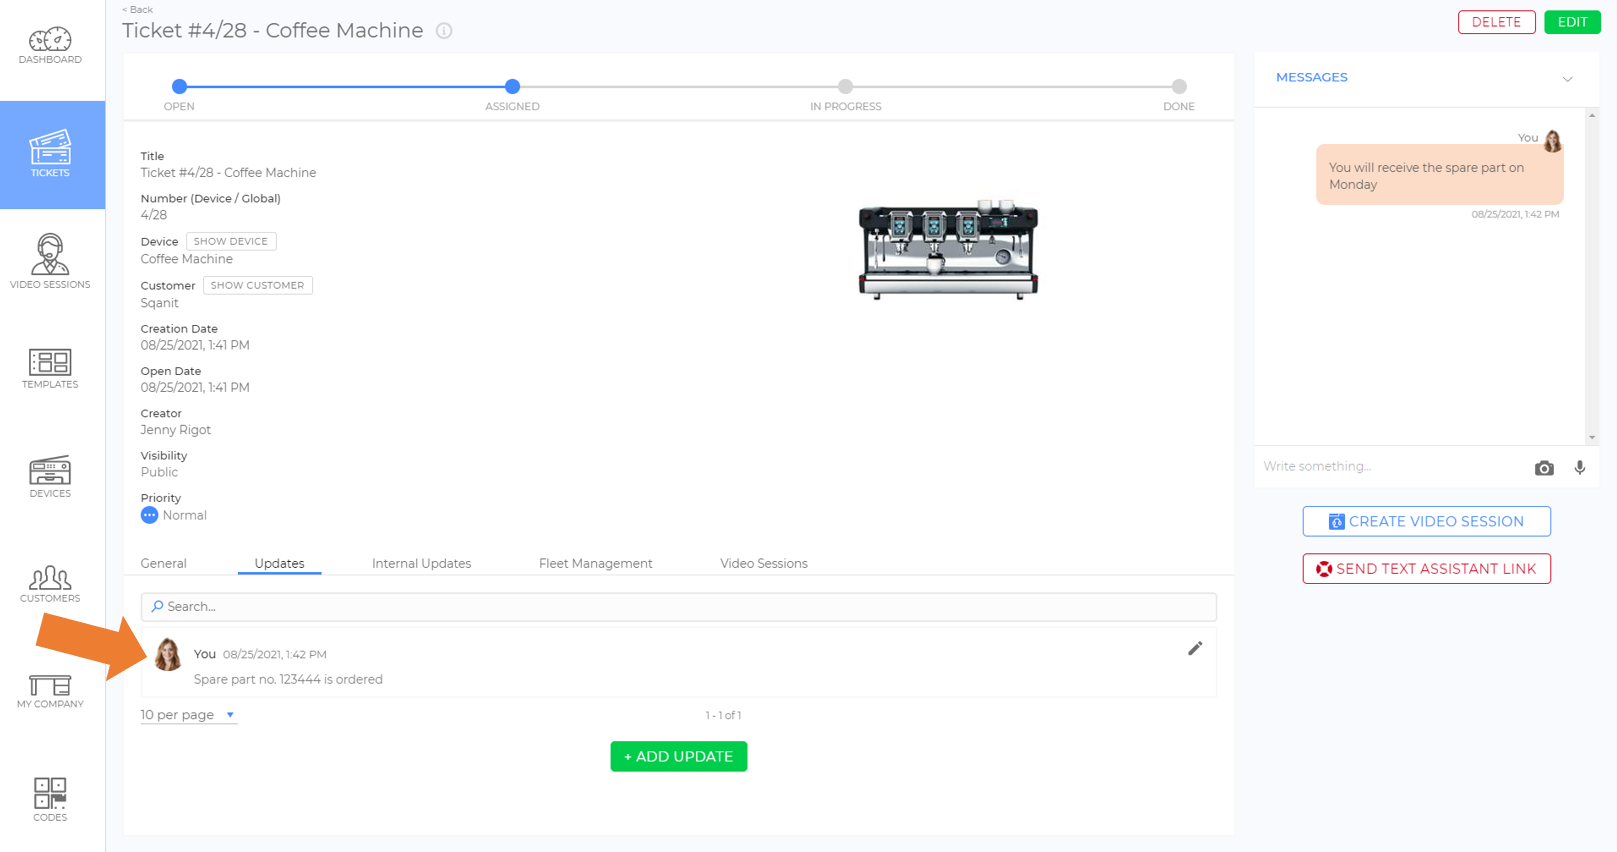
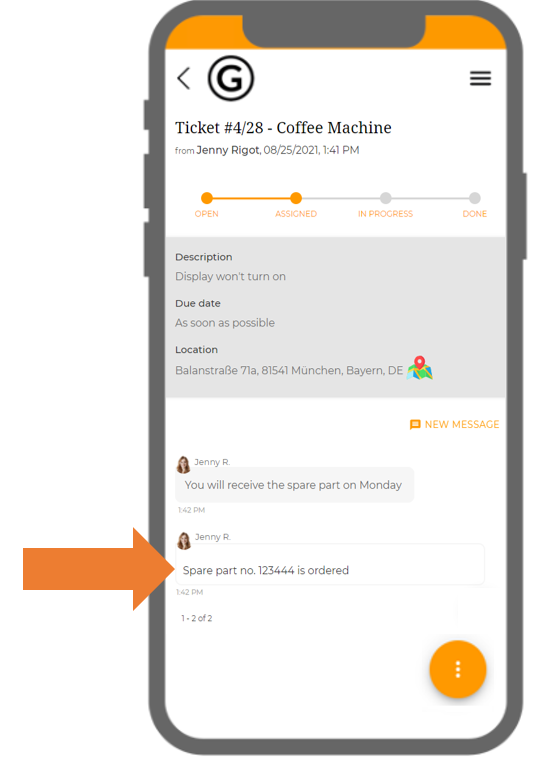
- Code users do not have an Updates Tab like employees in the Back Office. (picture) Instead, updates appear directly in their Messenger. (picture)
- Once a ticket is closed, code users can no longer use the Messenger.
- Messages cannot be deleted or edited after sending.
Was this article helpful?
YesNo
 We use cookies on our website to give you the most relevant experience by remembering your preferences and repeat visits. By clicking “Accept All”, you consent to the use of ALL the cookies. However, you may visit "Cookie Settings" to provide a controlled consent.
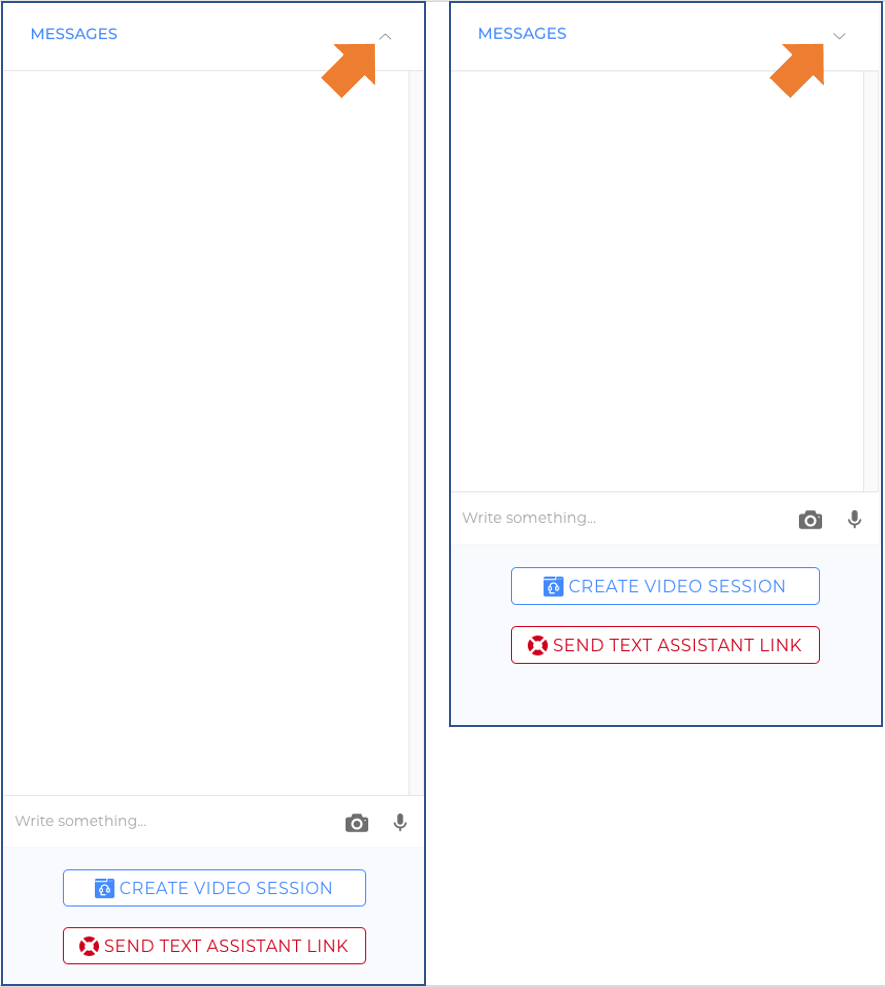