Introduction
The platform allows you to efficiently organize and manage customer information, ensuring seamless service processes and better customer experiences. By using customers, you unlock several key benefits:
- Offer Added Value: Provide corporate customers access to "their own platform" via a customer login. This enables them to use asset management capabilities, a feature that can be marketed as an upgrade or premium service by your organization. (article)
- Simplify Service: When customers are linked to devices, service employees automatically see customer details like name, address, and other devices they own during ticket creation or video sessions. This reduces the need for repetitive questions and saves valuable time.
- Leverage Smart Routing: Use Meta Teams and Teams to efficiently assign service requests to the right team (article). This functionality requires customers, as the system uses the customer-to-team mapping to determine the correct team within a Meta Team (article).
- Access Customer-Specific Statistics: Generate insights on ticket volume, service request frequency, and more, enabling data-driven decision-making.
The Difference Between Corporate and Private Customers
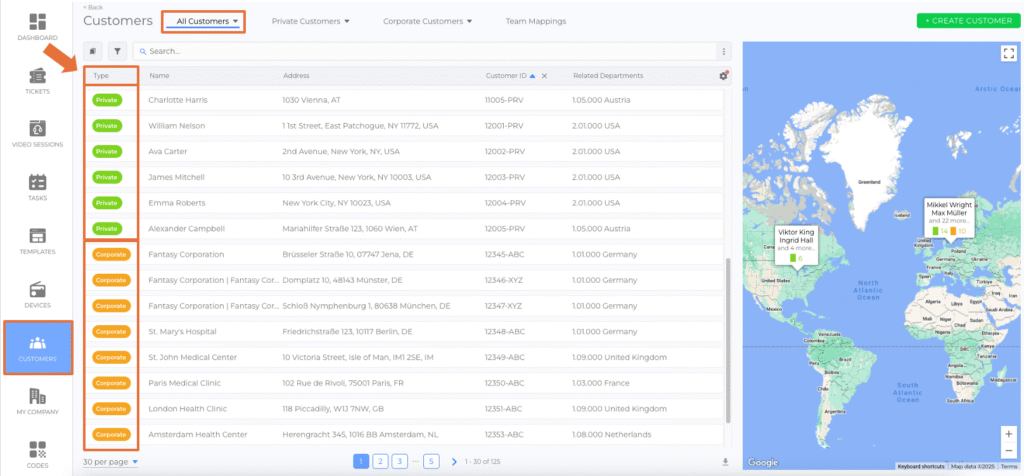
- Corporate Customers: These customers can have a headquarters and may have departments, each with unique information and contact details. It is identified with an orange color tag in the Customers list view.
- Private Customers: These customers are individual entities without departments. It is identified with a green color tag in the Customers list view.
Adding Customer - Step-by-Step Instructions
Option 1: Adding a Customer via the Creation Flow
(Go to Instruction Video)
- Select Customer from the side menu.
- Click + Create Customer.
- Choose the customer type: + Corporate Customer or + Private Customer.
- Enter the required customer data, such as name, address, departments and labels in the creation flow.
- Upload a profile picture for the customer profile. (Optional)
The Customer creation flow includes a Labels step, allowing users to select existing labels. This enables customers to be grouped thematically right during creation, making later filtering and analysis more efficient.
Adding a Department (Corporate Customers Only)
- Select Customers from the side menu.
- Choose the corporate customer you want to edit.
- Click + Create Department.
- Enter the department name and contact details.
- Click Save.
Option 2: Adding Customers via CSV File Import
(Go to Instruction Video)
- Select Customers from the side menu.
- Click + Add Customer.
- Choose + Import Corporate Customers or + Import Private Customers.
- Upload a CSV file with your customer data.
- Review the uploaded data and confirm by clicking Next. (To make corrections, press Back).
- Choose the import mode and specify the identifying field to update existing customers if needed.
- Click + Start Import. (Note: After clicking + Import Corporate Customers or + Import Private Customers, you can download a sample file to ensure the CSV layout is correct).
For more details, please read the article Imports & Exports (article).
Editing a Customer
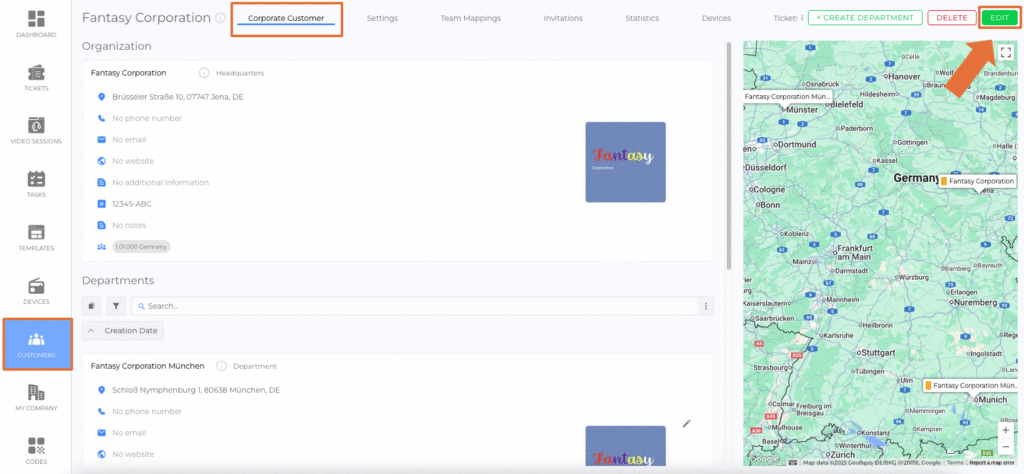
- Select Customers from the side menu.
- Choose the customer you want to edit.
- Click Edit.
- Make your changes and click Save.
Next Steps
Explore additional articles to maximize your customer management in the article collection Customers (articles)
Was this article helpful?
YesNo


