Introduction
Meta Teams are a key component of efficient workforce management, especially for companies operating across multiple locations with various local teams. By using Meta Teams, service providers ensure that only employees responsible for a specific region receive notifications for new tickets or video sessions, improving response times and operational efficiency.
The Meta Teams functionality only works for devices linked to customers with a properly set up customer-team mapping!
What Are Meta Teams?
A Meta Team acts as a category that groups multiple teams performing the same tasks but in different locations (e.g., geographic regions). Meta Teams streamline workforce management and enable smart routing for service requests.
Example: How Meta Teams Organize Teams by Location
| Meta Team (Category) | Teams (Responsible) |
|---|---|
| Service Technicians | Germany, USA, France |
| Customer Service Employees | North Germany, South Germany |
| Sales Representatives | Berlin, Munich, Frankfurt |
How Meta Teams Work
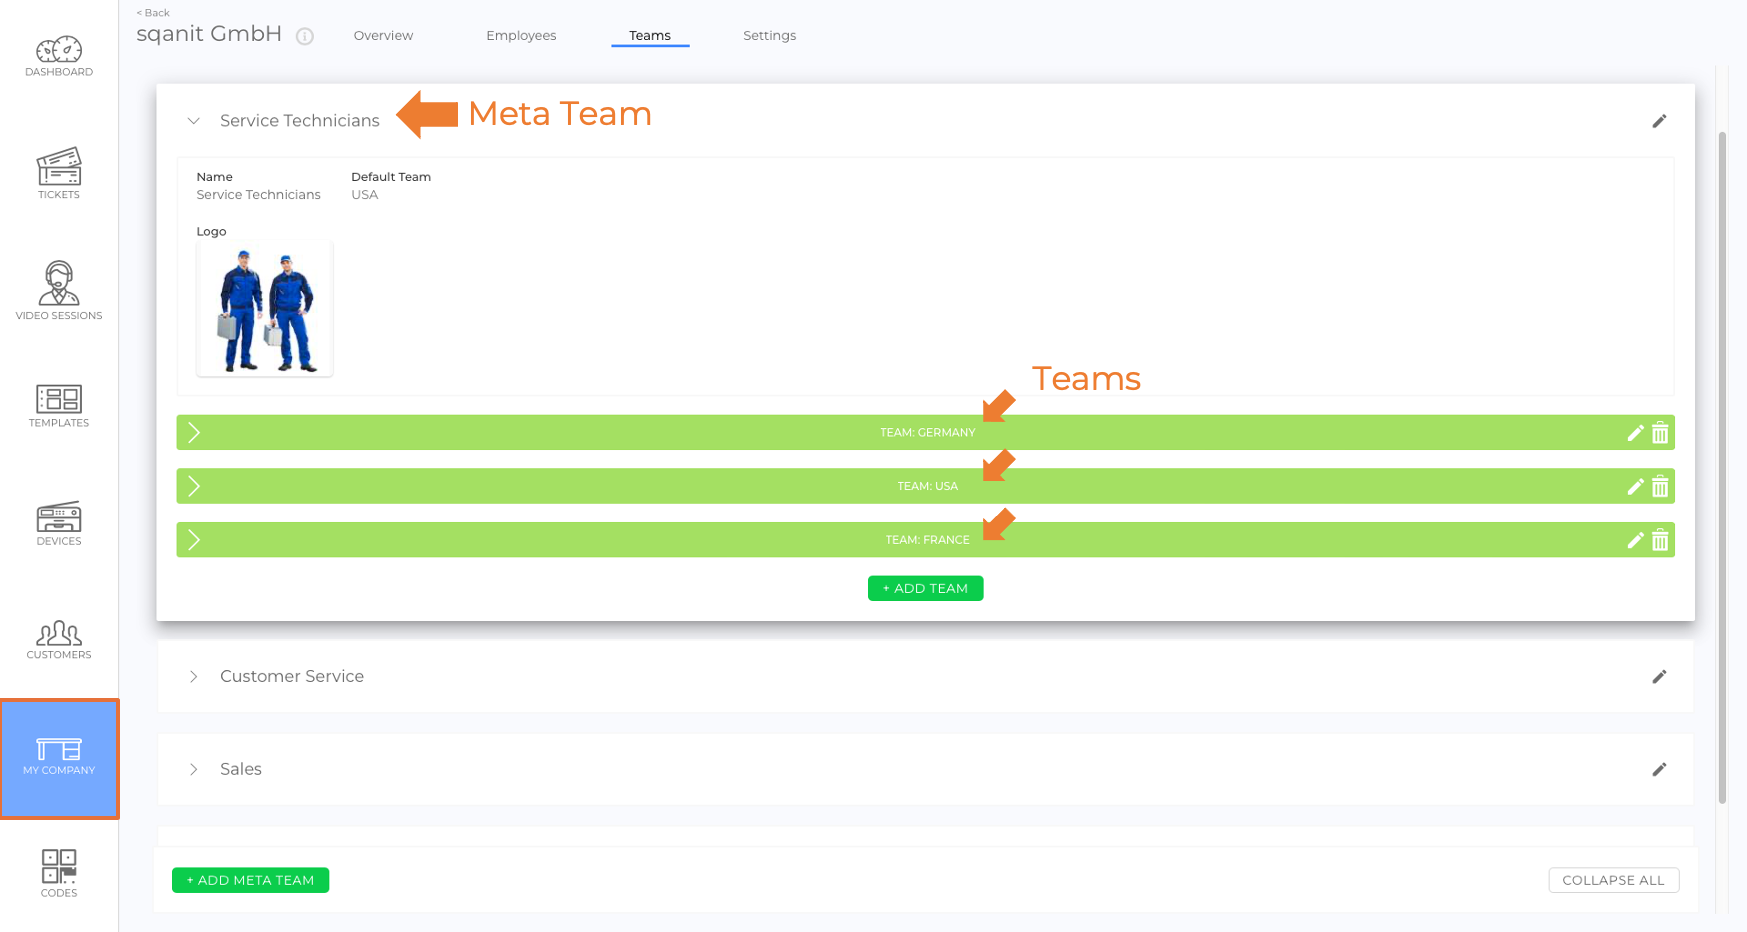
- At the Company Level → Meta Teams and individual teams are created, and employees are assigned to teams. (picture)(picture)(picture)
- At the Template Level → Meta Teams are added to Fleet Management or Notification Groups, which are then linked to ticket creation flows or video session requests. (picture)(picture)
- At the Customer Level → A team from each Meta Team is assigned to each customer, ensuring that service requests are routed correctly. (picture)
How to Set Up Meta Teams & Teams
1. Create Meta Teams & Teams
- Navigate to My Company in the side menu.
- Open the Teams Tab.
- Click + add Meta Team (picture).
- Enter a name for the new Meta Team (e.g., "Service Technicians") and click save.
Reminder: A Meta Team is a category that groups multiple teams. - Click + add Team.
- Enter a team name (e.g., "Germany" → Service Technicians responsible for Germany) and click next.
- (Optional) Add a team logo.
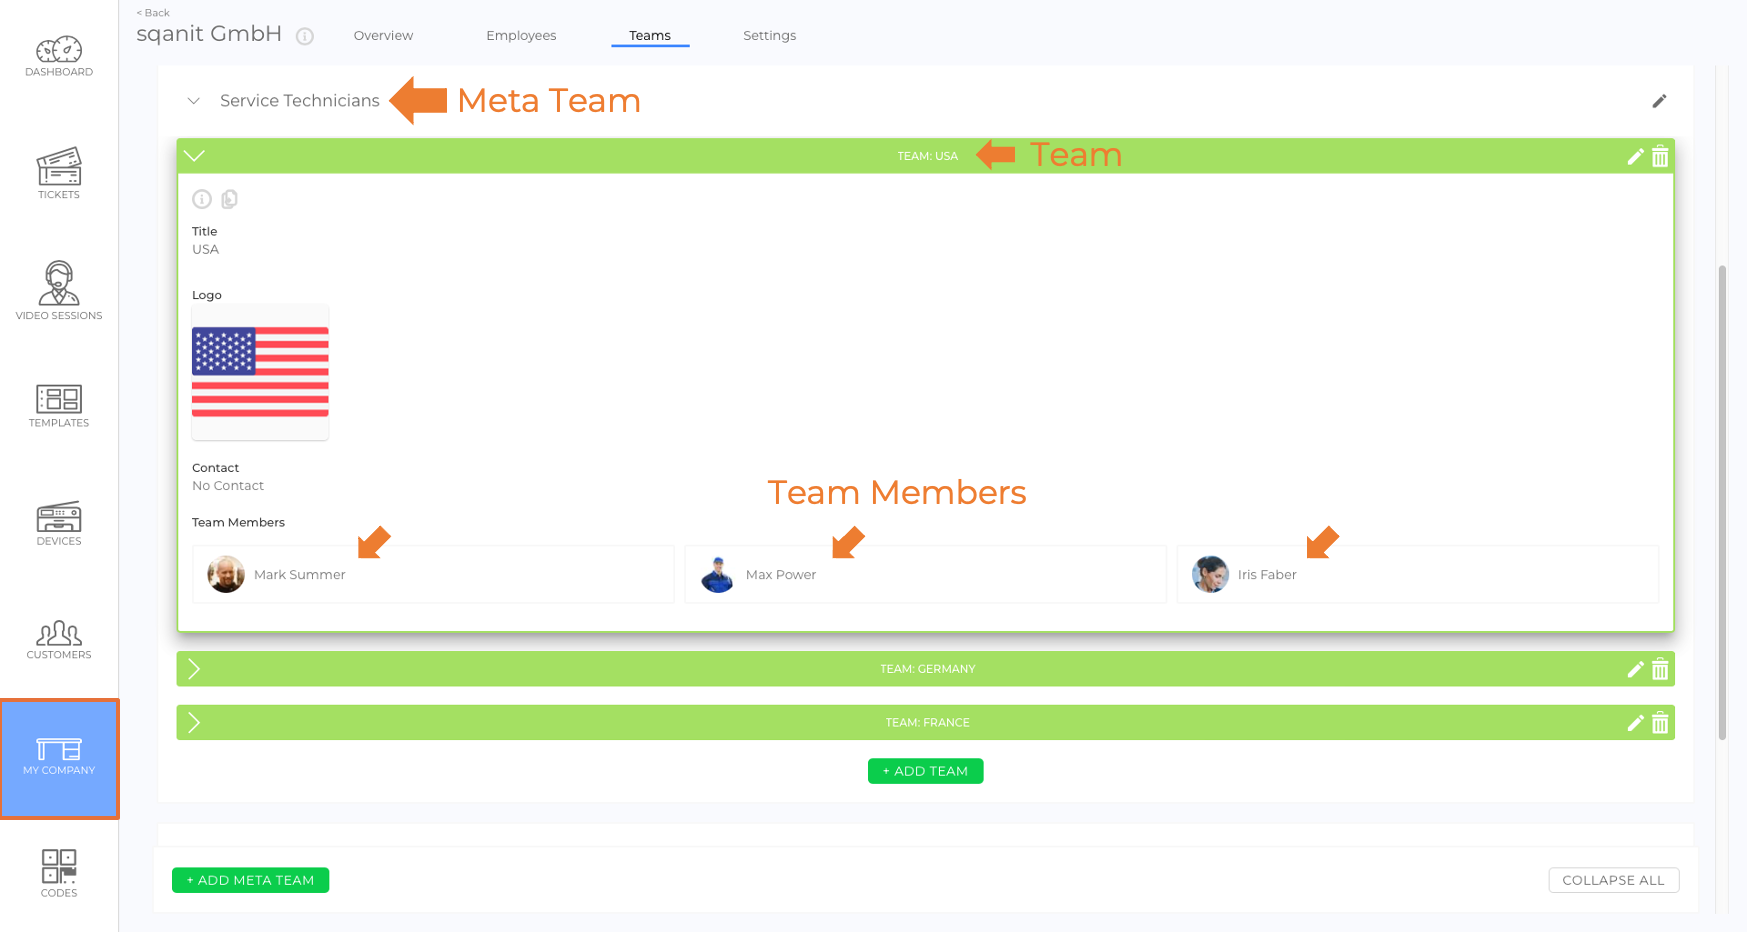
- Click + add Employee and select employees for this team. (picture)
- Click save.
Meta team "Technicians" with team "USA"

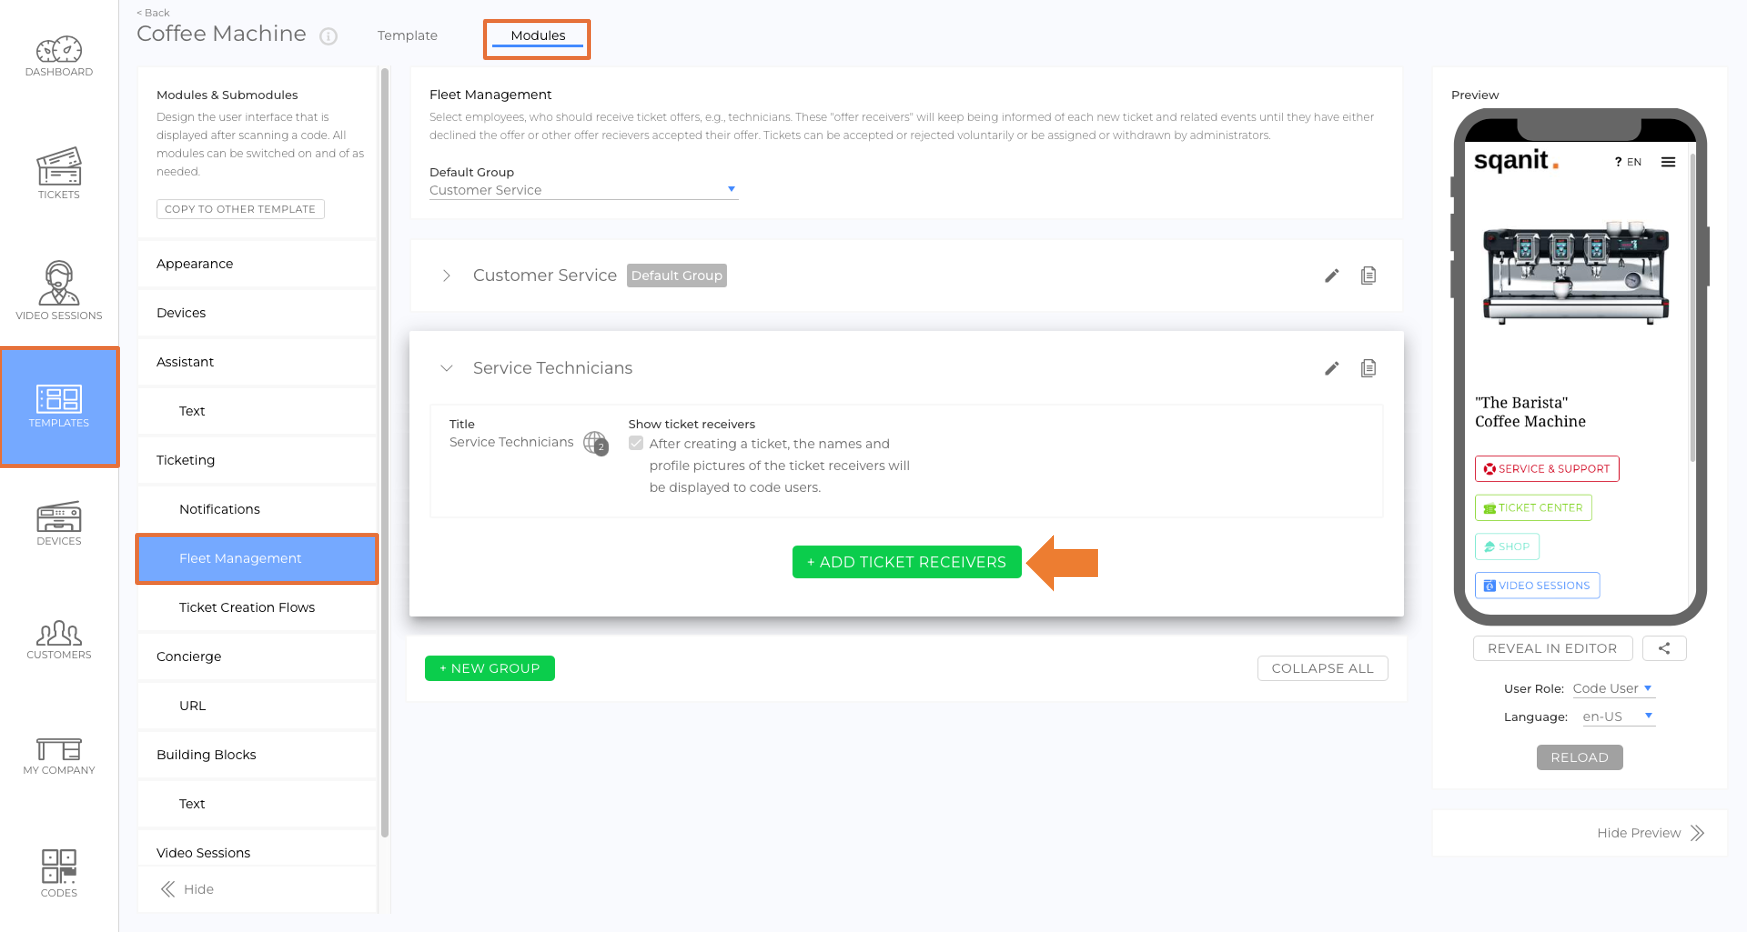
2. Add Meta Teams to Groups (Ticketing)
- Navigate to Templates in the side menu.
- Select a template.
- Open the Modules Tab.
- Select Notifications or Fleet Management (submodules of Ticketing).
- Click + New Group.
- Enter a title (e.g., "Service Technicians") and click save.
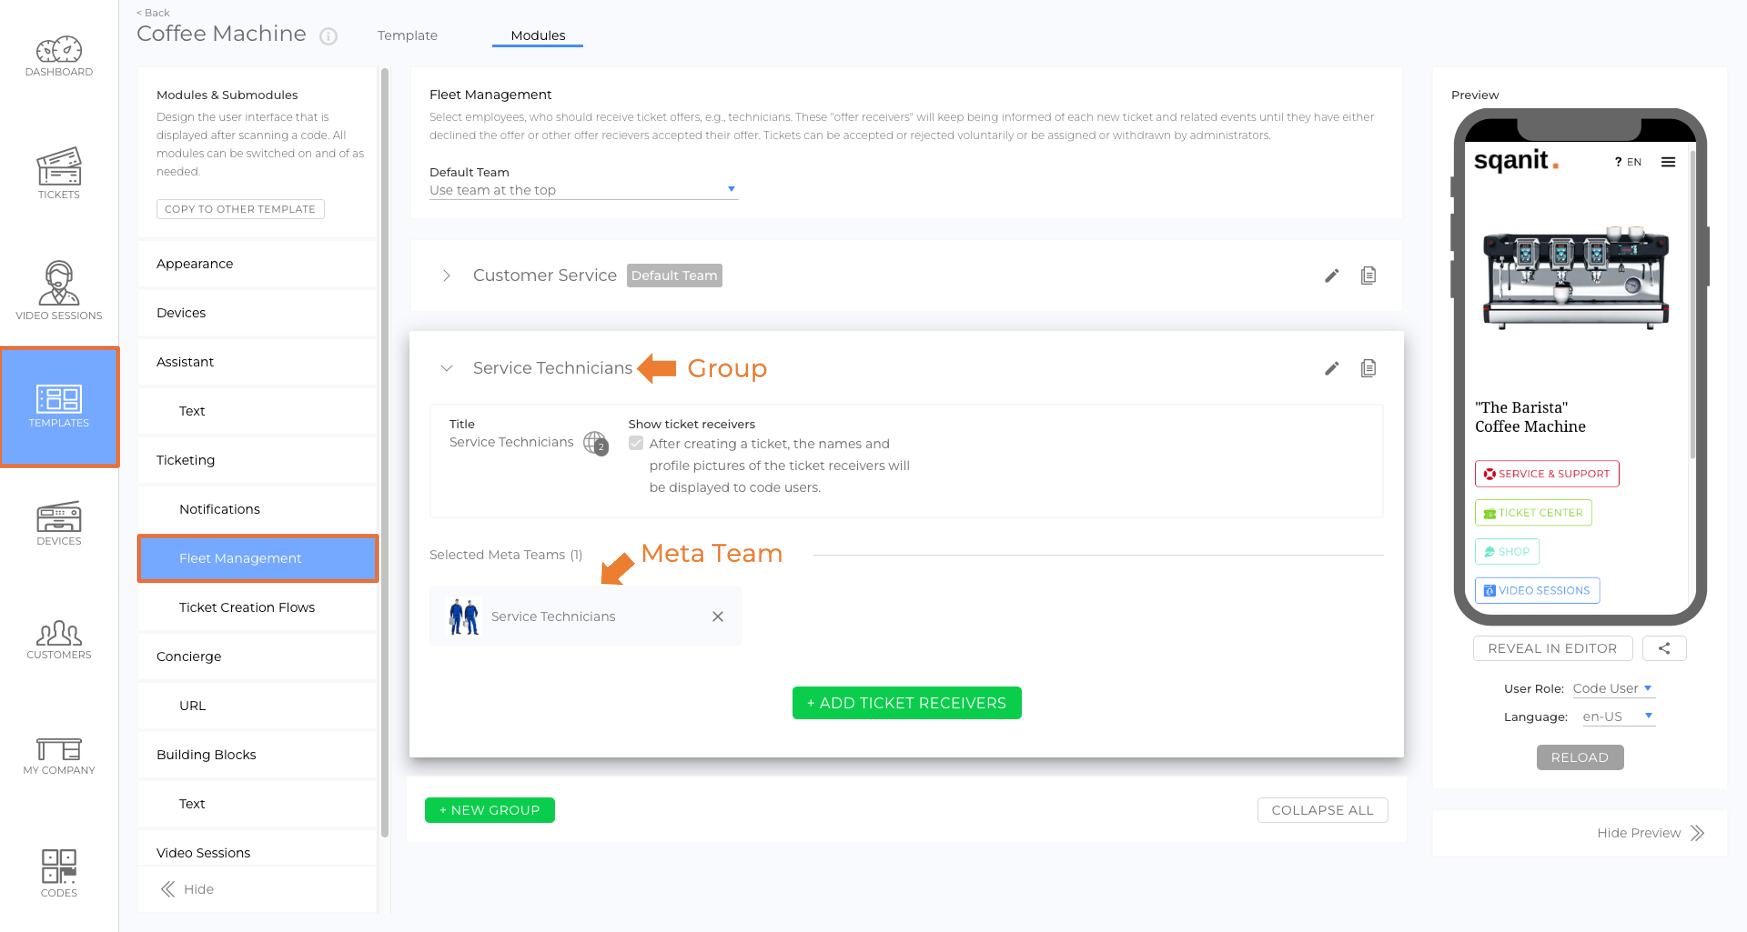
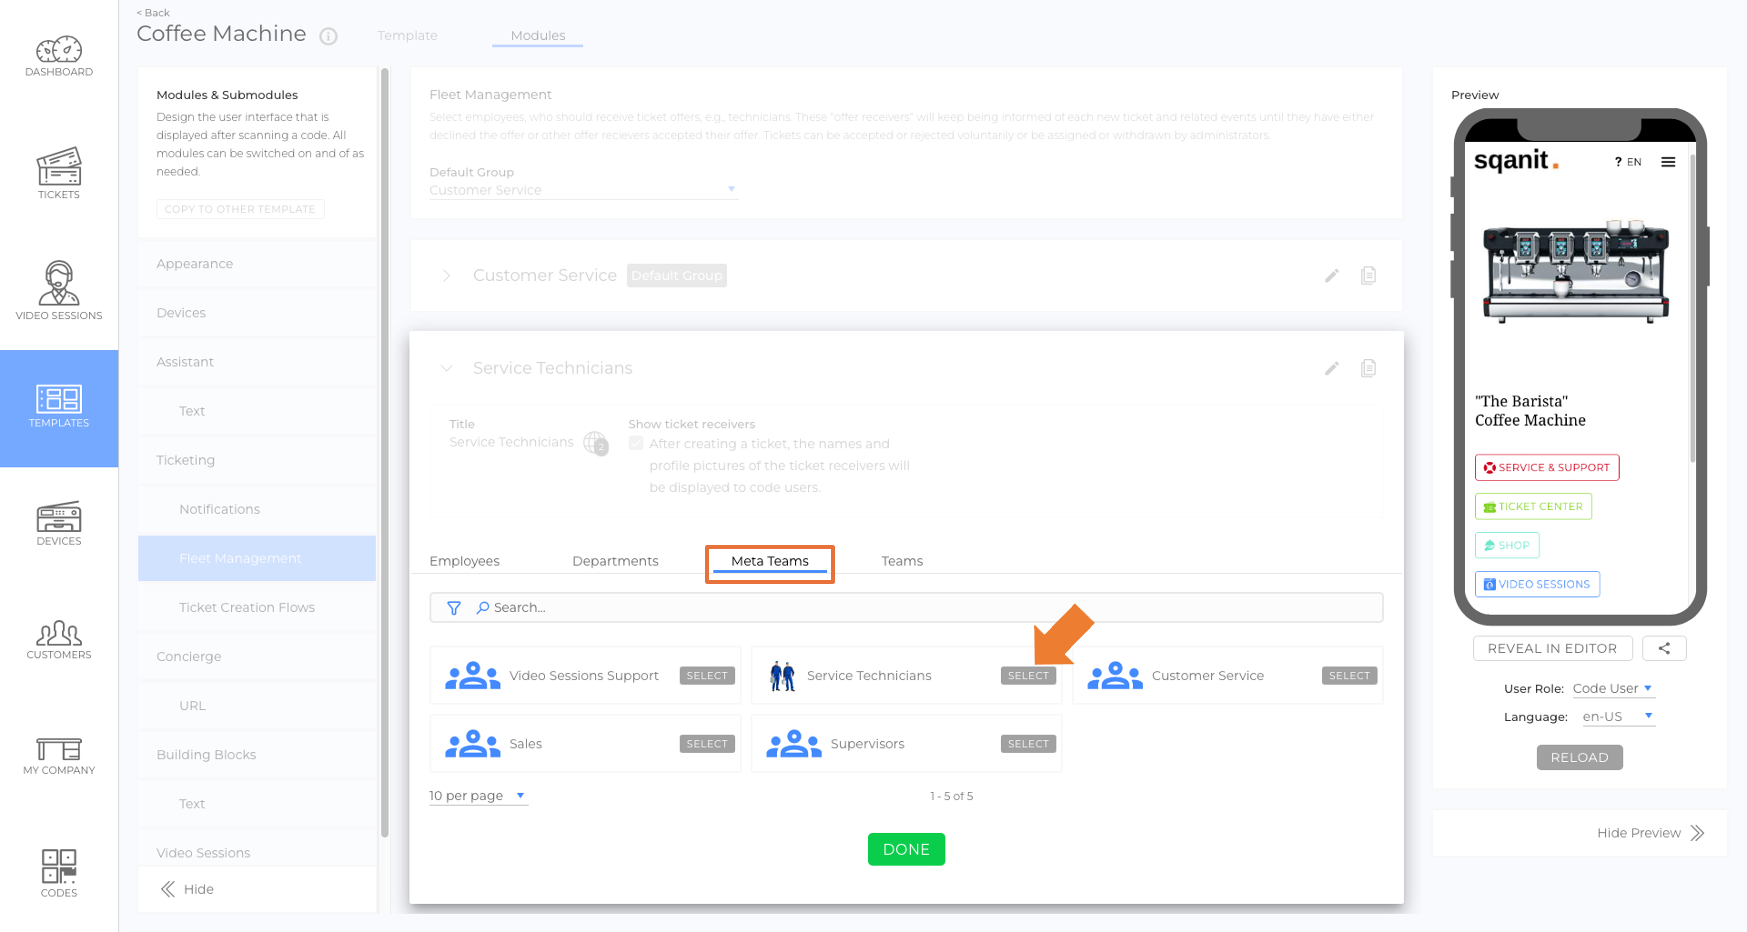
- Click + add notifications receiver or + add ticket receiver (picture).
- Open the Meta Teams Tab and select a Meta Team (picture).
- Click done.
Fleet Management Group with Meta Team

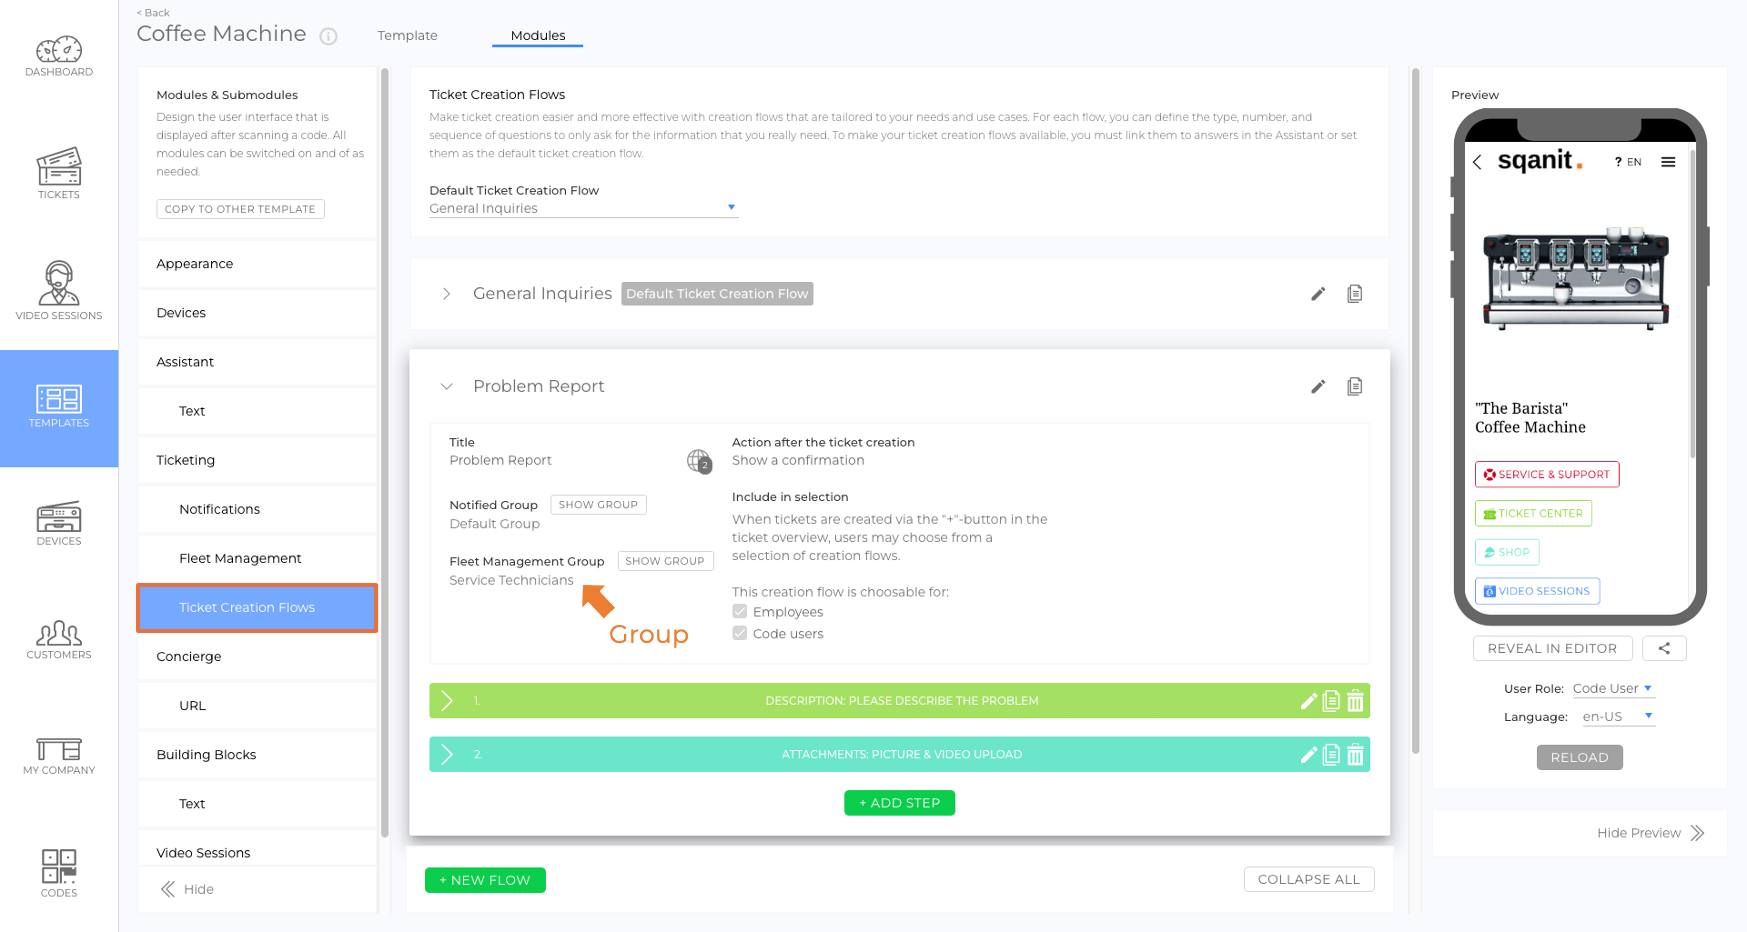
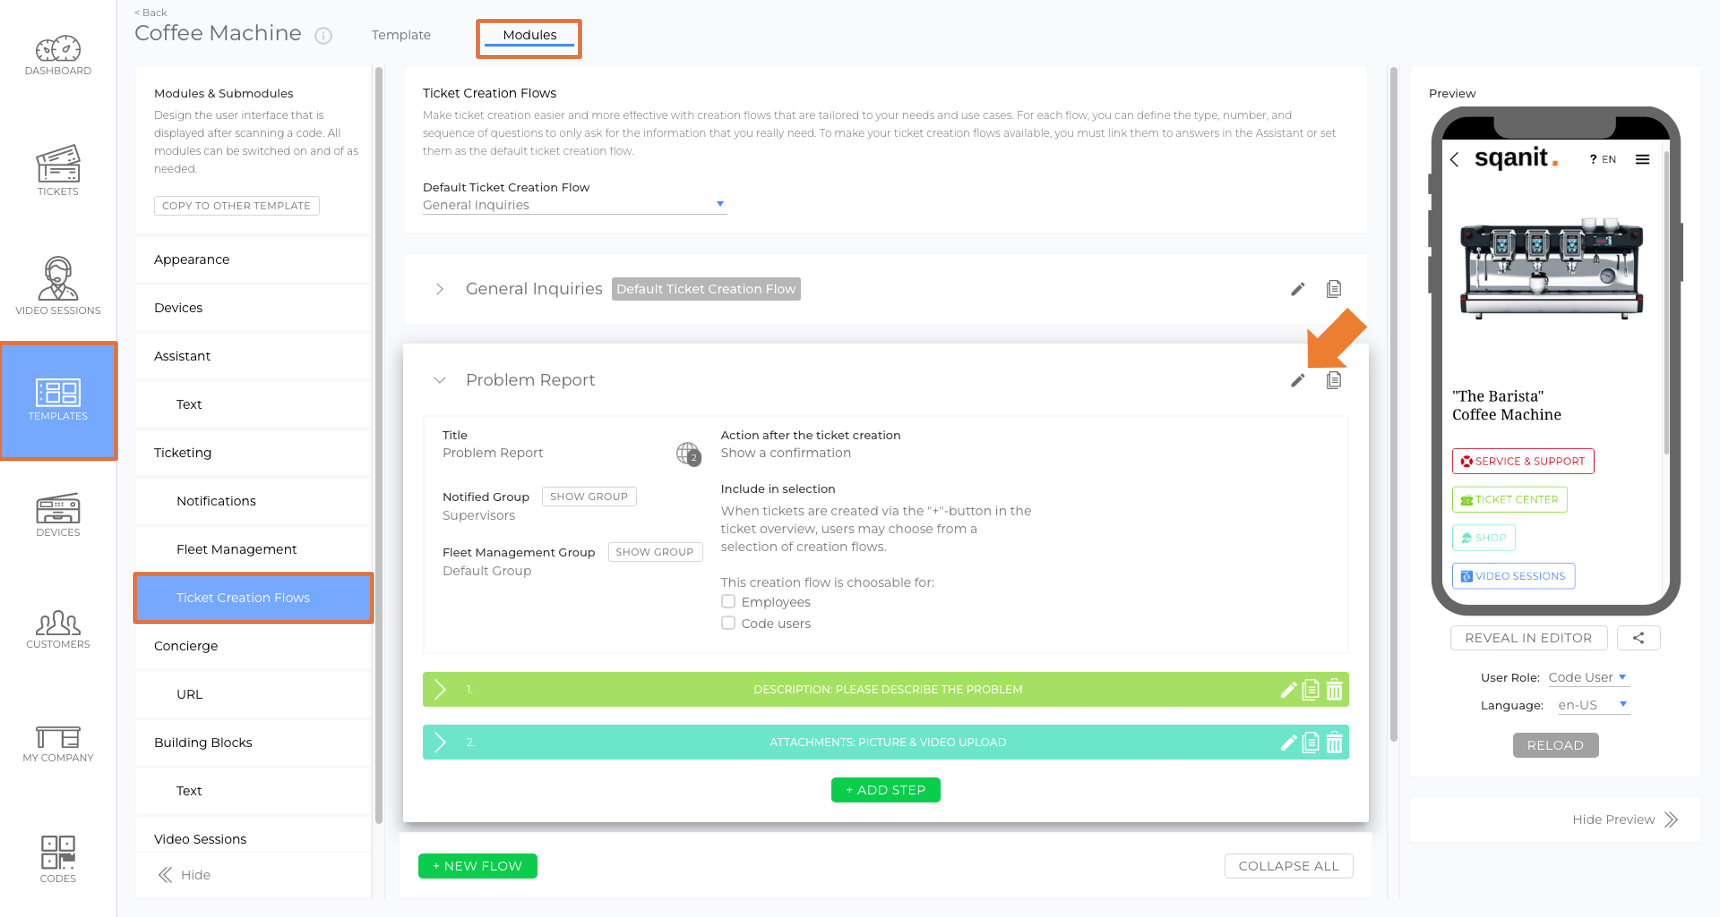
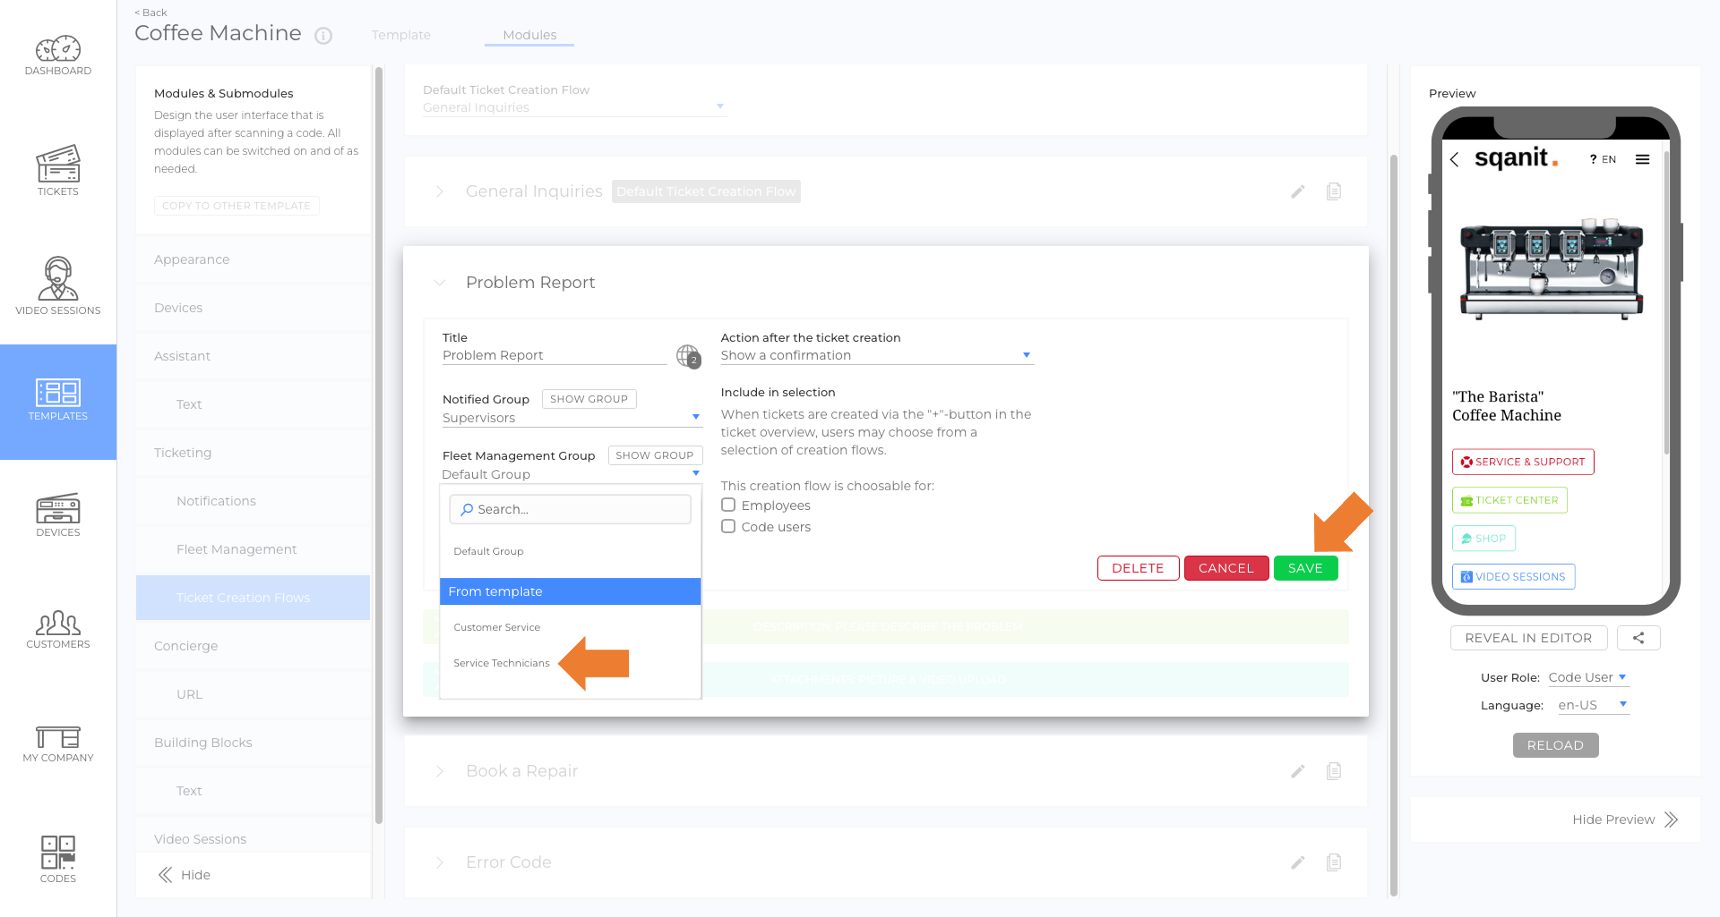
3. Link Groups to Ticket Creation Flows
- In Templates, select Ticket Creation Flows.
- Select a ticket creation flow and click the pencil icon to edit (picture).
- Open the Notified Group / Fleet Management Group drop-down menu.
- Select the group created in the previous step.
- Click save. (picture)
Ticket Creation Flow with Group

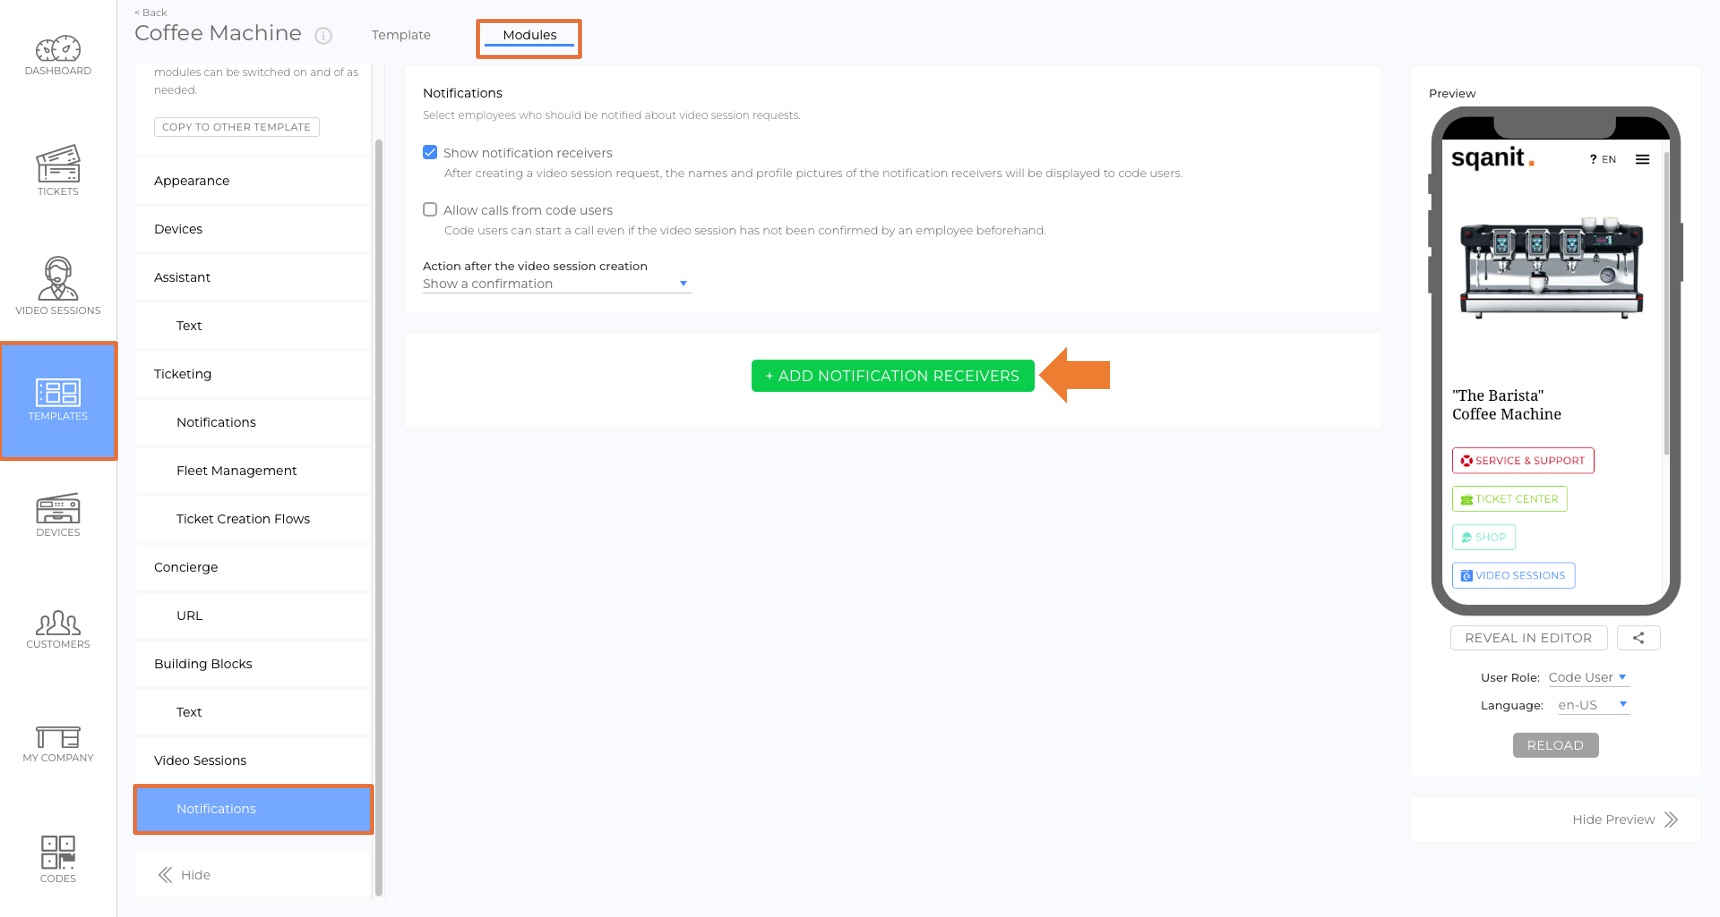
4. Add Meta Teams to Video Sessions
- Navigate to Templates in the side menu.
- Select a template.
- Open the Modules Tab.
- Select Notifications (submodule of Video Sessions).
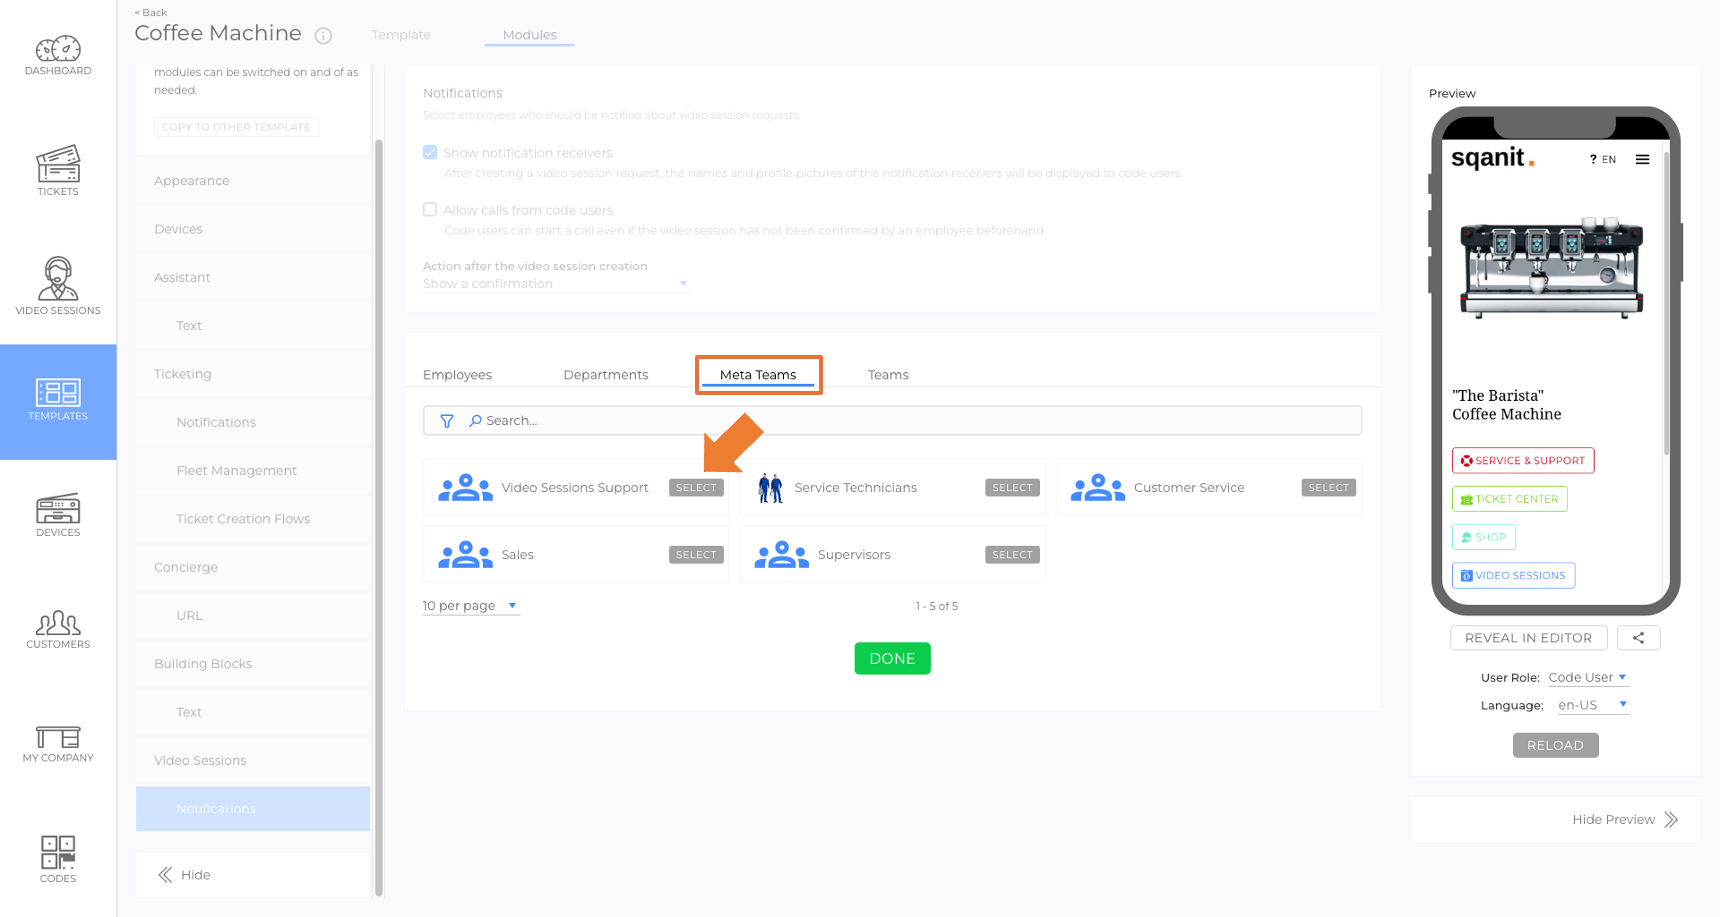
- Click + add notifications receivers (picture).
- Open the Meta Teams Tab and select a Meta Team (picture).
- Click done.
Meta Team set up as Notification Receiver for Video Sessions

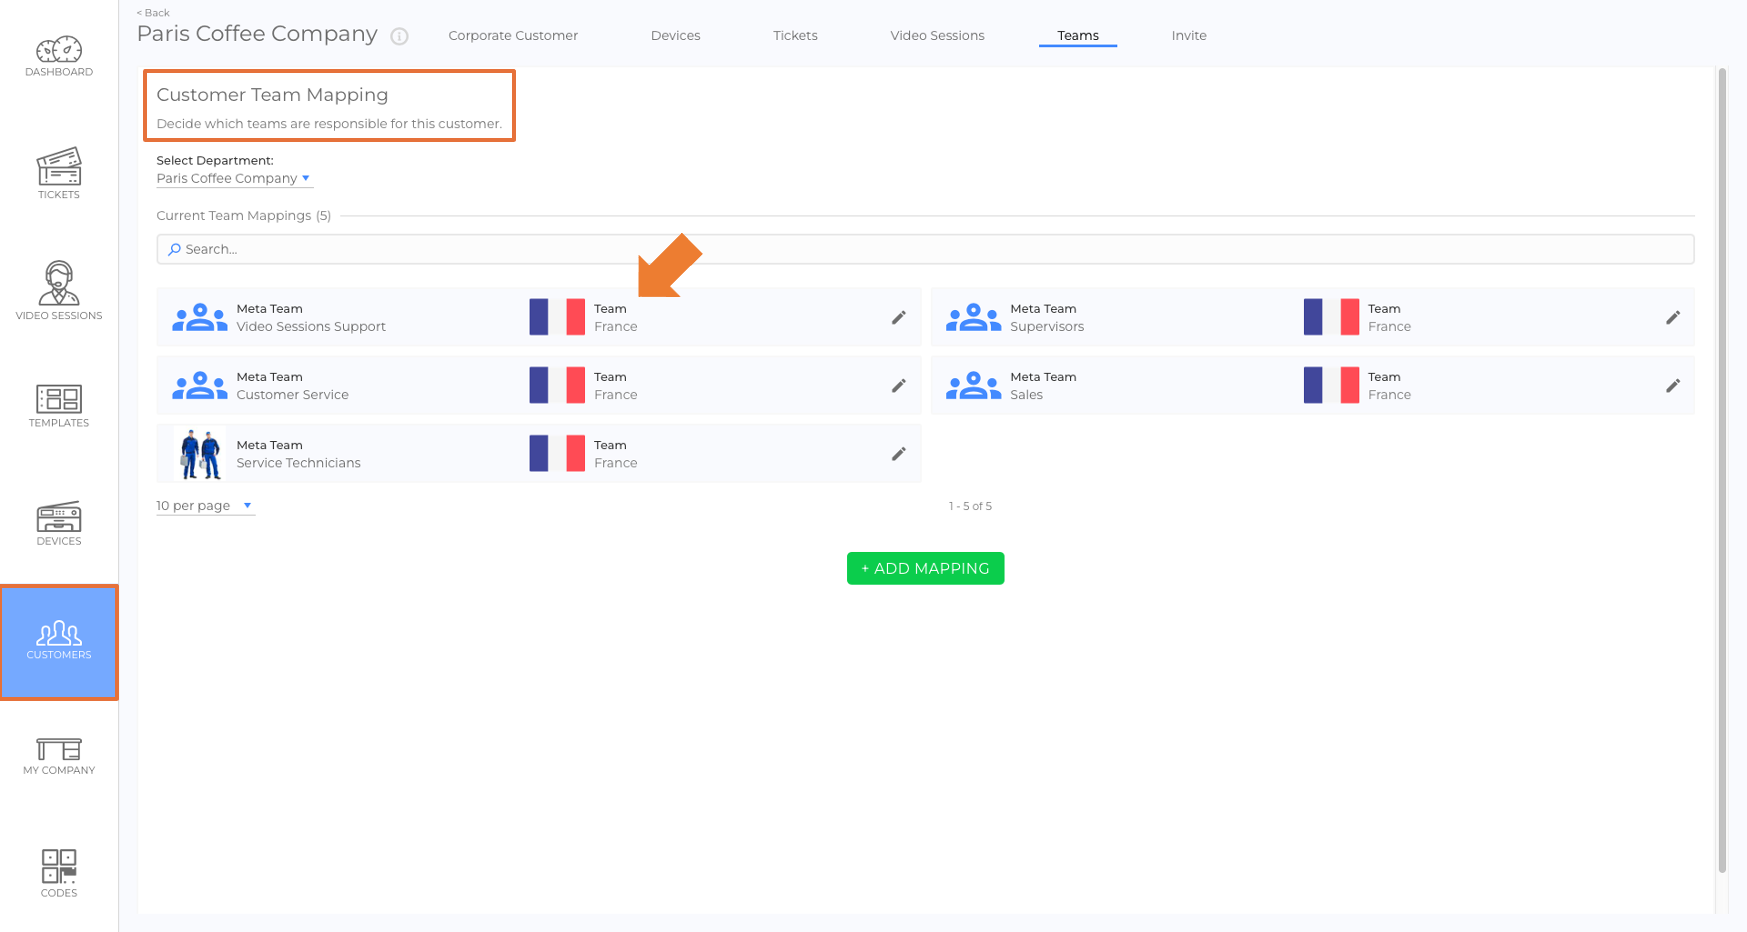
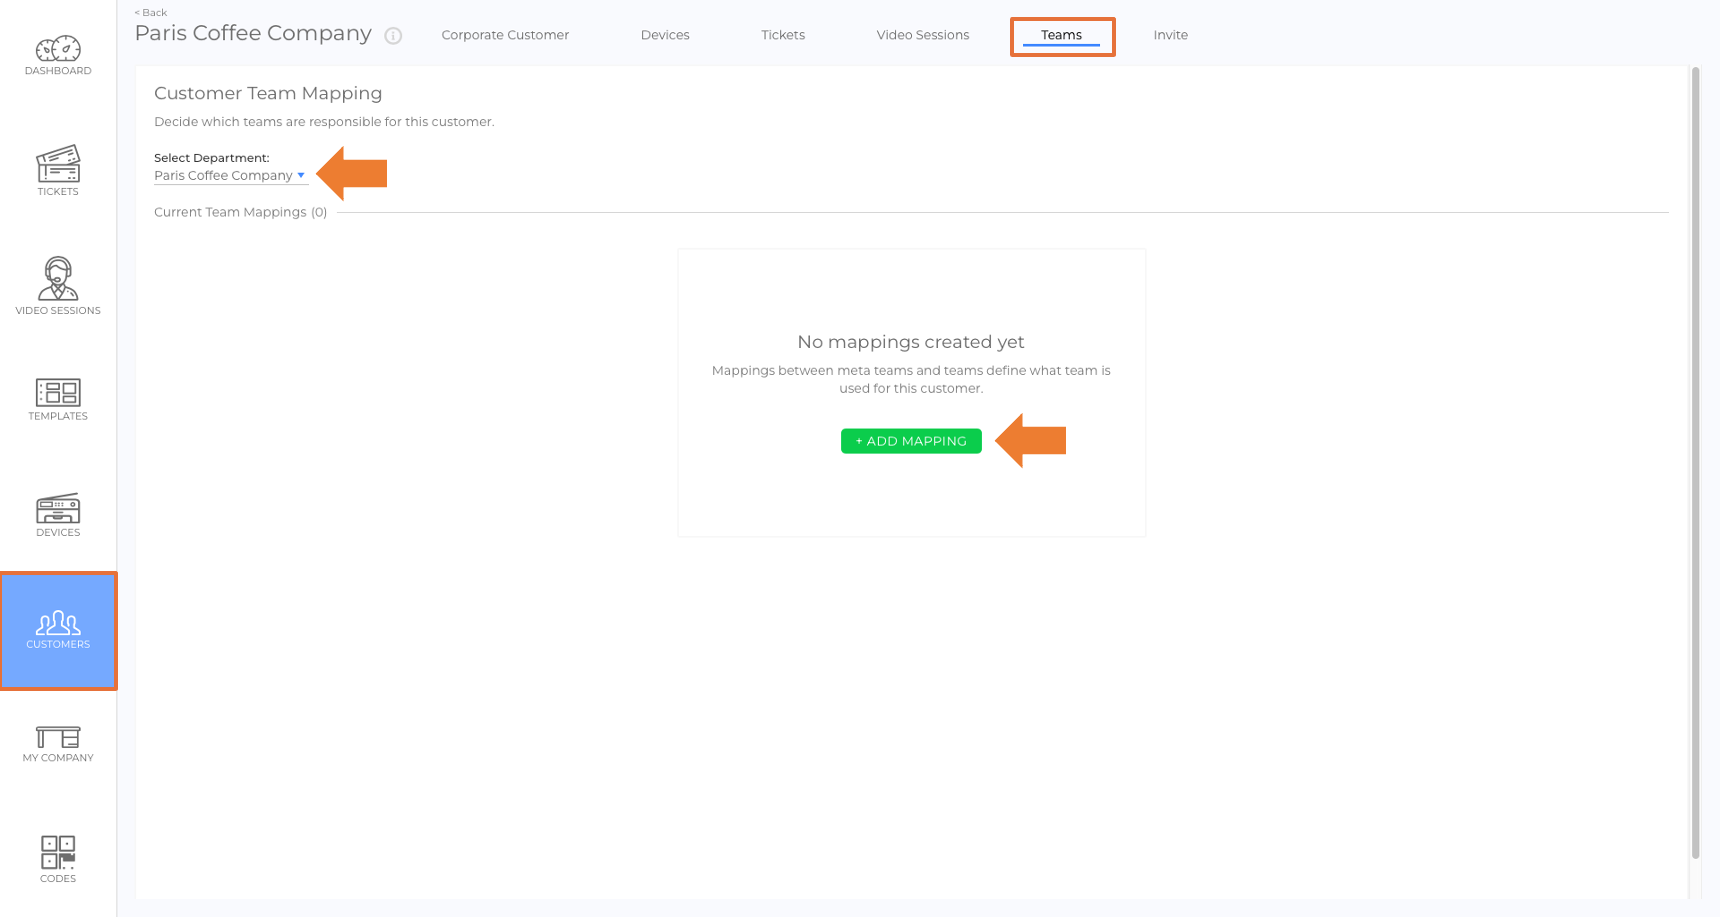
5. Configure the Customer Team Mapping
- Navigate to Customers in the side menu.
- Select a customer.
- Open the Team Mappings Tab.
- (For corporate customers with multiple departments) Use the drop-down menu to select a department.
- Click + add Mapping (picture).
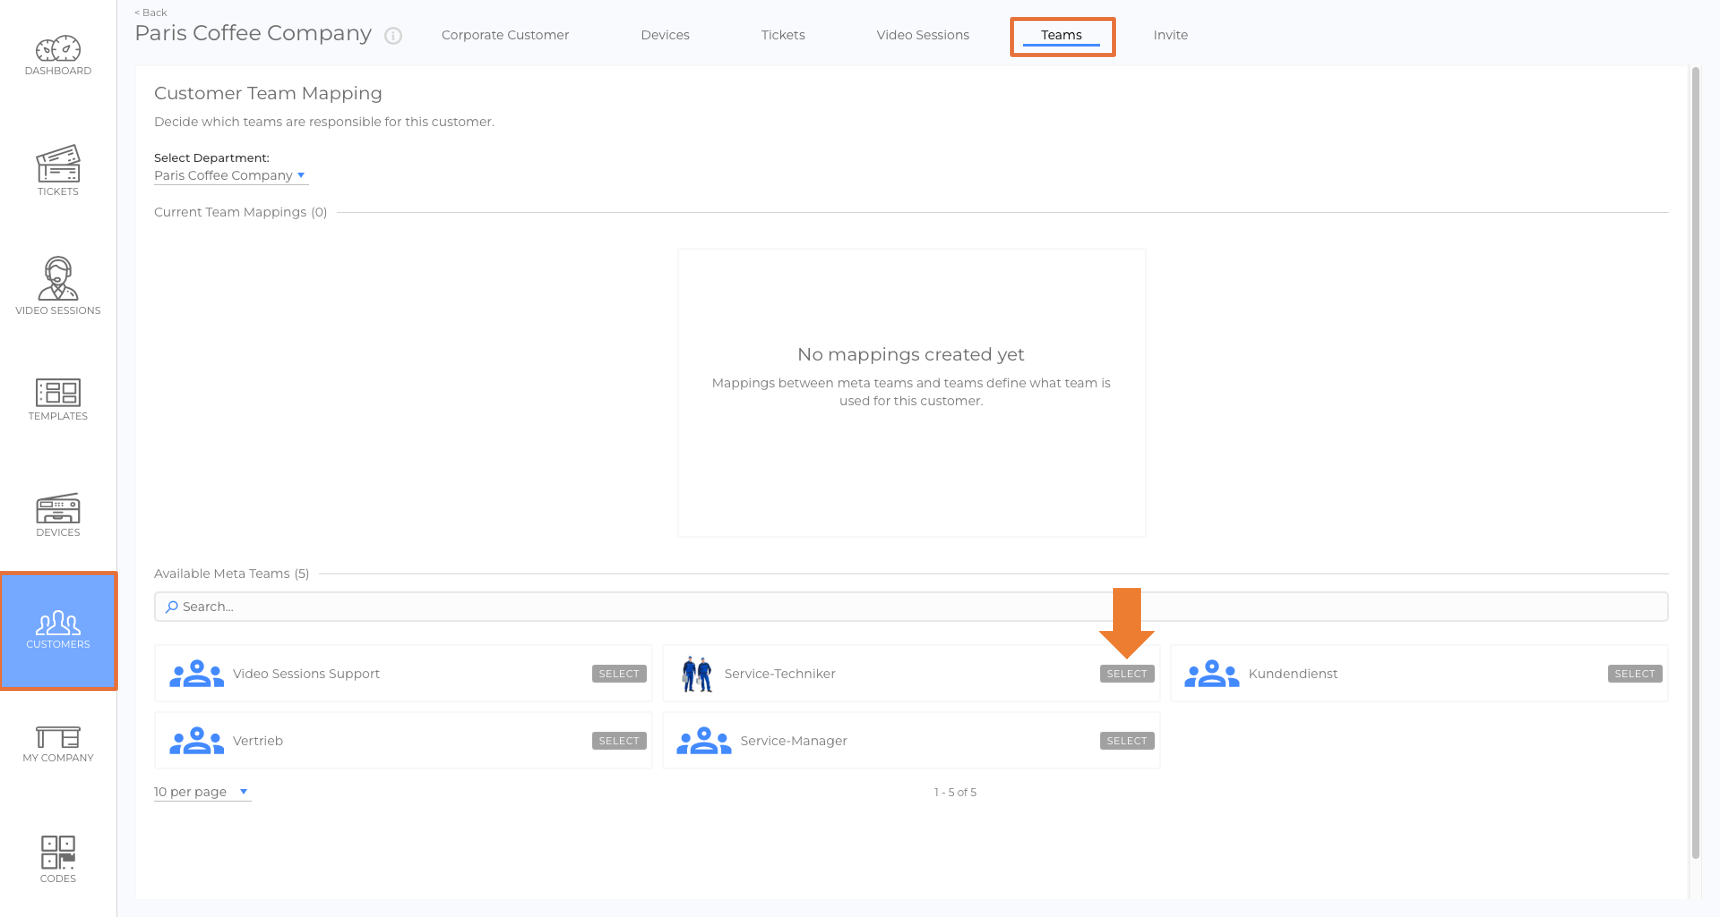
- Select a Meta Team (picture).
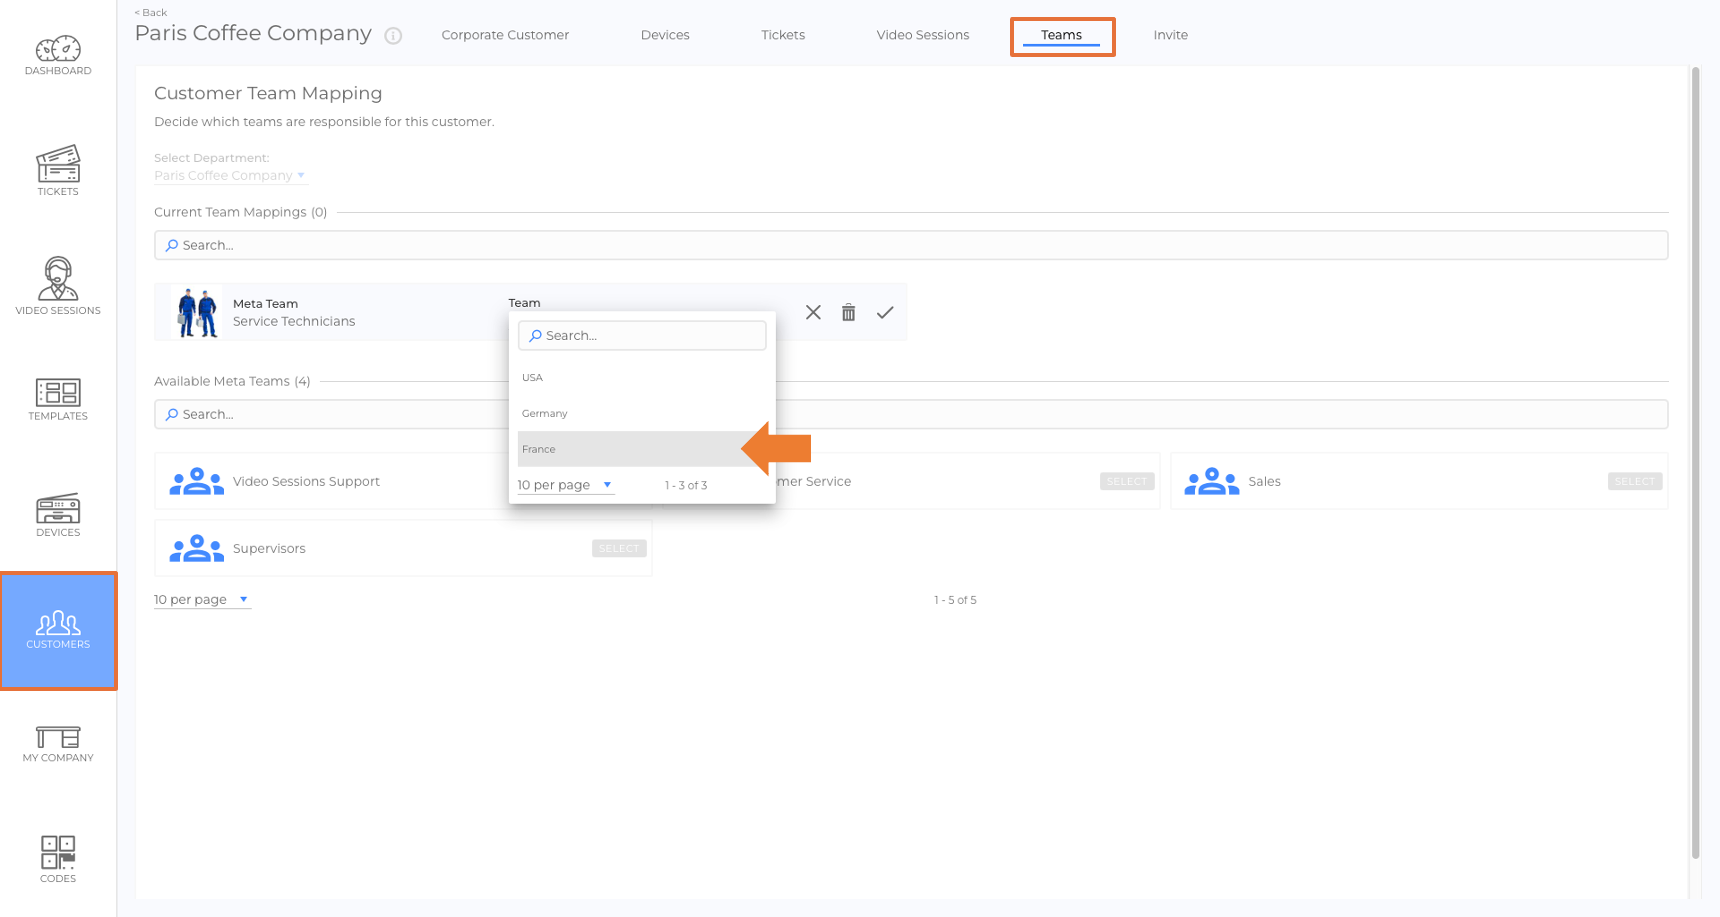
- A drop-down menu appears. Select the team responsible for this customer (picture).
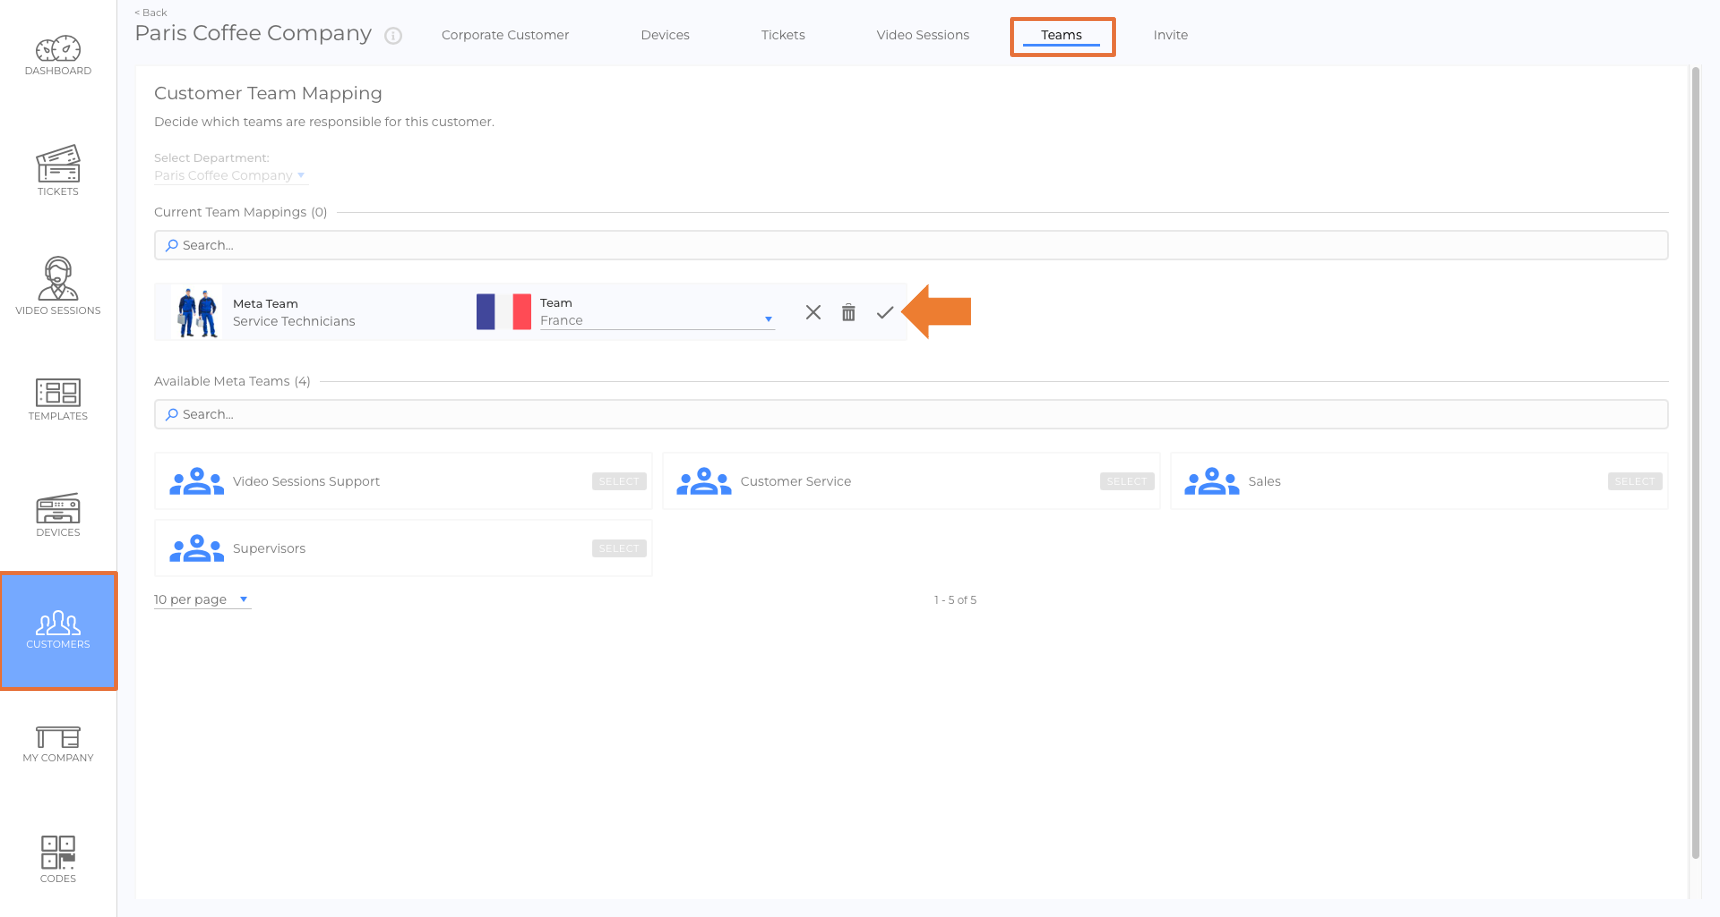
- Click the checkmark to save the changes (picture).
- Click done (picture).
Result: Once saved, all service requests from this customer will be routed to the assigned team within the Meta Team.
Customer Team Mapping

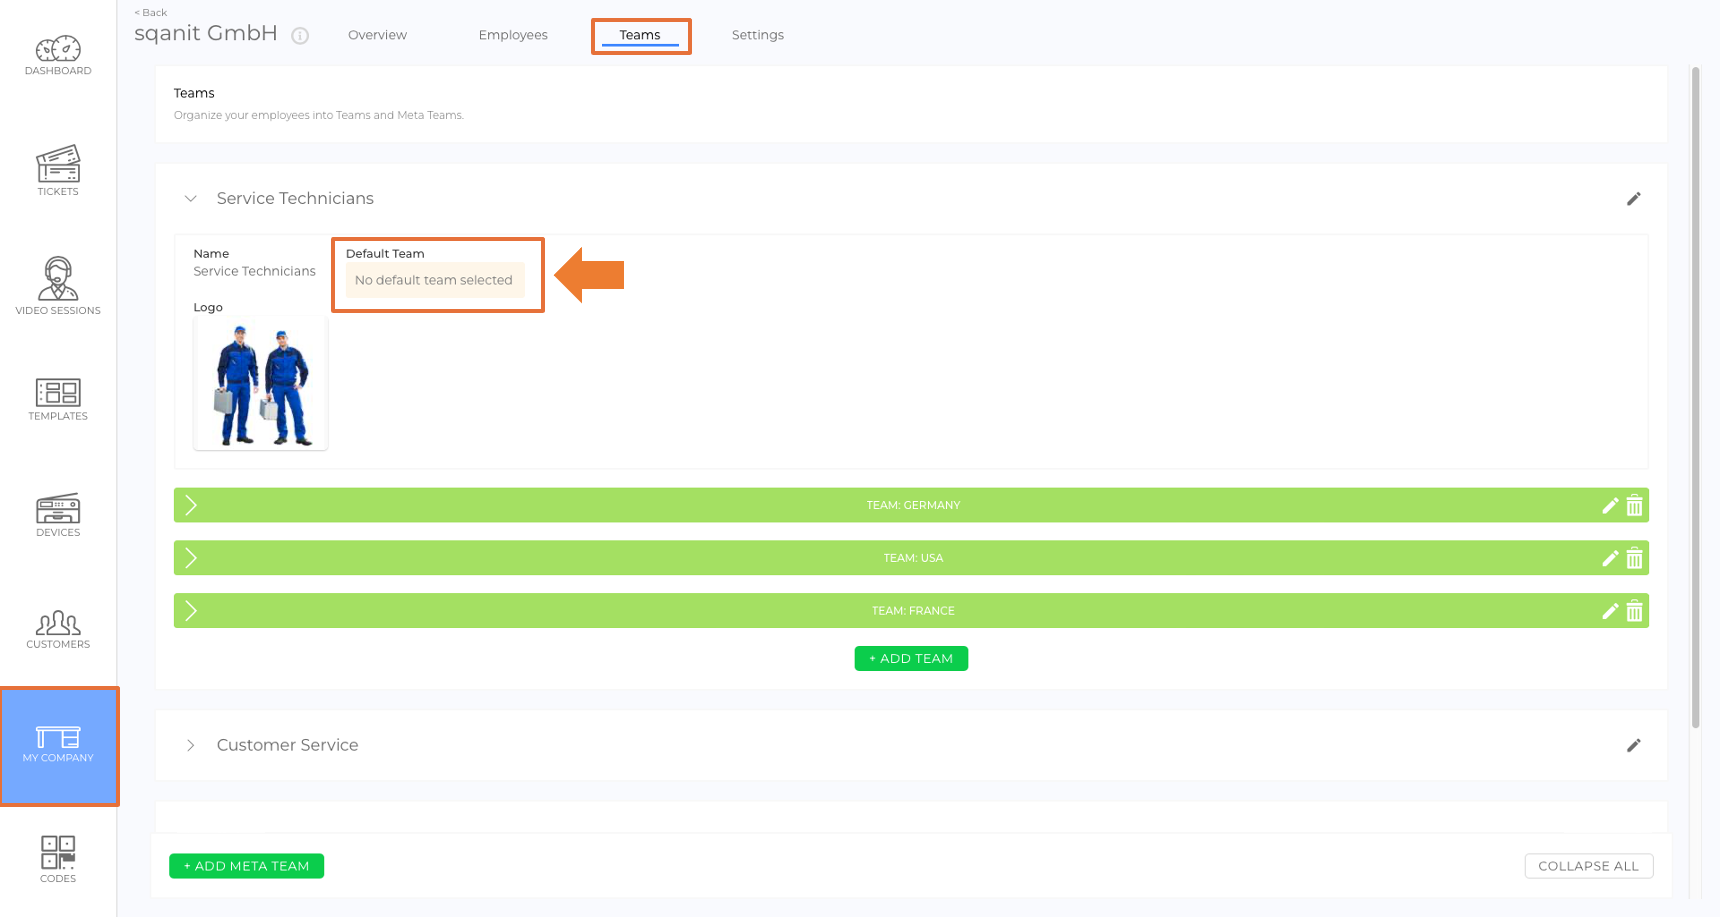
What Are "Default Teams"?
Each Meta Team has one Default Team, which serves as a fallback option if a customer does not have a specific team mapping. (picture)
Example: If a customer without a team mapping creates a service request, the default team for the assigned Meta Team will be notified.
If no default team is assigned, tickets and video session requests for unmapped customers may go unnoticed, as no team will receive notifications.
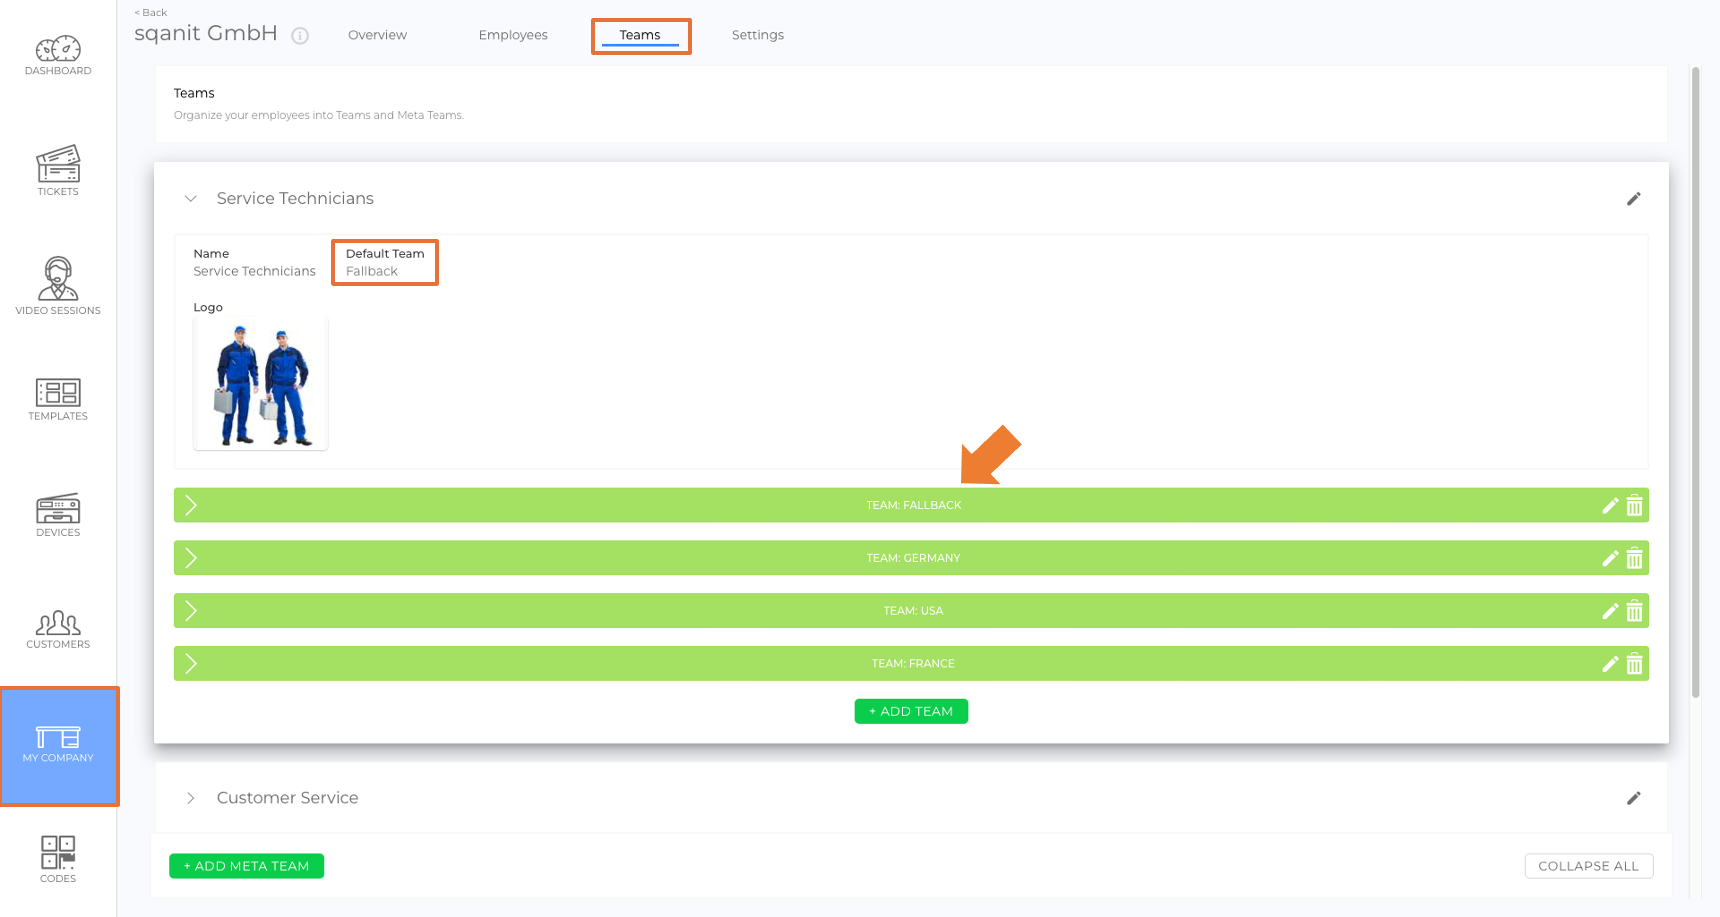
To prevent missed requests, create a team named "Fallback" in each Meta Team and set it as the default team (picture).
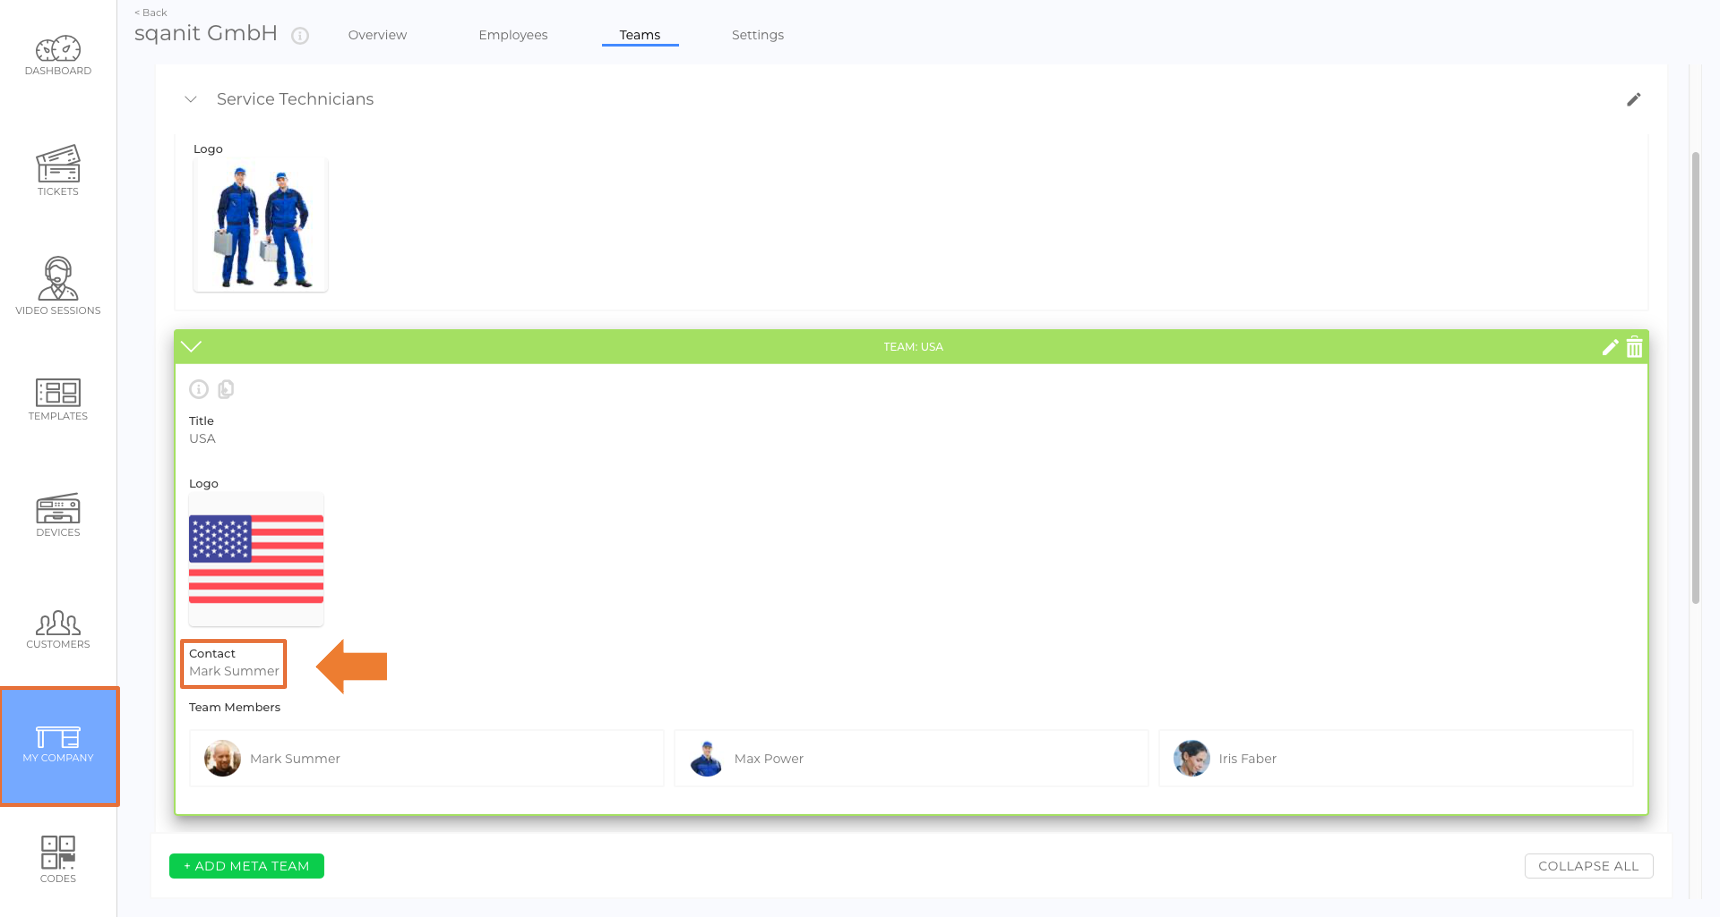
What Is "Contact"?
Each team can have one primary contact person who is highlighted in the system.
Note: This is for informational purposes only and does not affect functionality. (picture)
Good to Know
- Smart Routing: Meta Teams allow service requests to be directed to the correct team based on customer team mappings.
- Flexible Organization: Teams can be structured under Meta Teams for geographic or functional separation.
- Fallback Teams Ensure Coverage: Assigning a Default Team prevents service requests from being missed.
 We use cookies on our website to give you the most relevant experience by remembering your preferences and repeat visits. By clicking “Accept All”, you consent to the use of ALL the cookies. However, you may visit "Cookie Settings" to provide a controlled consent.
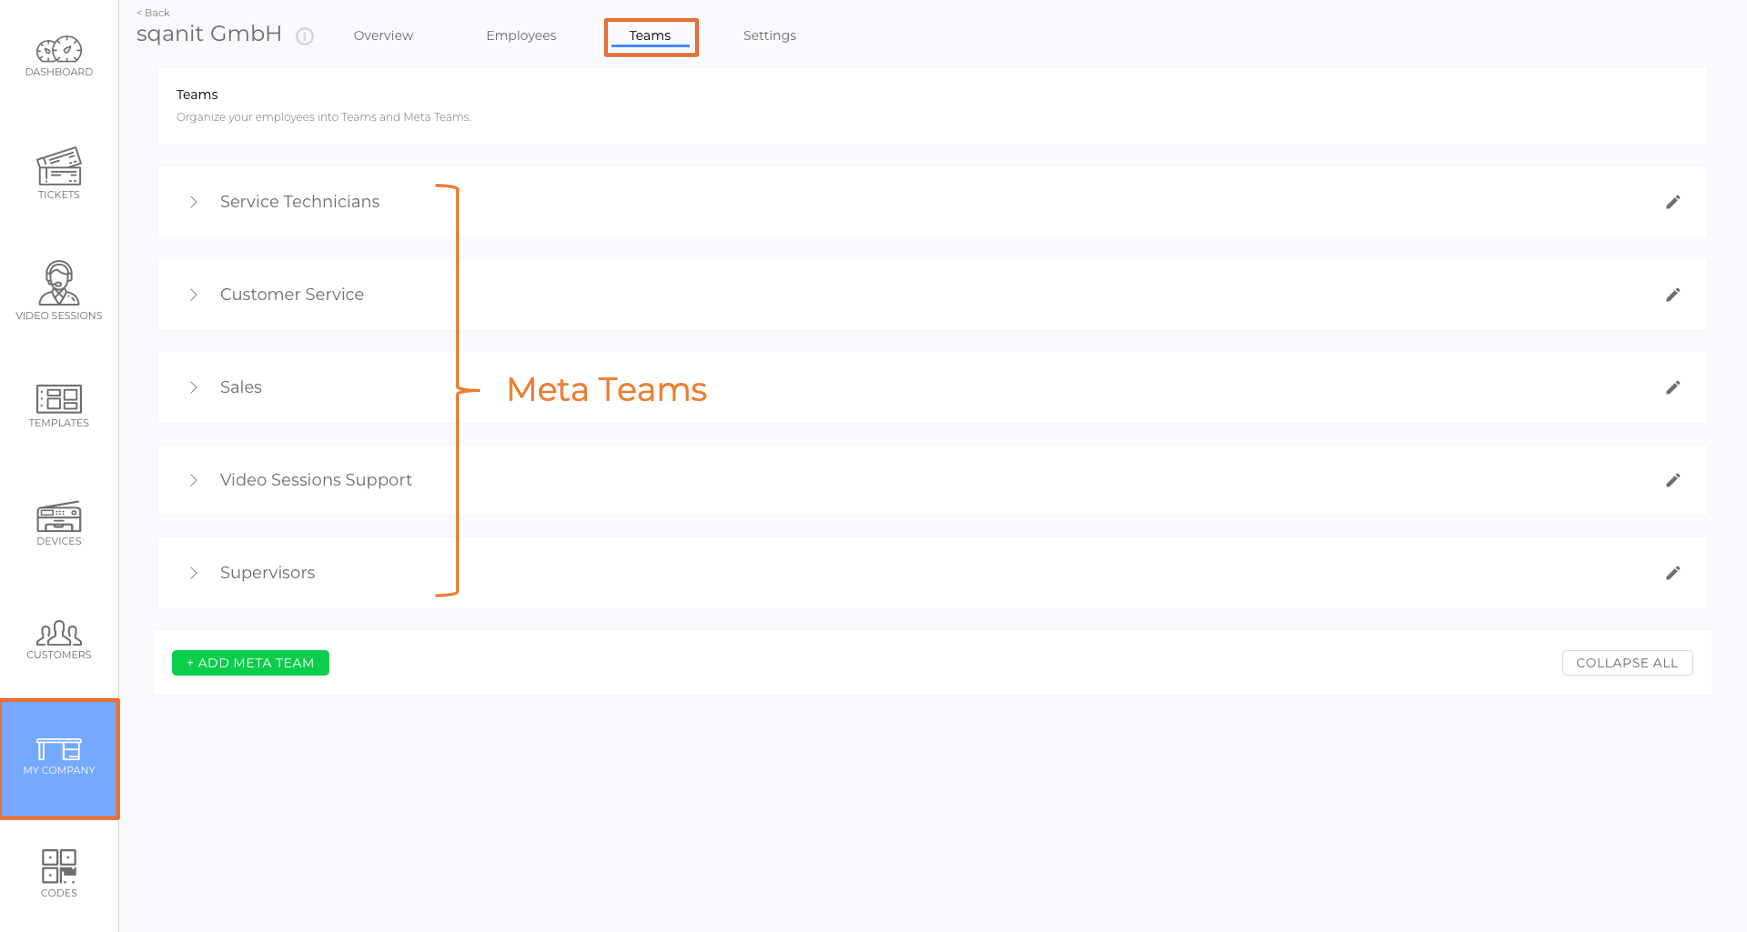