Introduction
The Fleet Management Submodule within Ticketing ensures that service employees receive work offers for each new service request within their responsibility. This functionality is specifically designed for employees actively engaged in customer service. By enabling offers to be accepted, declined, assigned, or canceled, Fleet Management facilitates structured and efficient ticket processing.
Unlike employees specified in the Notifications Submodule (article), these employees receive updates only while they are actively involved in handling a service case.

How Fleet Management Works
- Group Creation:
Groups are created within the Fleet Management Submodule. These groups determine which employees will receive offers for specific service requests. (picture) - Assignment to Ticket Creation Flows:
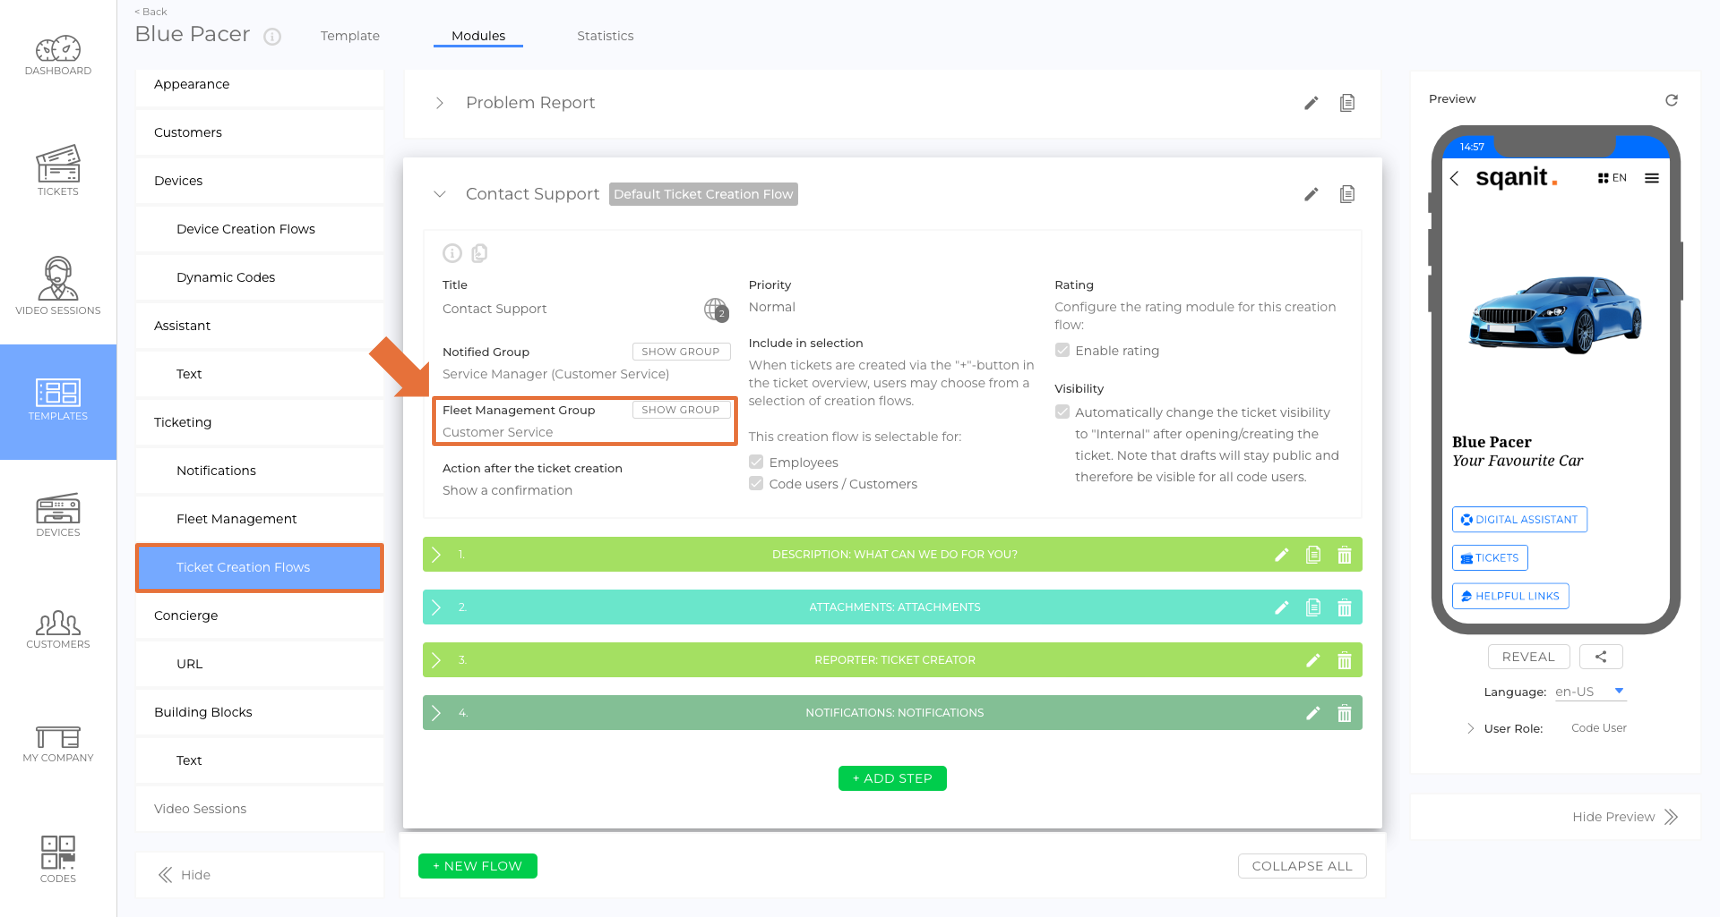
Each ticket creation flow is assigned a designated Fleet Management group. Only groups created within the same template can be assigned. (picture)
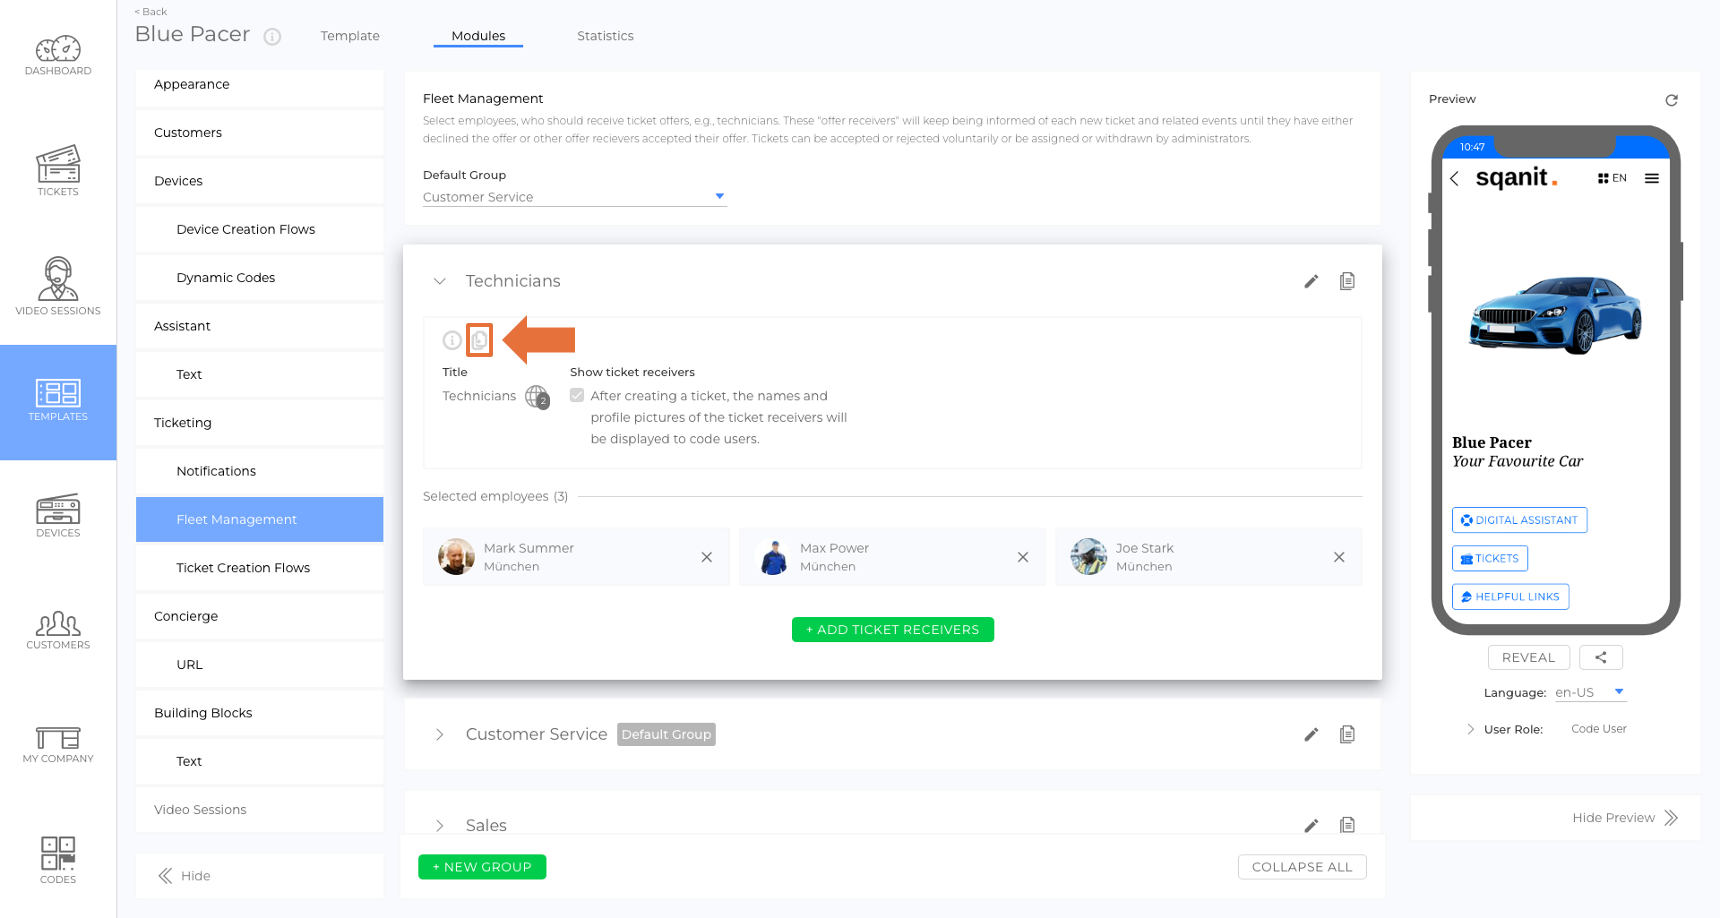
Tip: Groups can be copied to other templates using the copy function. (picture) - Ticket Offers:
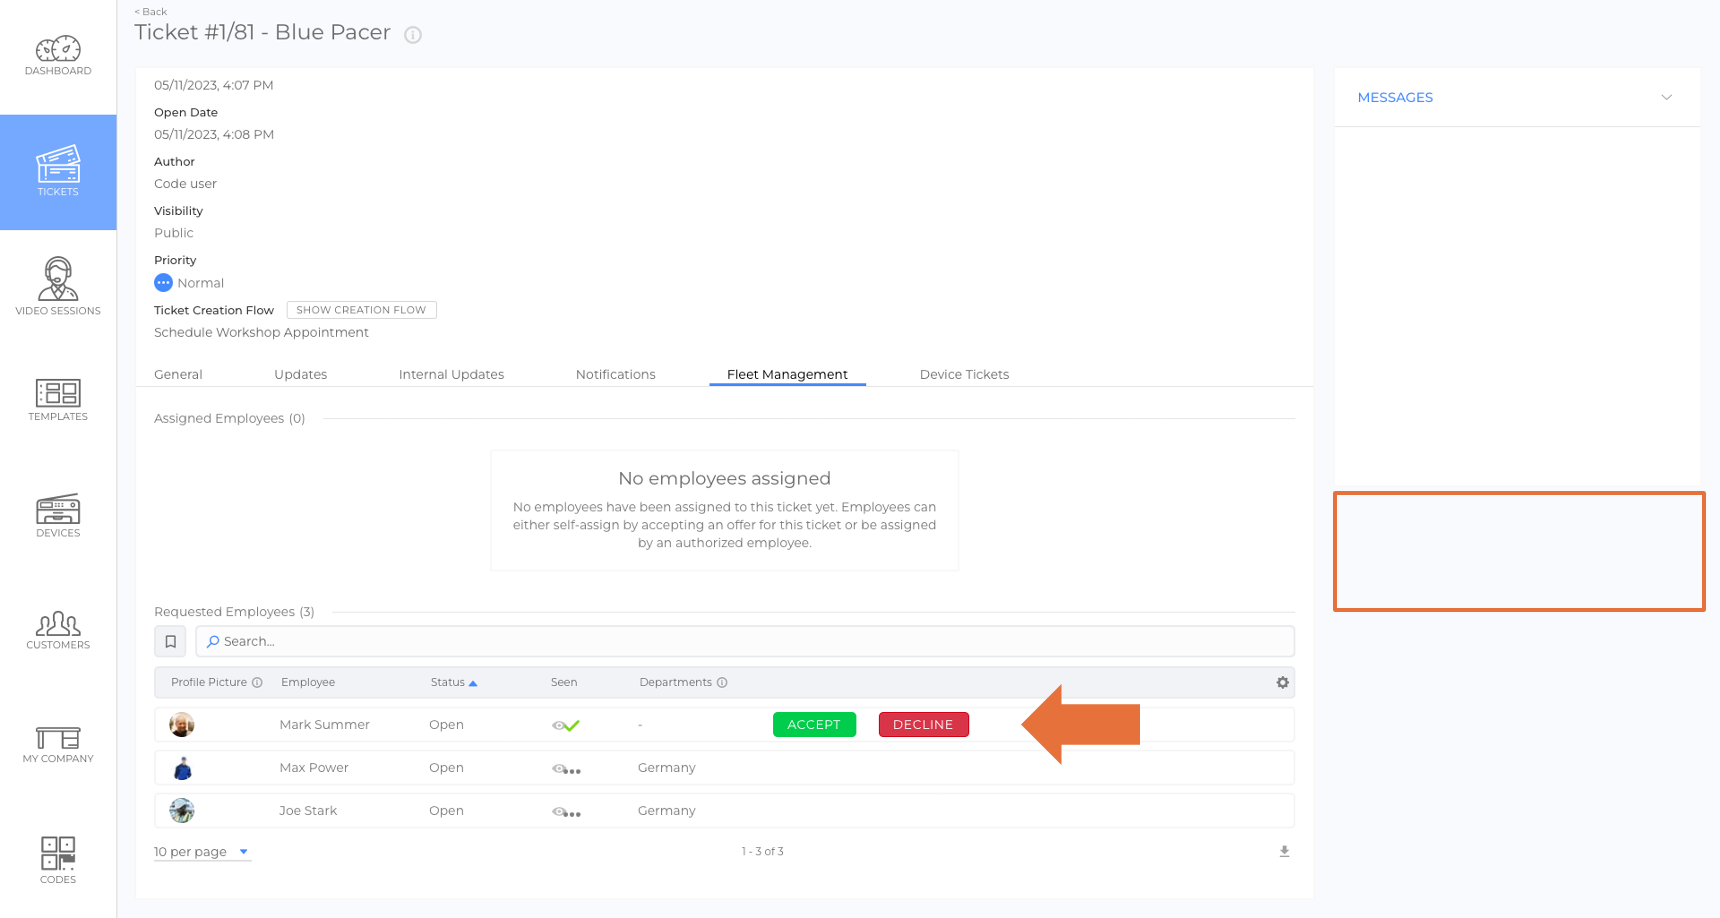
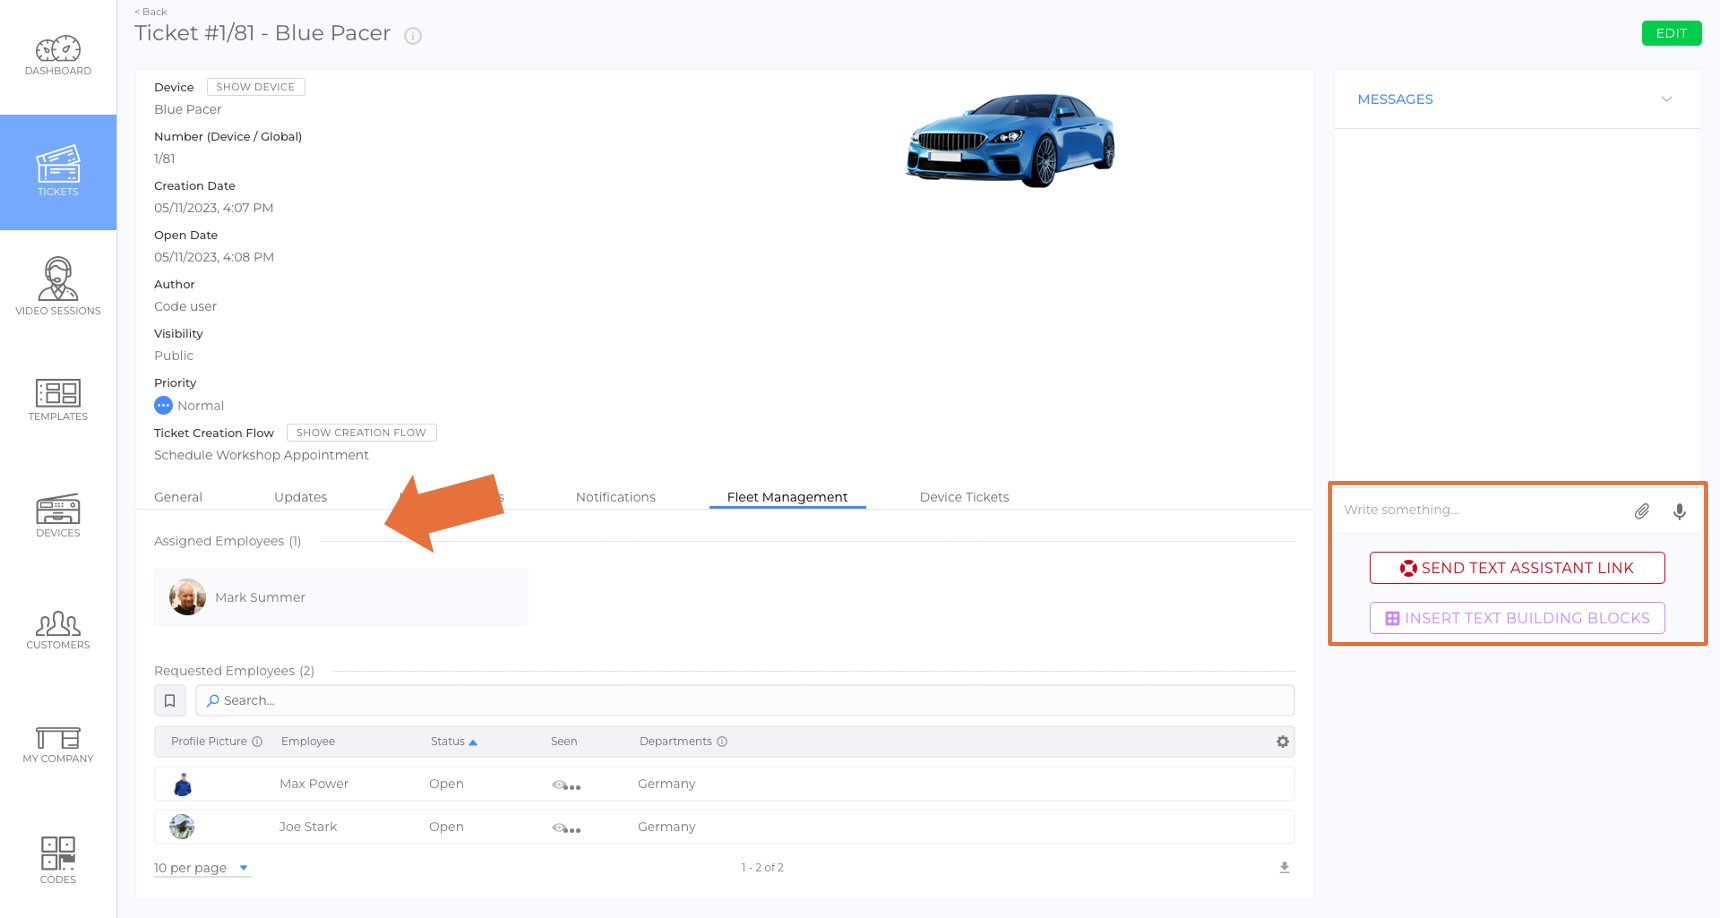
When a ticket is created, members of the assigned group receive an offer to work on the service case.- Employees can either accept or decline the offer. Regular service employees (role: Member) cannot work on tickets unless they accept the offer. (picture) (picture)
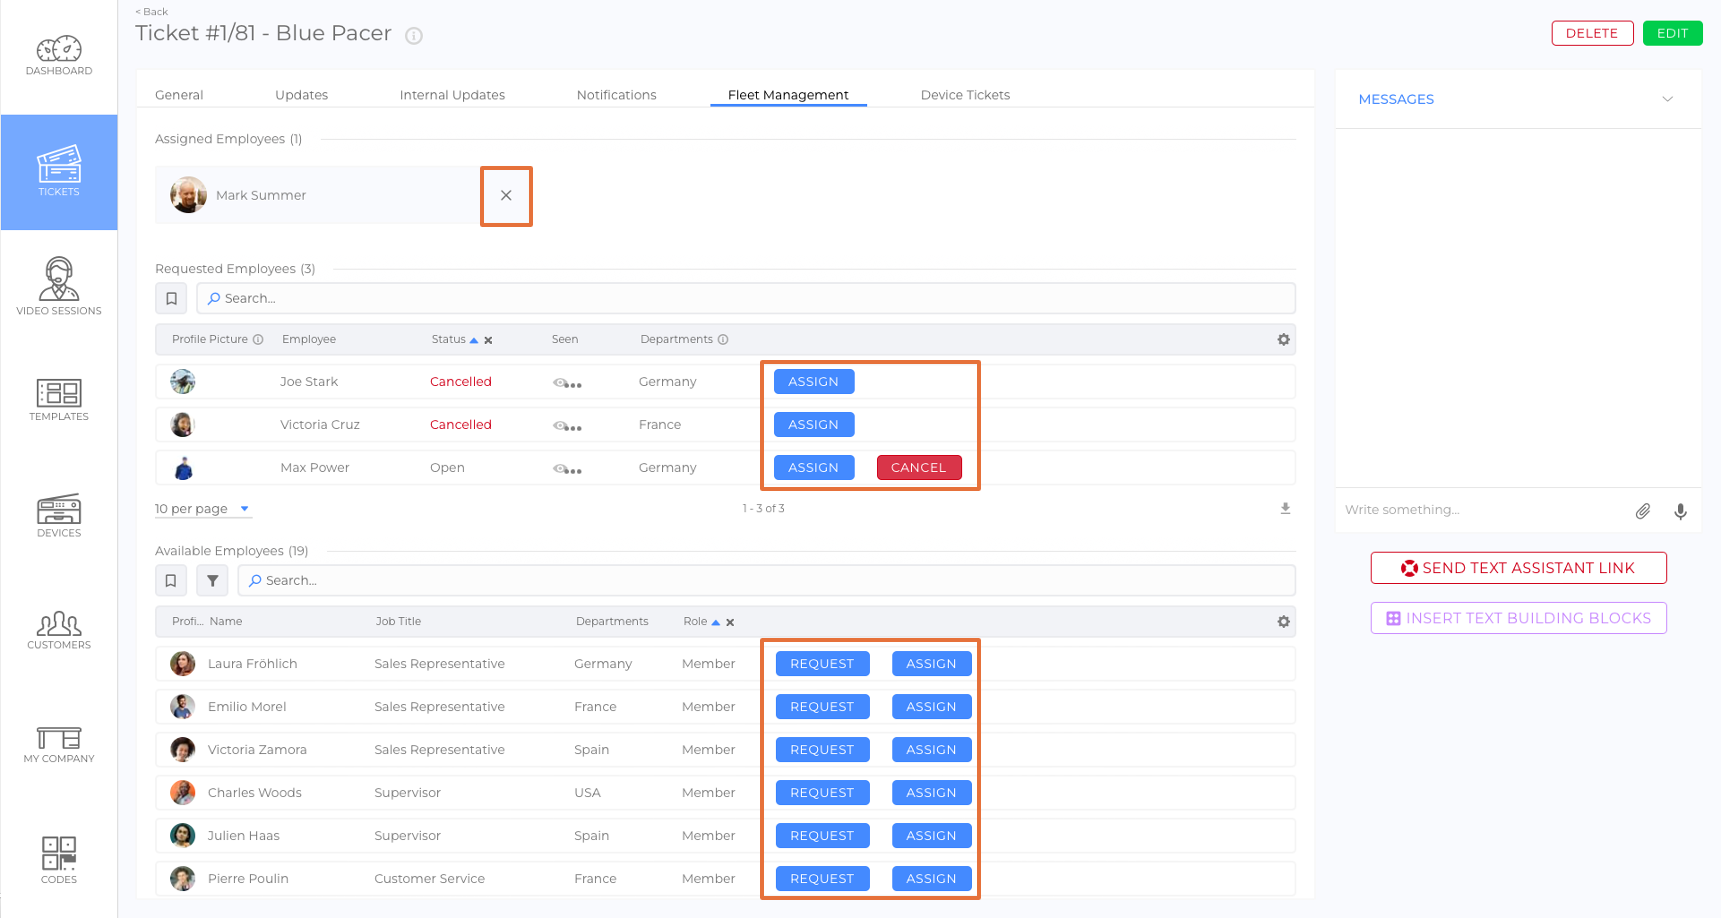
- Supervisors (roles: Moderator or Administrator) can assign or cancel ticket offers at any time, regardless of the employee's decision. (picture)
- Offer Notifications:
The type of notifications (e.g., email, push) and the notification strategy can be configured in the Advanced Notification Settings (article). - Visibility of Decisions:
Other employees can view the status of each offer receiver's decision (e.g., accepted, declined). Employees who decline an offer will no longer receive notifications for the specific ticket. (picture)
How to Create a New Fleet Management Group
- Select Templates from the side menu.
- Choose the template for which you want to create the new group.
- Navigate to the Modules tab.
- Select Fleet Management from the side menu.
- Click + New Group.
- Enter a title for the group (e.g., "Service Technicians").
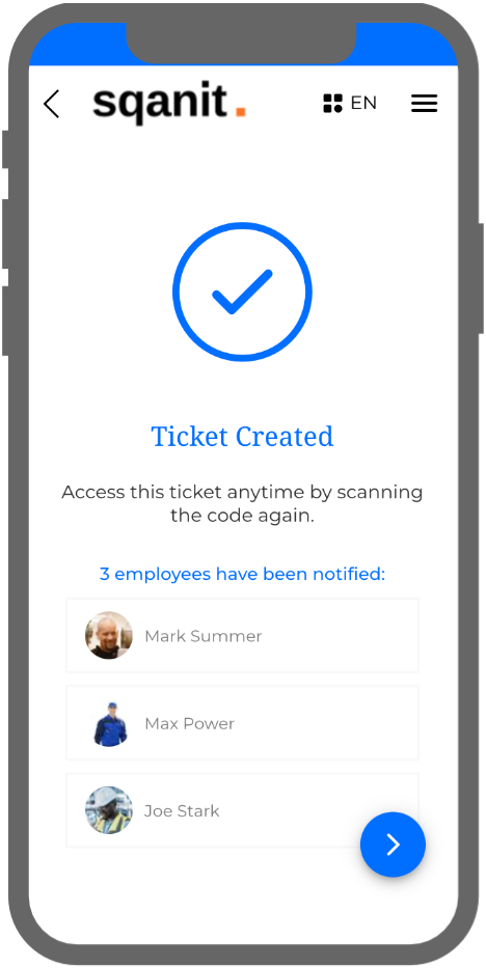
- Specify whether the names and profile pictures of the group members should be visible to users after they create a ticket. (picture)(picture)
- Click save.
- Click + Add Offer Receivers.
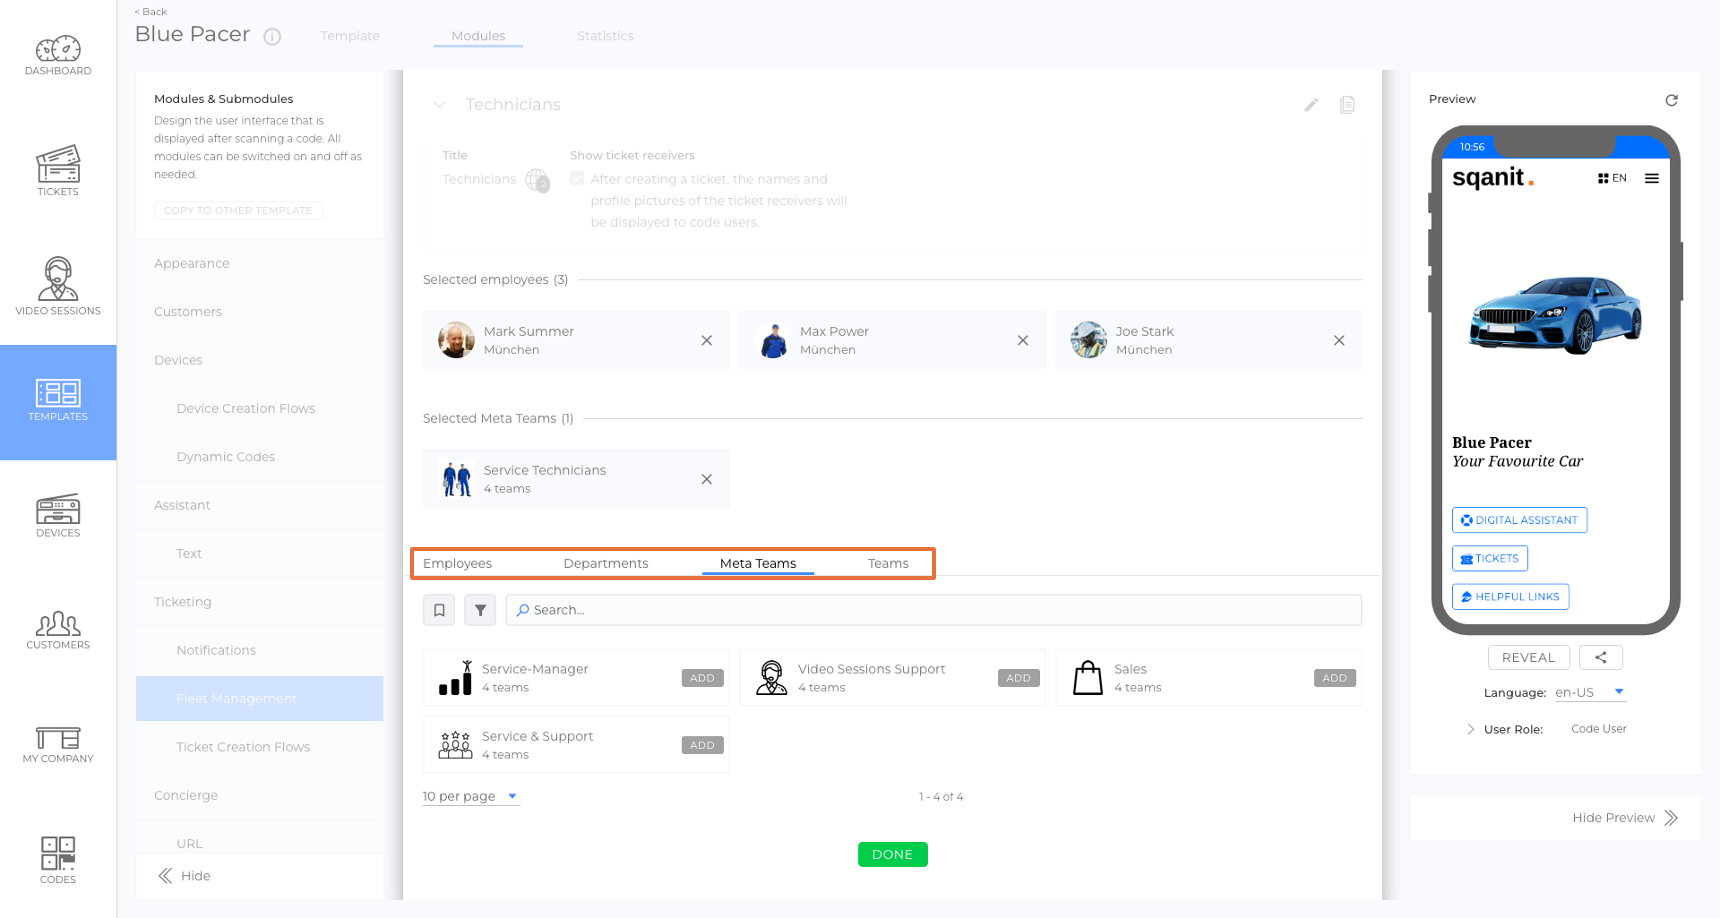
- In the pop-up, switch between tabs to select recipients (picture):
- Employees
- Departments
- Meta Teams
- Teams
- Click done to confirm your selection.
How to Assign a Fleet Management Group to a Ticket Creation Flow
- Select Templates from the side menu.
- Choose the template you want to edit.
- Navigate to the Modules tab.
- Select Ticket Creation Flows from the side menu.
- Choose the ticket creation flow you want to edit.
- Click the pencil icon to activate edit mode.
- In the dropdown menu under Fleet Management Group, select the desired group.
Note: Only groups from the Fleet Management Submodule of the same template can be selected. (picture) - Click save .
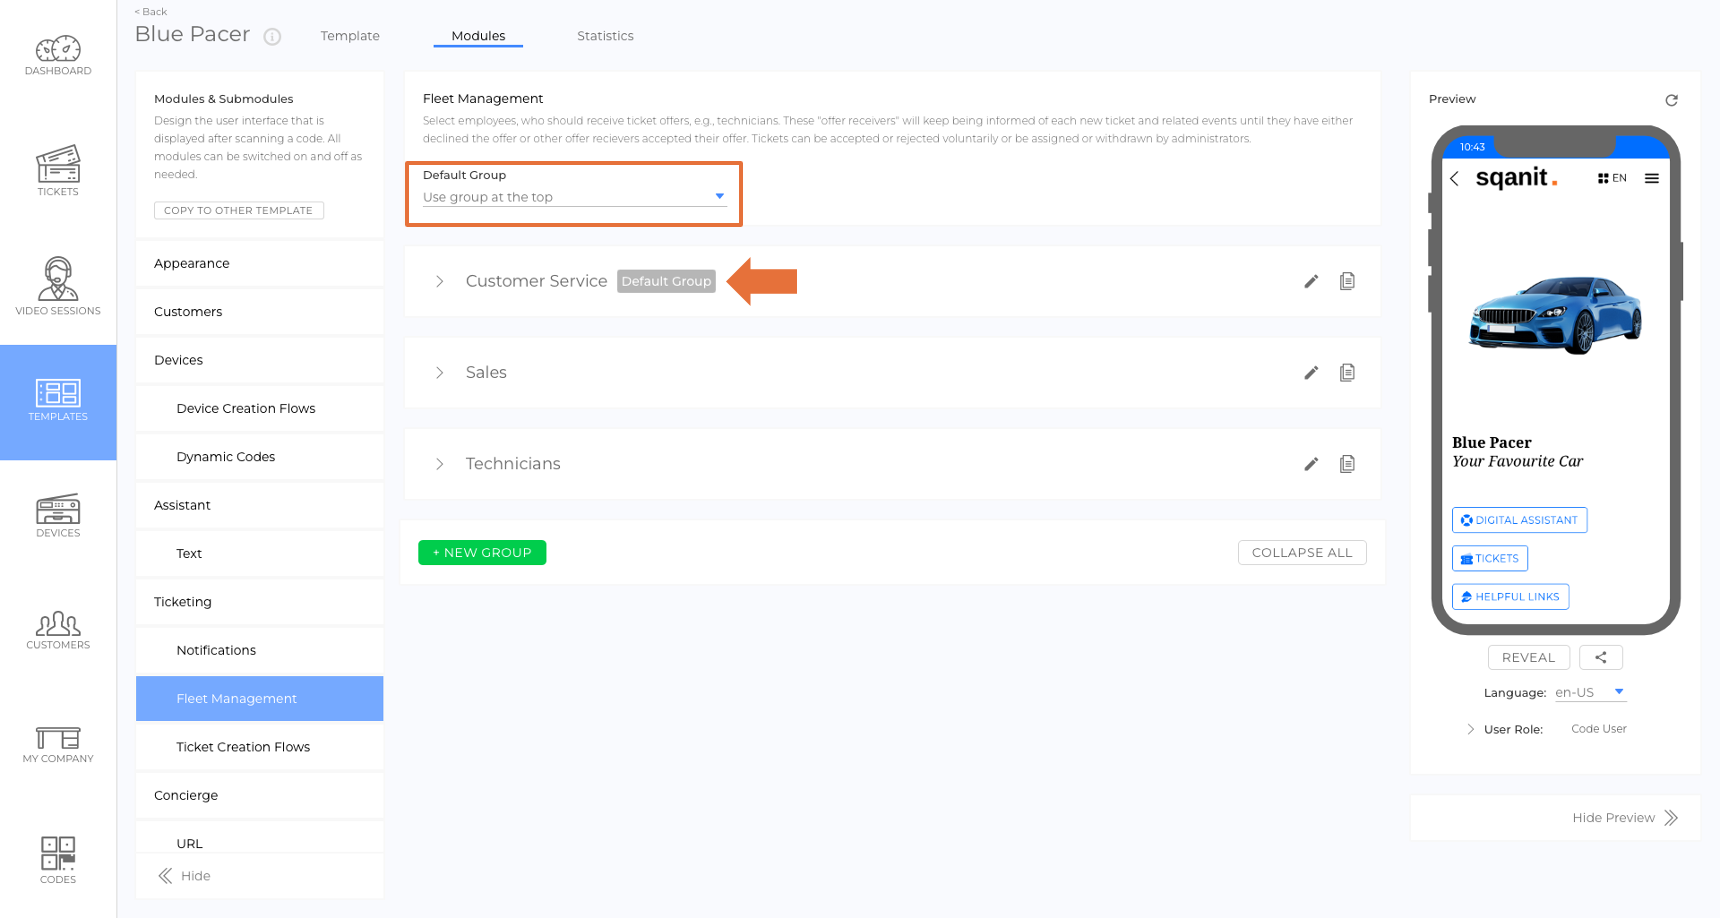
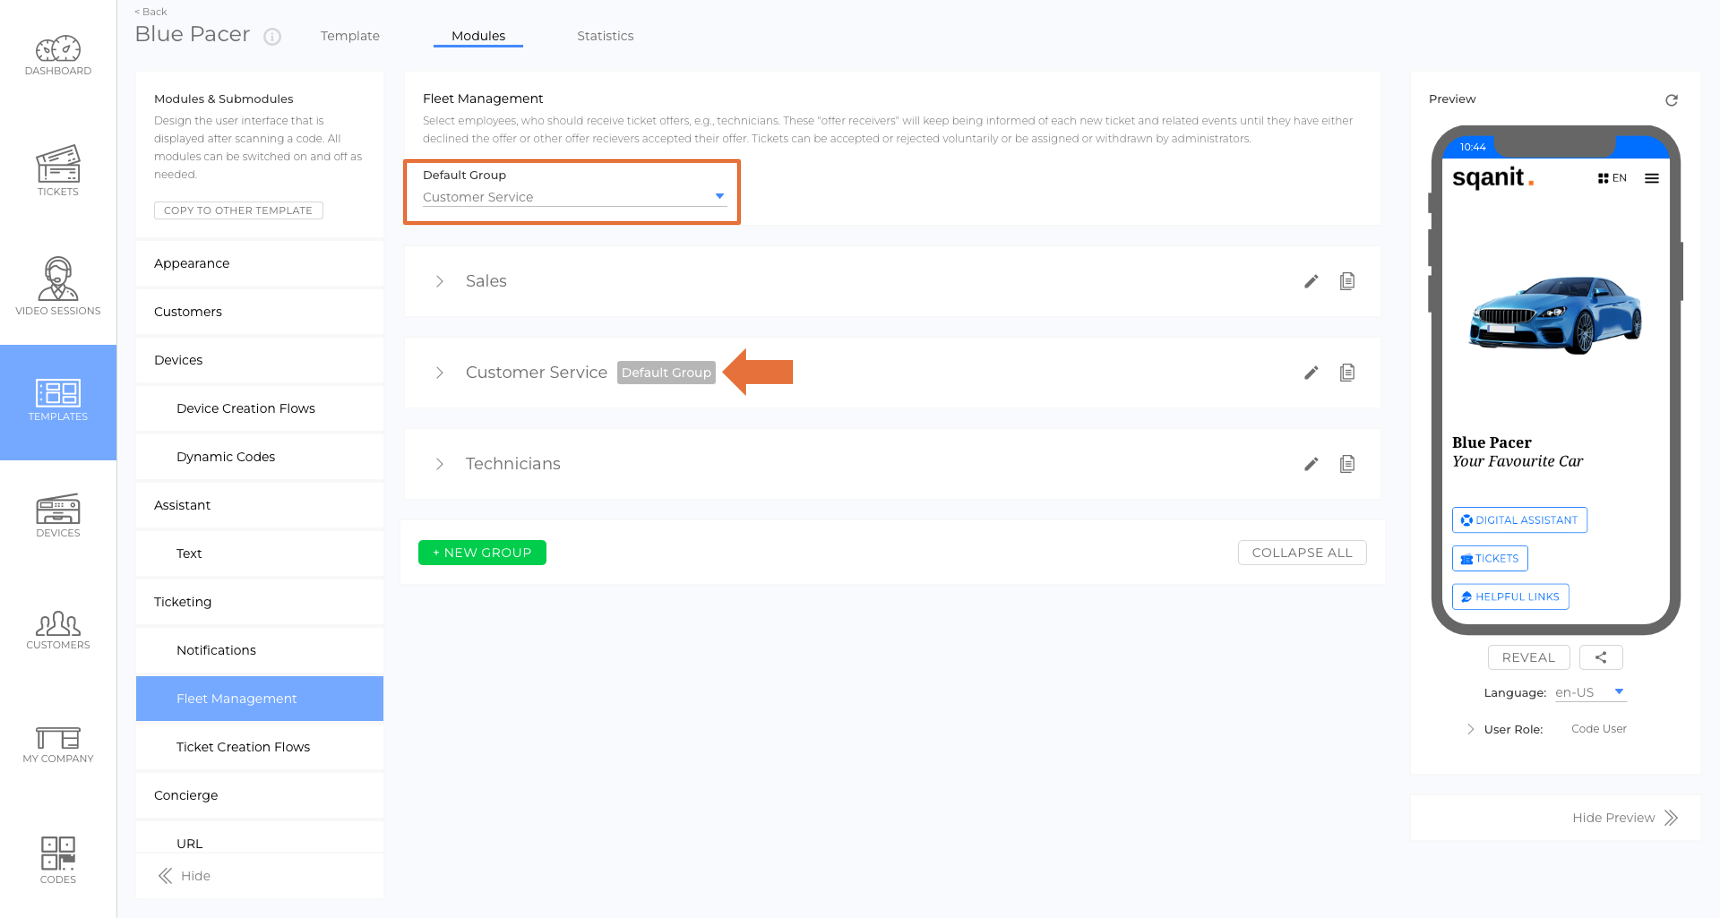
Default Group
If no specific group is assigned to a ticket creation flow, the Default Group will receive the notifications. (picture)(picture)
Was this article helpful?
YesNo
 We use cookies on our website to give you the most relevant experience by remembering your preferences and repeat visits. By clicking “Accept All”, you consent to the use of ALL the cookies. However, you may visit "Cookie Settings" to provide a controlled consent.
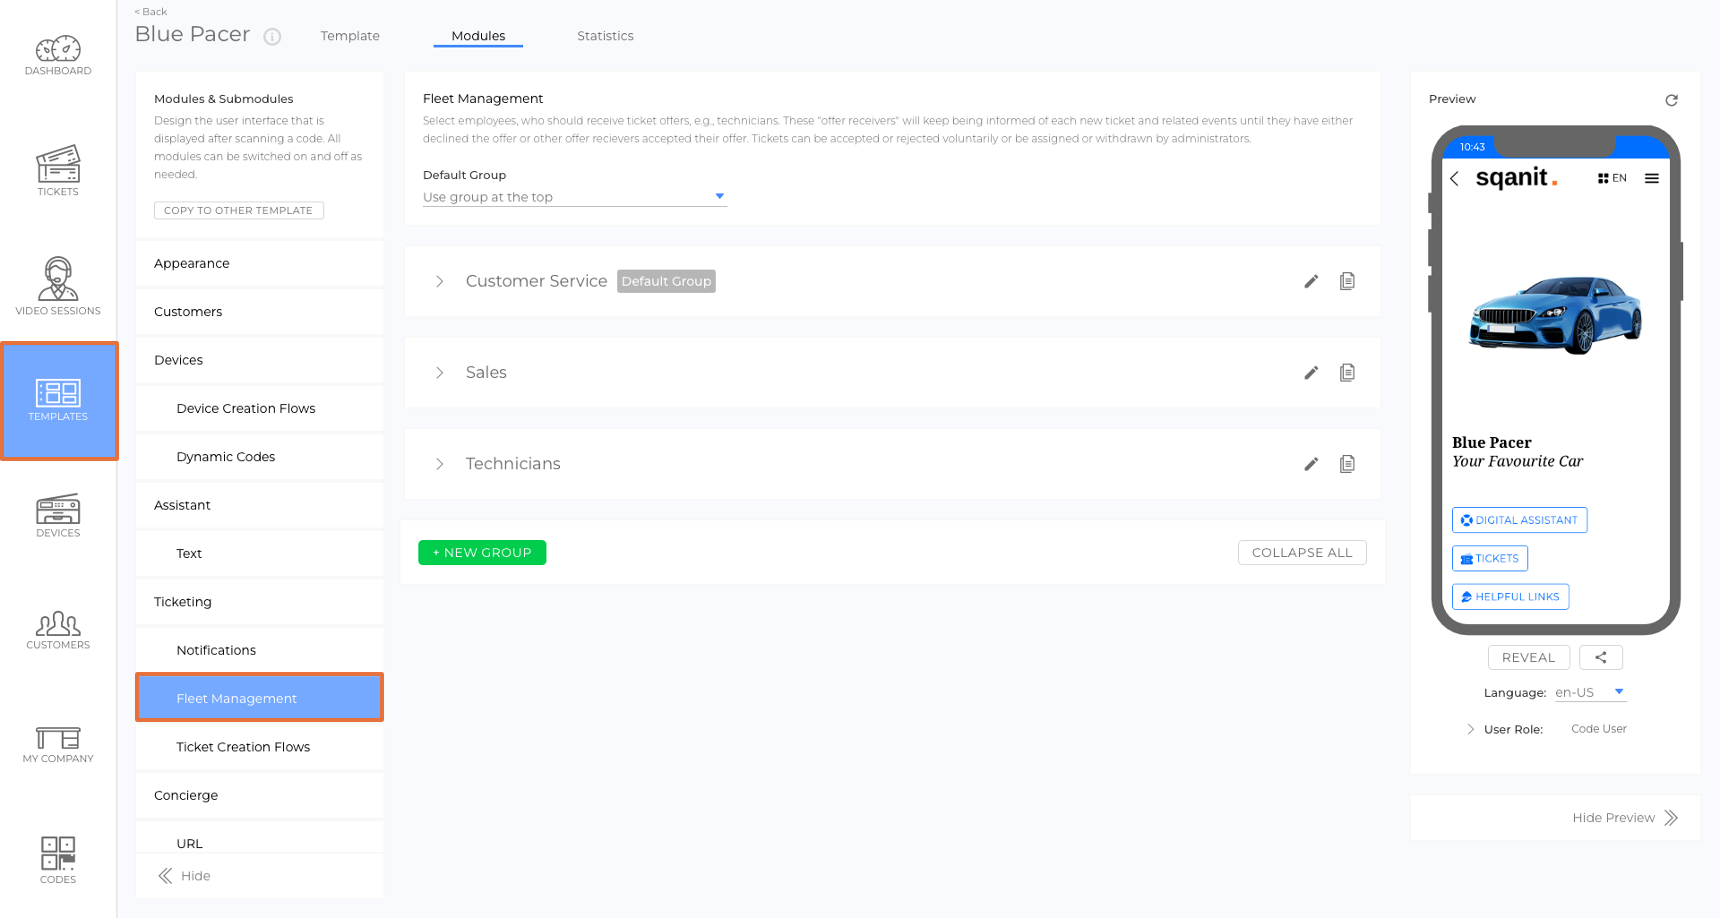