Introduction
The Notifications Submodule within Ticketing ensures that designated employees stay informed about ongoing service operations. This feature is particularly useful for managers who are not actively involved in customer service but need to monitor and oversee processes for control and reporting purposes. Unlike employees specified in the Fleet Management Submodule (article), these employees do not receive ticket offers for active processing but are kept updated through notifications.

How Notifications Work
- Group Creation:
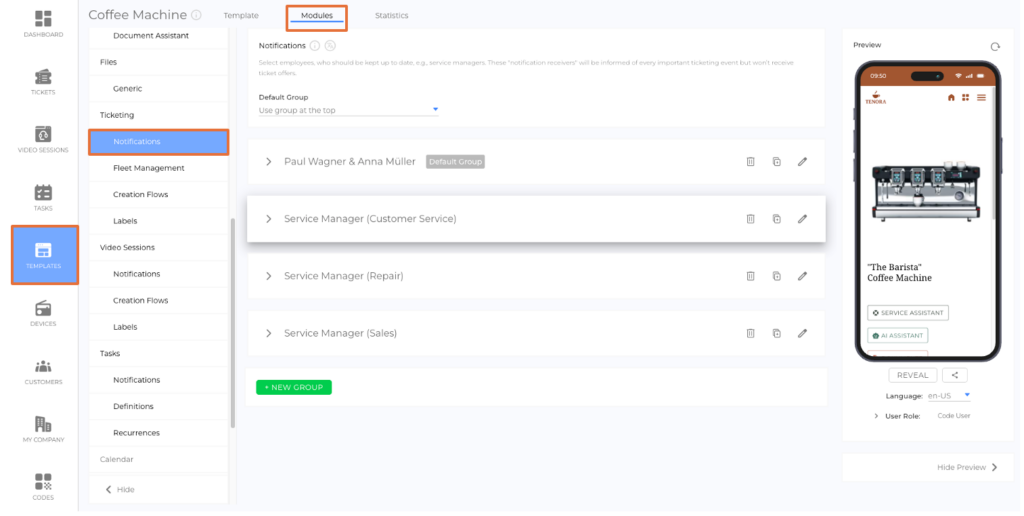
Groups are created within the Notifications Submodule. These groups can then be selected in the Creation Flows submodule to define which group will receive notifications for which kind of tickets. (picture) - Assignment to Ticket Creation Flows:
Each ticket creation gets assigned a designated notification group. Only groups created within the same template can be assigned. If no specific group is selected, the default group will receive the notifications. (picture)
Tip: You can use the copy function to copy groups to other templates (picture). - Notifications:
Members of the assigned group receive notifications when a ticket is created, updated, or processed. - Notification Channels and Strategies:
The type of notifications (e.g., email, push) and the notification strategy can be configured in the Advanced Notification Settings (article).
How to Create a New Notification Group
- Select TEMPLATES from the side menu.
- Choose the template for which you want to create a new notification group.
- Navigate to the Modules tab.
- Select Notifications from the side menu.
- Click +NEW GROUP.
- Enter a title for the group (e.g., "Service Managers") and click SAVE.
- Click +ADD NOTIFICATION RECEIVERS.
- In the pop-up, switch between the tabs to select the recipients you want (picture):
- Employees
- Departments
- Meta Teams
- Teams
- Click DONE to confirm your selection.
How to Assign a Notification Group to a Ticket Creation Flow
- Select TEMPLATES from the side menu.
- Choose the template you want to edit.
- Navigate to the Modules tab.
- Select Ticket Creation Flows from the side menu.
- Choose the ticket creation flow you want to edit.
- Click the pencil icon to activate edit mode.
- In the drop-down menu below Notified Group, select the desired group.
Note: You can only select groups from the Notifications Submodule of the same template. - Click SAVE.
Default Group
If no specific group is assigned to a ticket creation flow, the Default Group will receive the notifications. (picture)(picture)
Was this article helpful?
YesNo
