This can only be done by administrators.
Introduction
The My Company section is where administrators can configure and manage critical aspects of their organization on the platform. From managing employees and teams to defining company settings and creating labels, this section is the cornerstone of your platform setup.
How to Get There
- Select My Company from the side menu.
- Use the various tabs to configure your organization: Overview, Employees, Teams, Labels, and Settings.
Sections of My Company
Overview
The Overview tab displays details about your organization and its departments.
- Details Available: Name (required), address, telephone number, email, website URL, notes, and logo.
- Departments: Add departments to organize your company (video). Departments can isolate data, ensuring only members of a specific department can view assigned elements like devices and customers. For more details, read the article Department Isolation (article).
- Map: Displays the locations of all departments on a map, provided addresses are added.
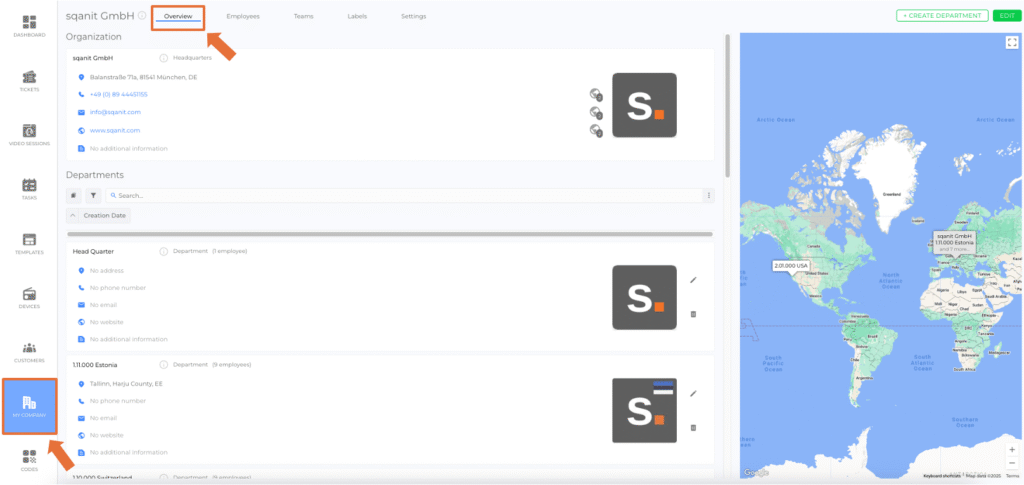
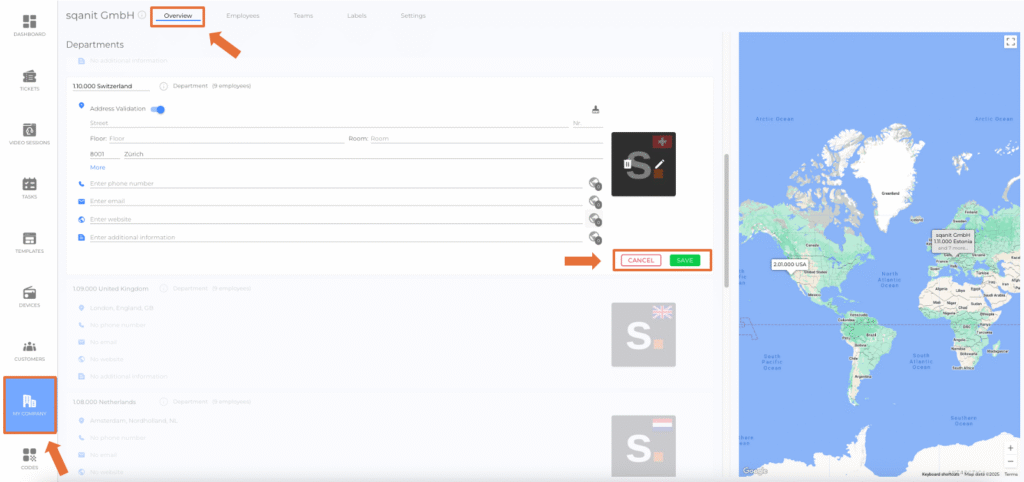
The creation process for new organizations is fully synchronized across the platform.
Whether the setup is initiated from the main area, user management, or a specific module, all entered information is automatically synchronized across the relevant tabs. This ensures that every new organization is created completely and consistently without requiring duplicate data entry.
Employees
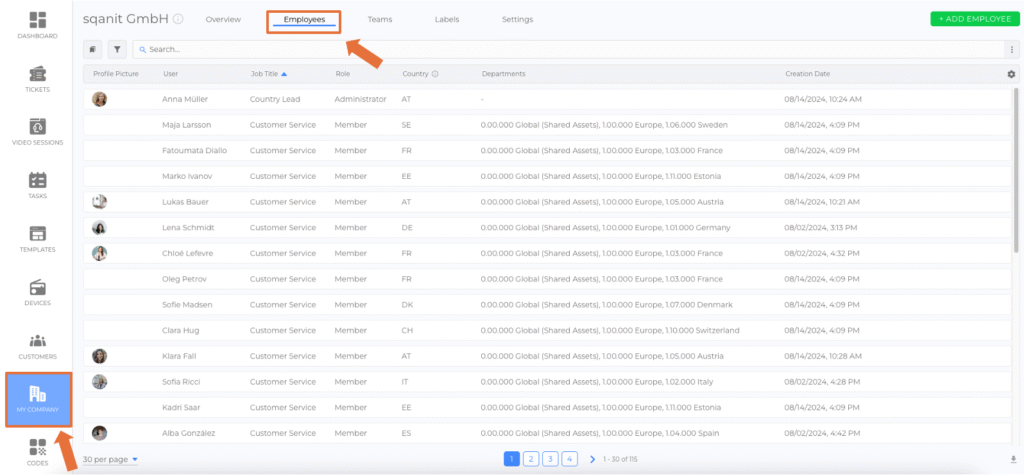
The Employees tab provides a comprehensive list of all employees added to the platform.
- Features:
- Add employees via the + Add Employee button.
- Sort, filter, and search the list for easy workforce management.
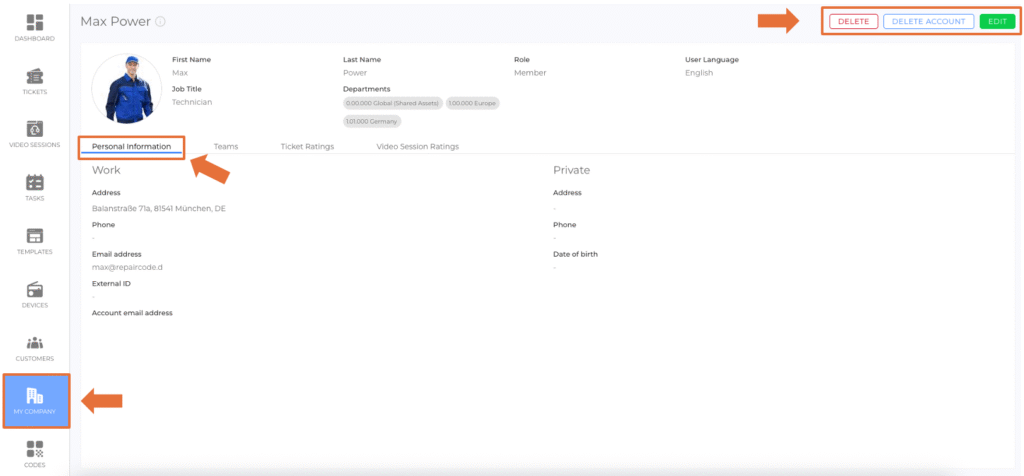
- Click on an employee’s name to view their details (article).
- For detailed instructions, read the article How to add new Employees.
Teams
The Teams tab allows you to create and manage Meta Teams and Teams.
- Features:
- Add, edit, or delete teams.
- Assign employees to specific teams.
- For more details, read the article Meta Teams (article).
Labels
In the Labels tab, you can create, edit, and delete labels for organisational purposes.
- Usage: Labels can be attached to tickets and video sessions, tasks, devices, customers, departments and more.
- Types of Labels:
- Public: Visible to code users and employees.
- Internal: Visible to employees only.
- Customization: Labels include a color and text, defined by administrators or moderators.
The Labels overview includes a Draft Column and can be Filtered also. The filter allows user to display only labels that are currently saved as drafts and have not yet been published. It helps administrators and content creators distinguish between active and work-in-progress labels, ensuring better organization and version control within the labeling system.
Settings
The Settings tab includes key configurations for your company.
- Corporate Identity Color: Define a color that represents your company and highlights elements like backgrounds and icons.
- Language Settings:
- Company Language: The main language used as a fallback if content is not available in the user’s language.
- Additional Languages: Specify other languages your company supports. These settings help content creators identify missing translations.
- Missing translations are highlighted in edit mode, using globe icons to indicate status:
| | The translation into the Company Language is missing. |
| | Translations into Additional Languages are missing. |
| | All the required translations are available. |
Note: The small number next to the globe indicates how many translations are available in total.
- Department Isolation: Activate or deactivate the department isolation feature for your company (article).
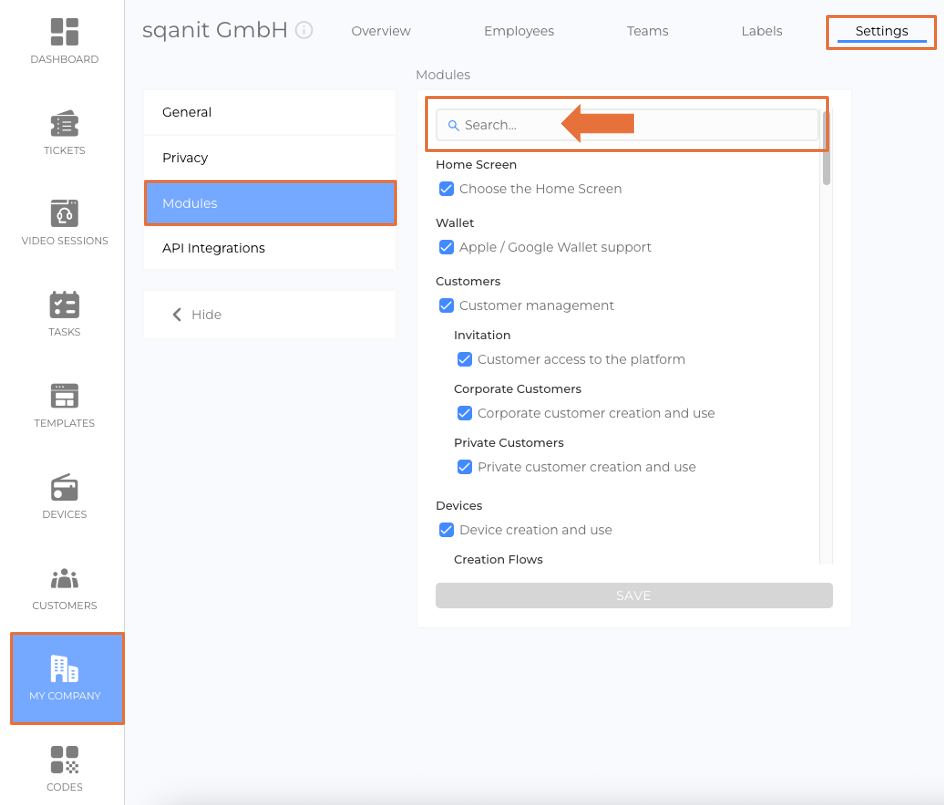
- Module Activation: Enable or disable modules at the company level. Deactivated modules cannot be used at any other level (e.g., customer or template level).
A search field is available in the Module Activation section within the Settings tab. It allows users to quickly find and manage specific modules within the organizational settings. This feature is especially helpful when many modules are available, ensuring faster navigation and improved usability.
Tips
- Regularly review your company settings to ensure alignment with your organizational needs.
- Use the department isolation feature to control data visibility for different teams.
- Keep labels updated for efficient ticket and session categorization.
