Introduction
The Department Isolation feature enables organizations to structure data access within the platform. By assigning templates, devices, codes, and customers to specific departments, companies can restrict visibility to department employees, ensuring that all associated tickets, video sessions, and statistics remain confidential within the assigned department. This functionality is especially beneficial for multinational companies or organizations operating in multiple locations, allowing them to separate activities internally.
How to Enable Department Isolation
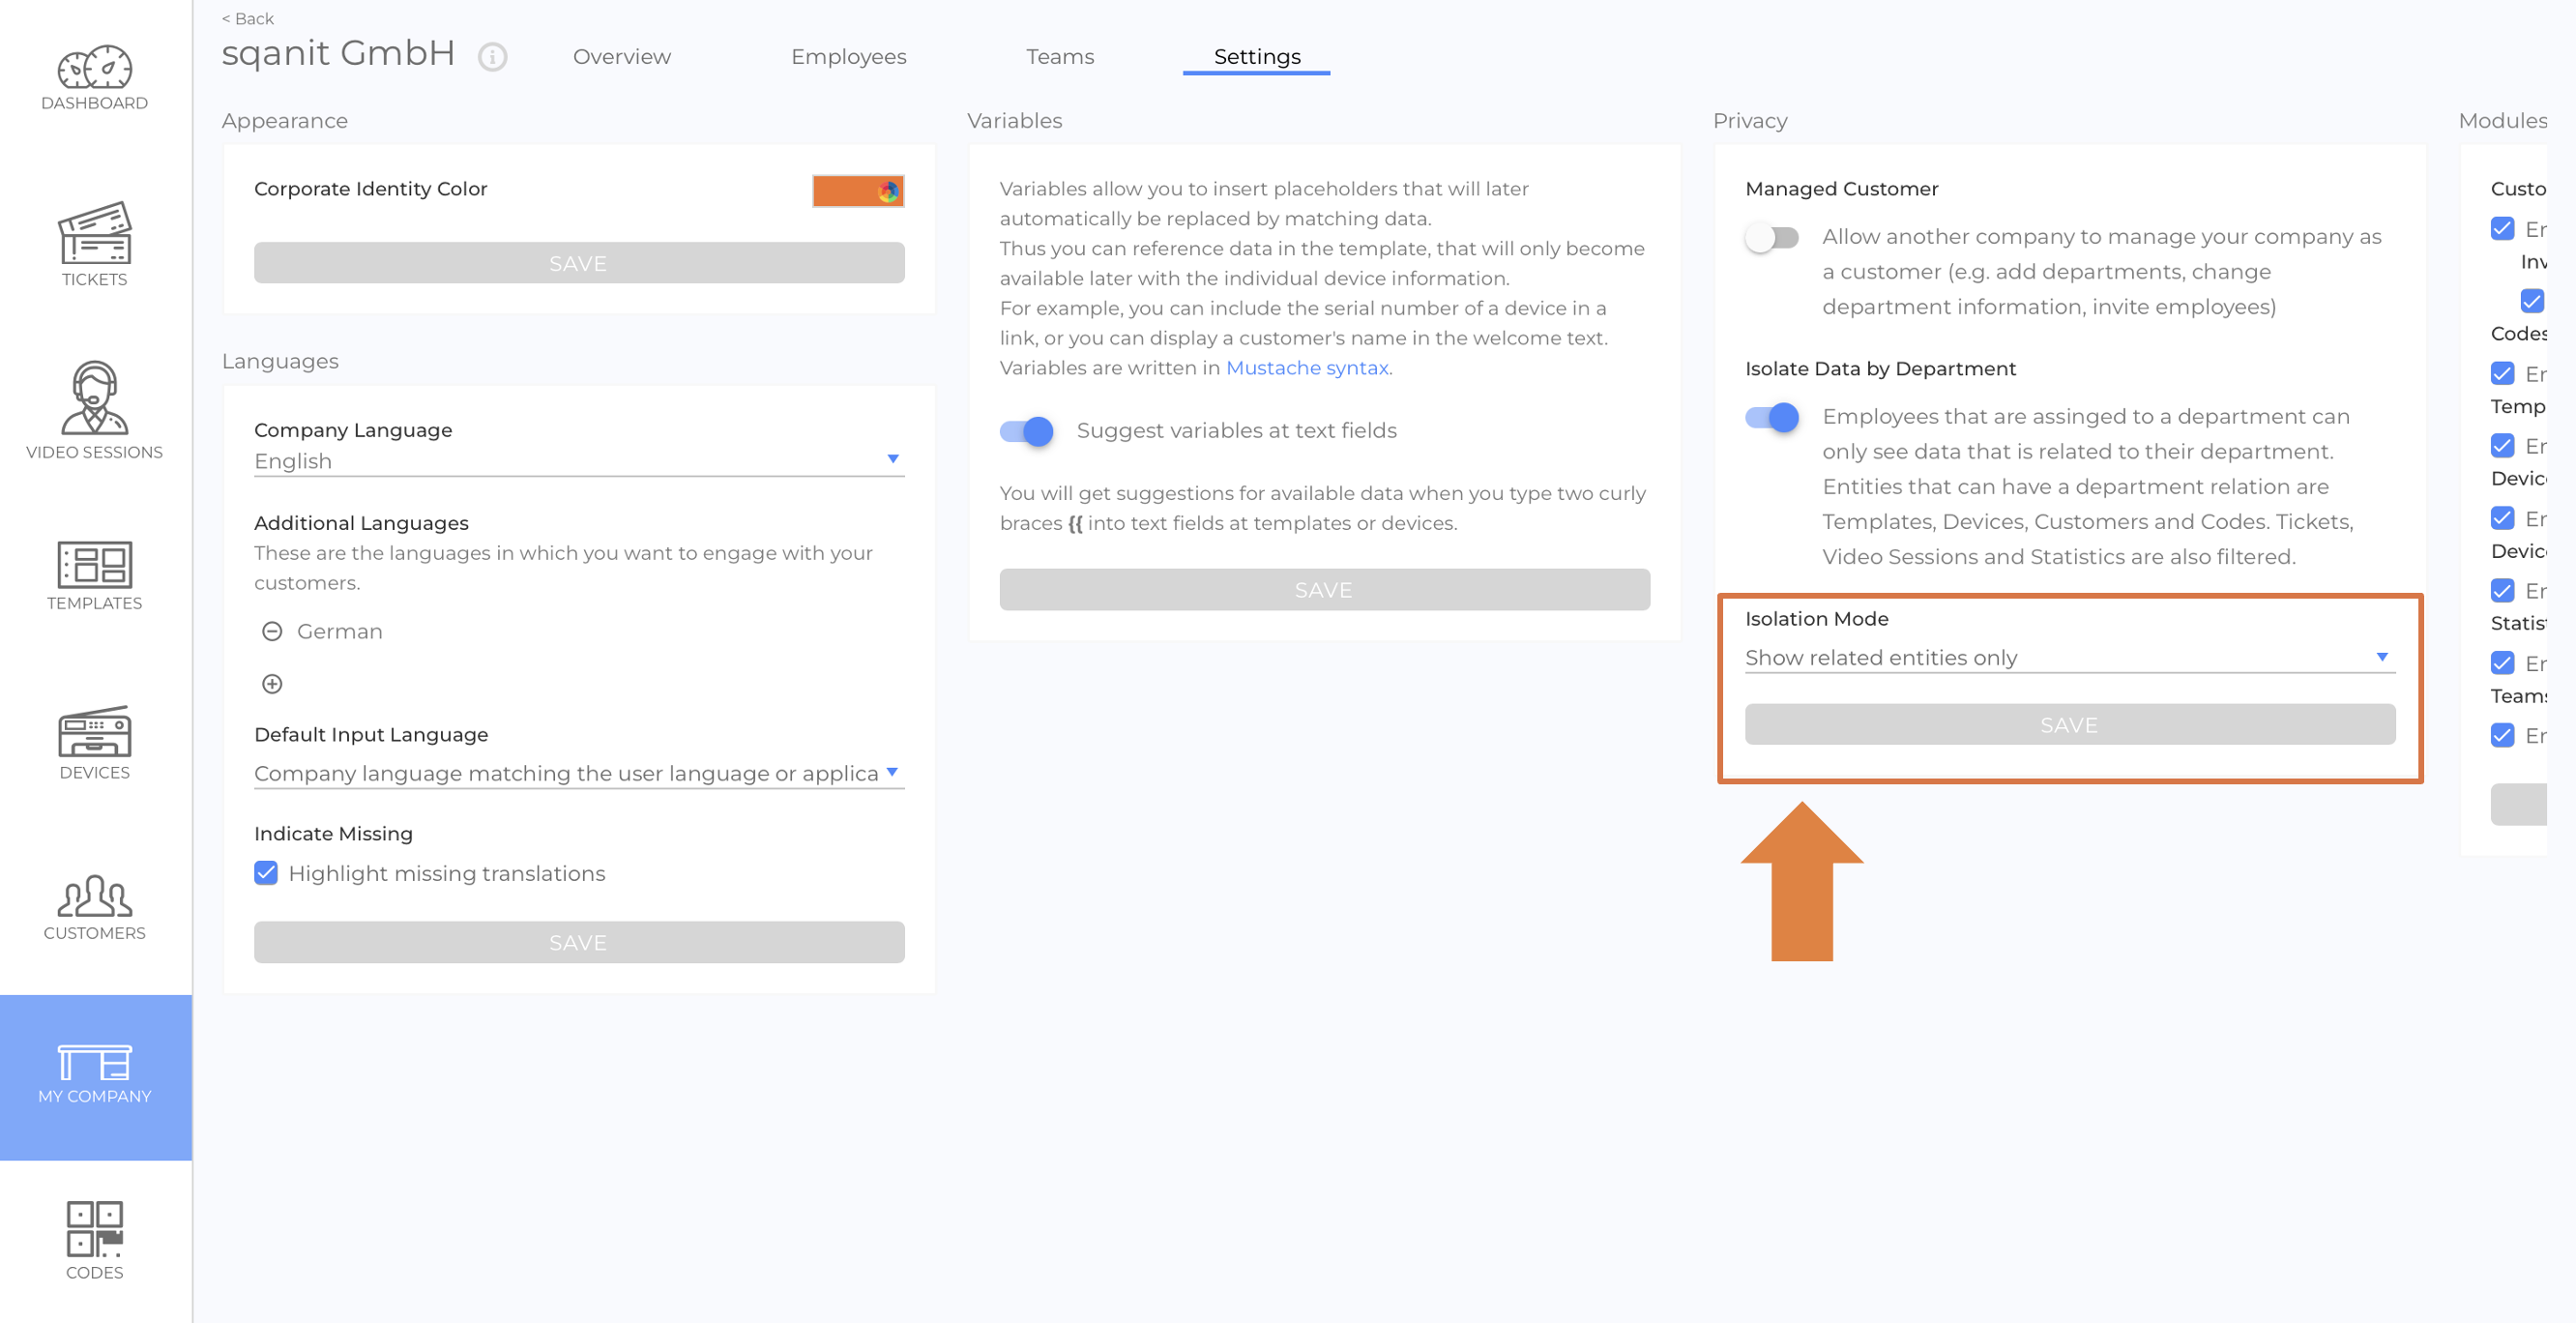
- Navigate to My Company in the side menu.
- Open the Settings Tab.
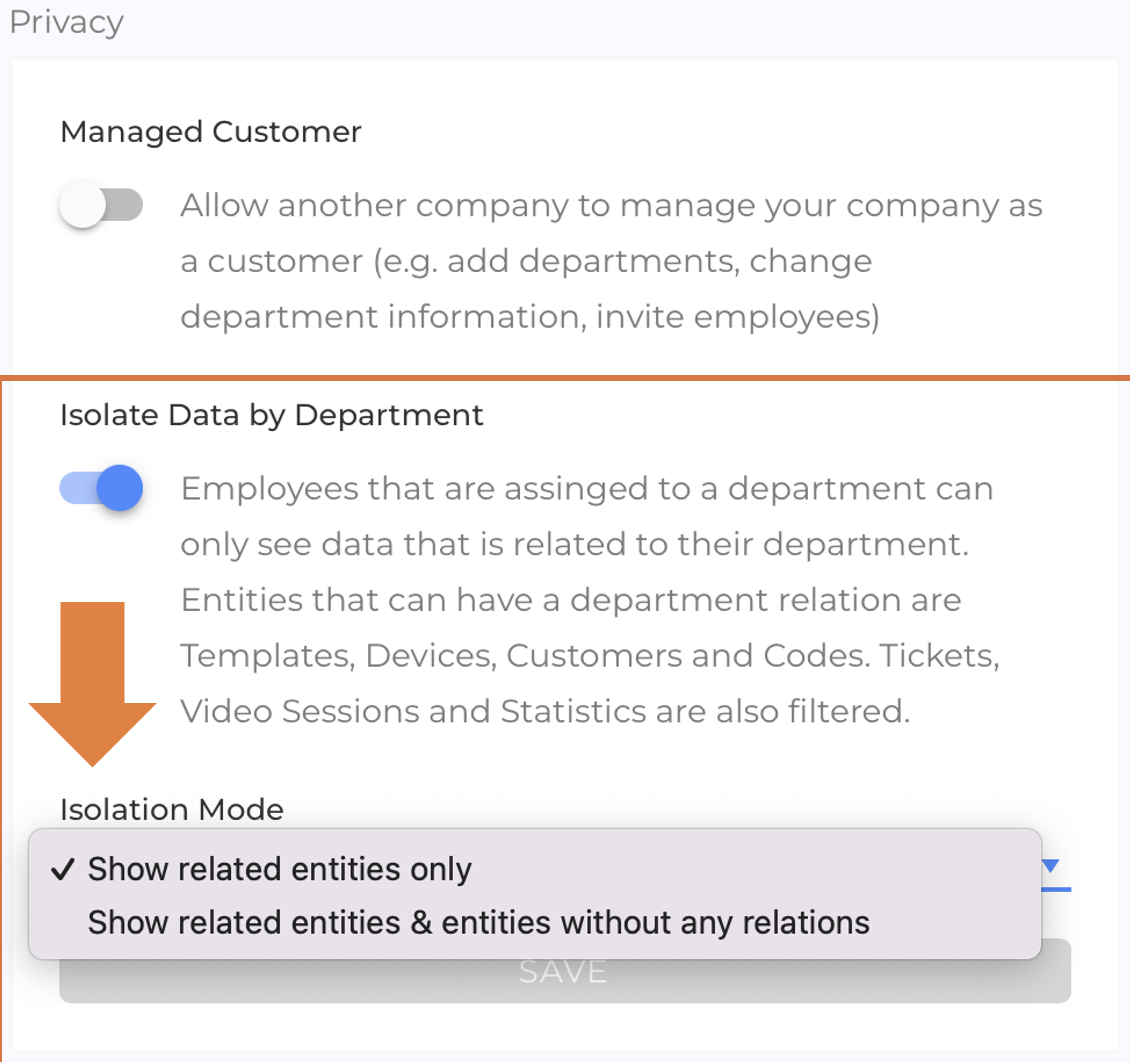
- In the Privacy Section, locate the setting Isolate Data by Department and activate it. (picture)
How Department Isolation Works
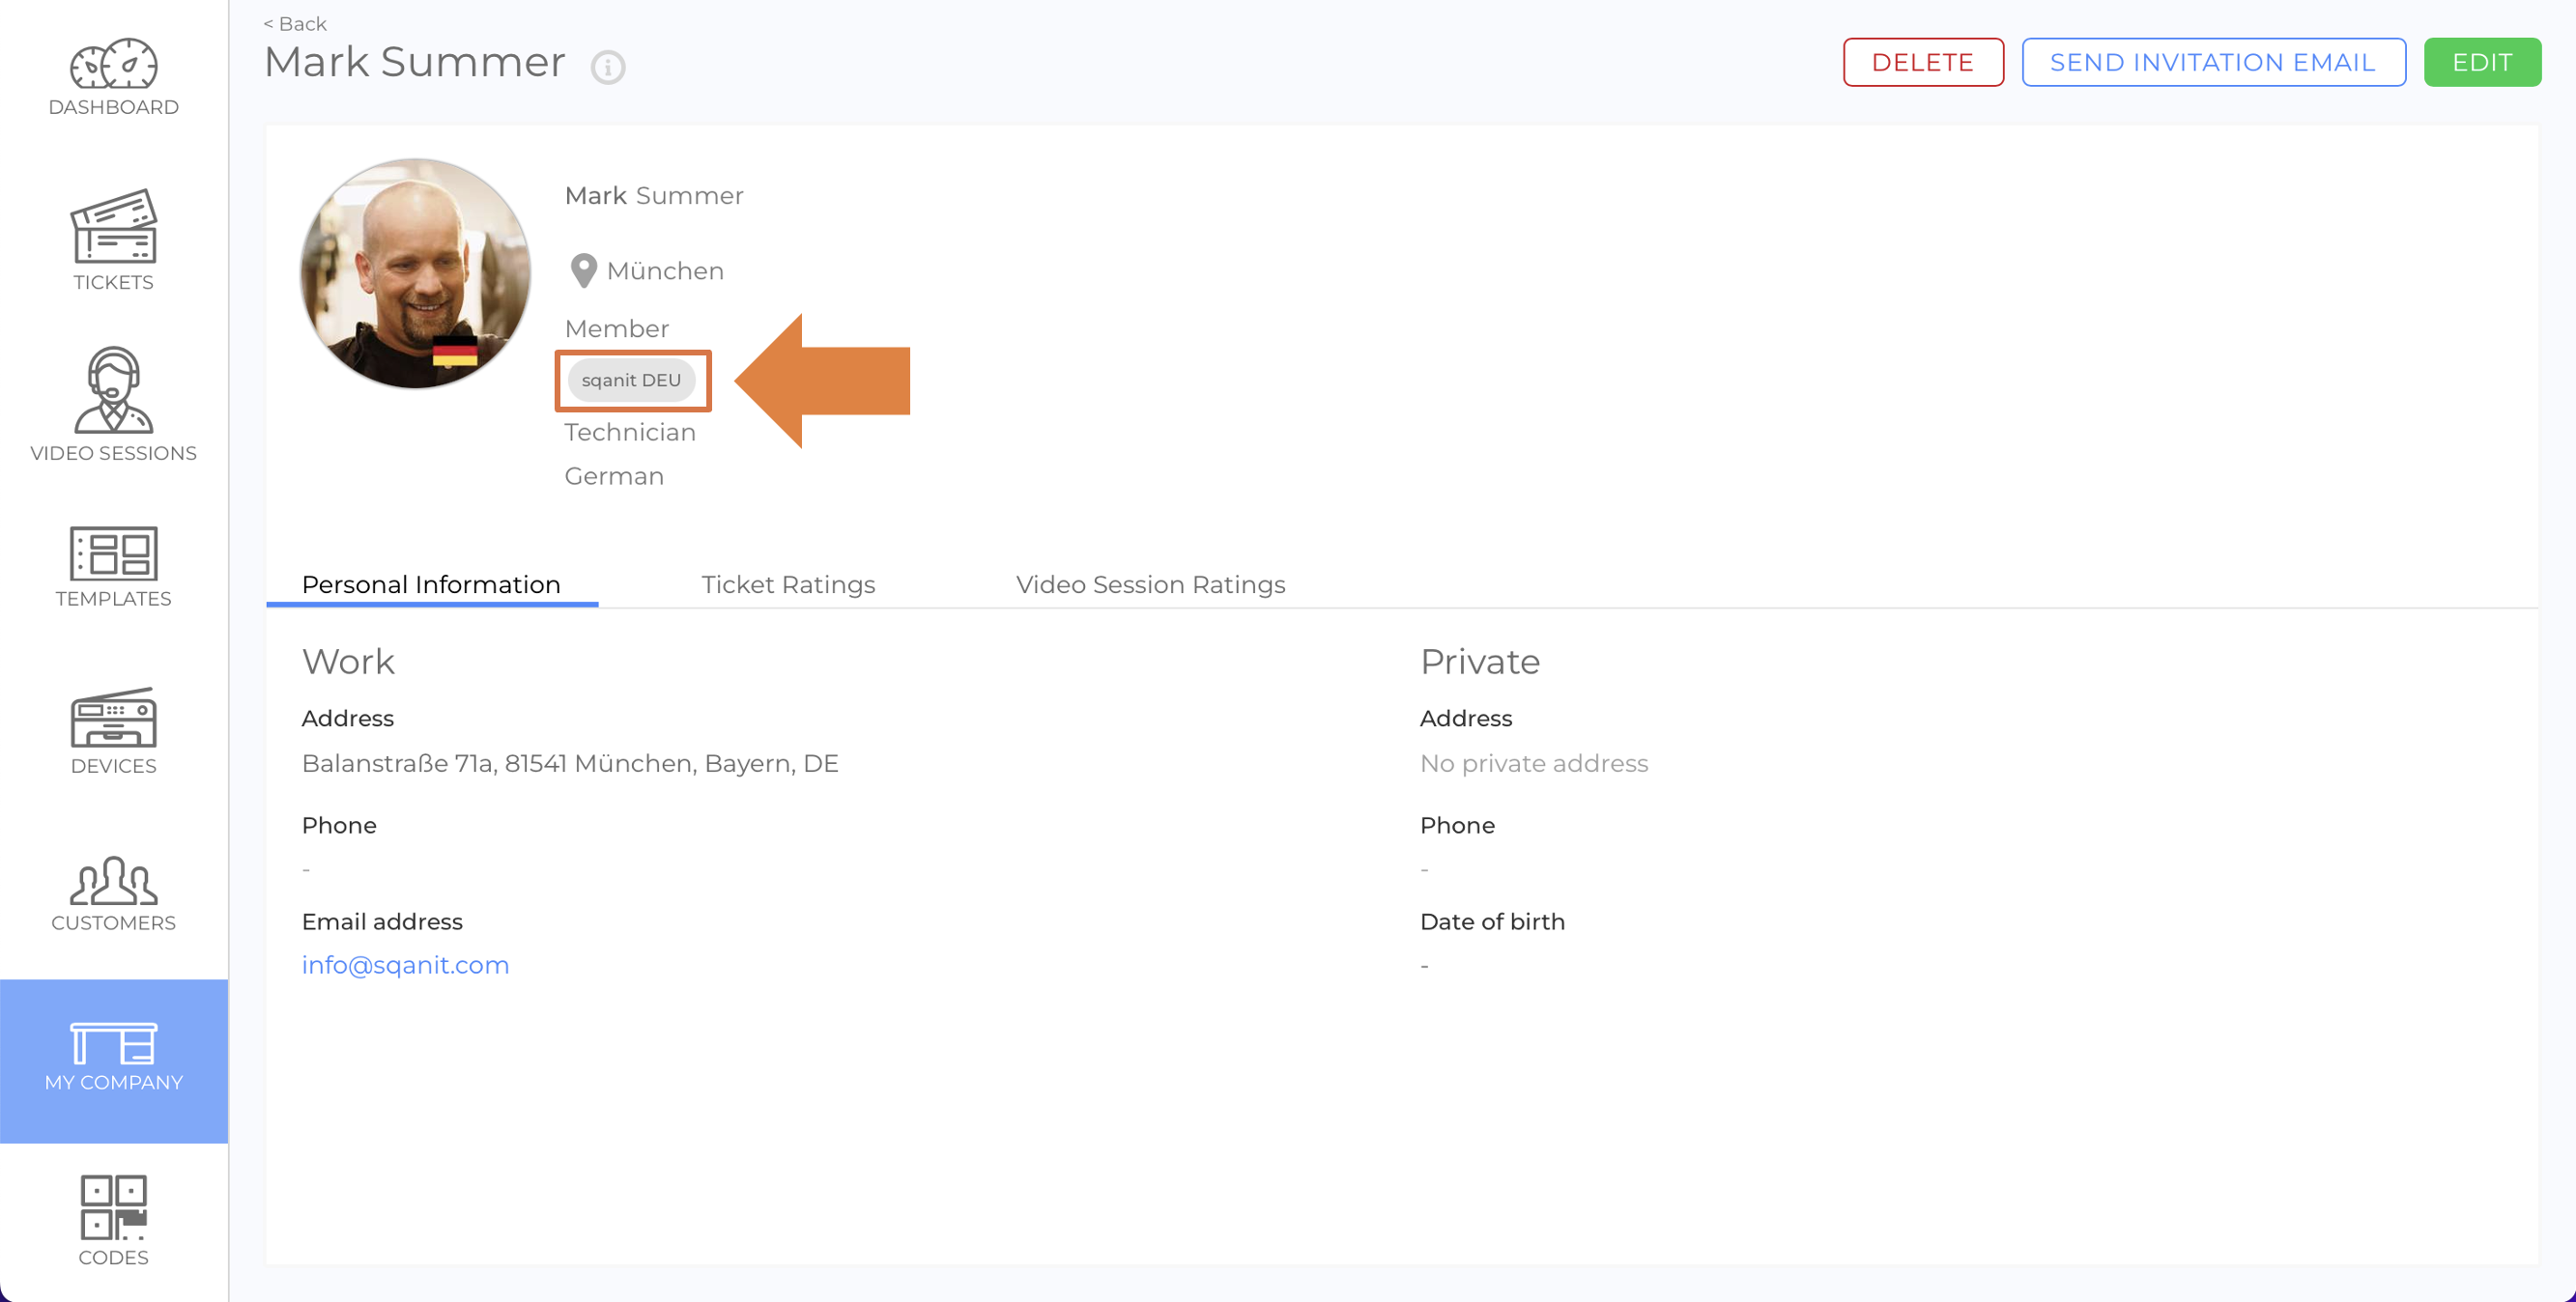
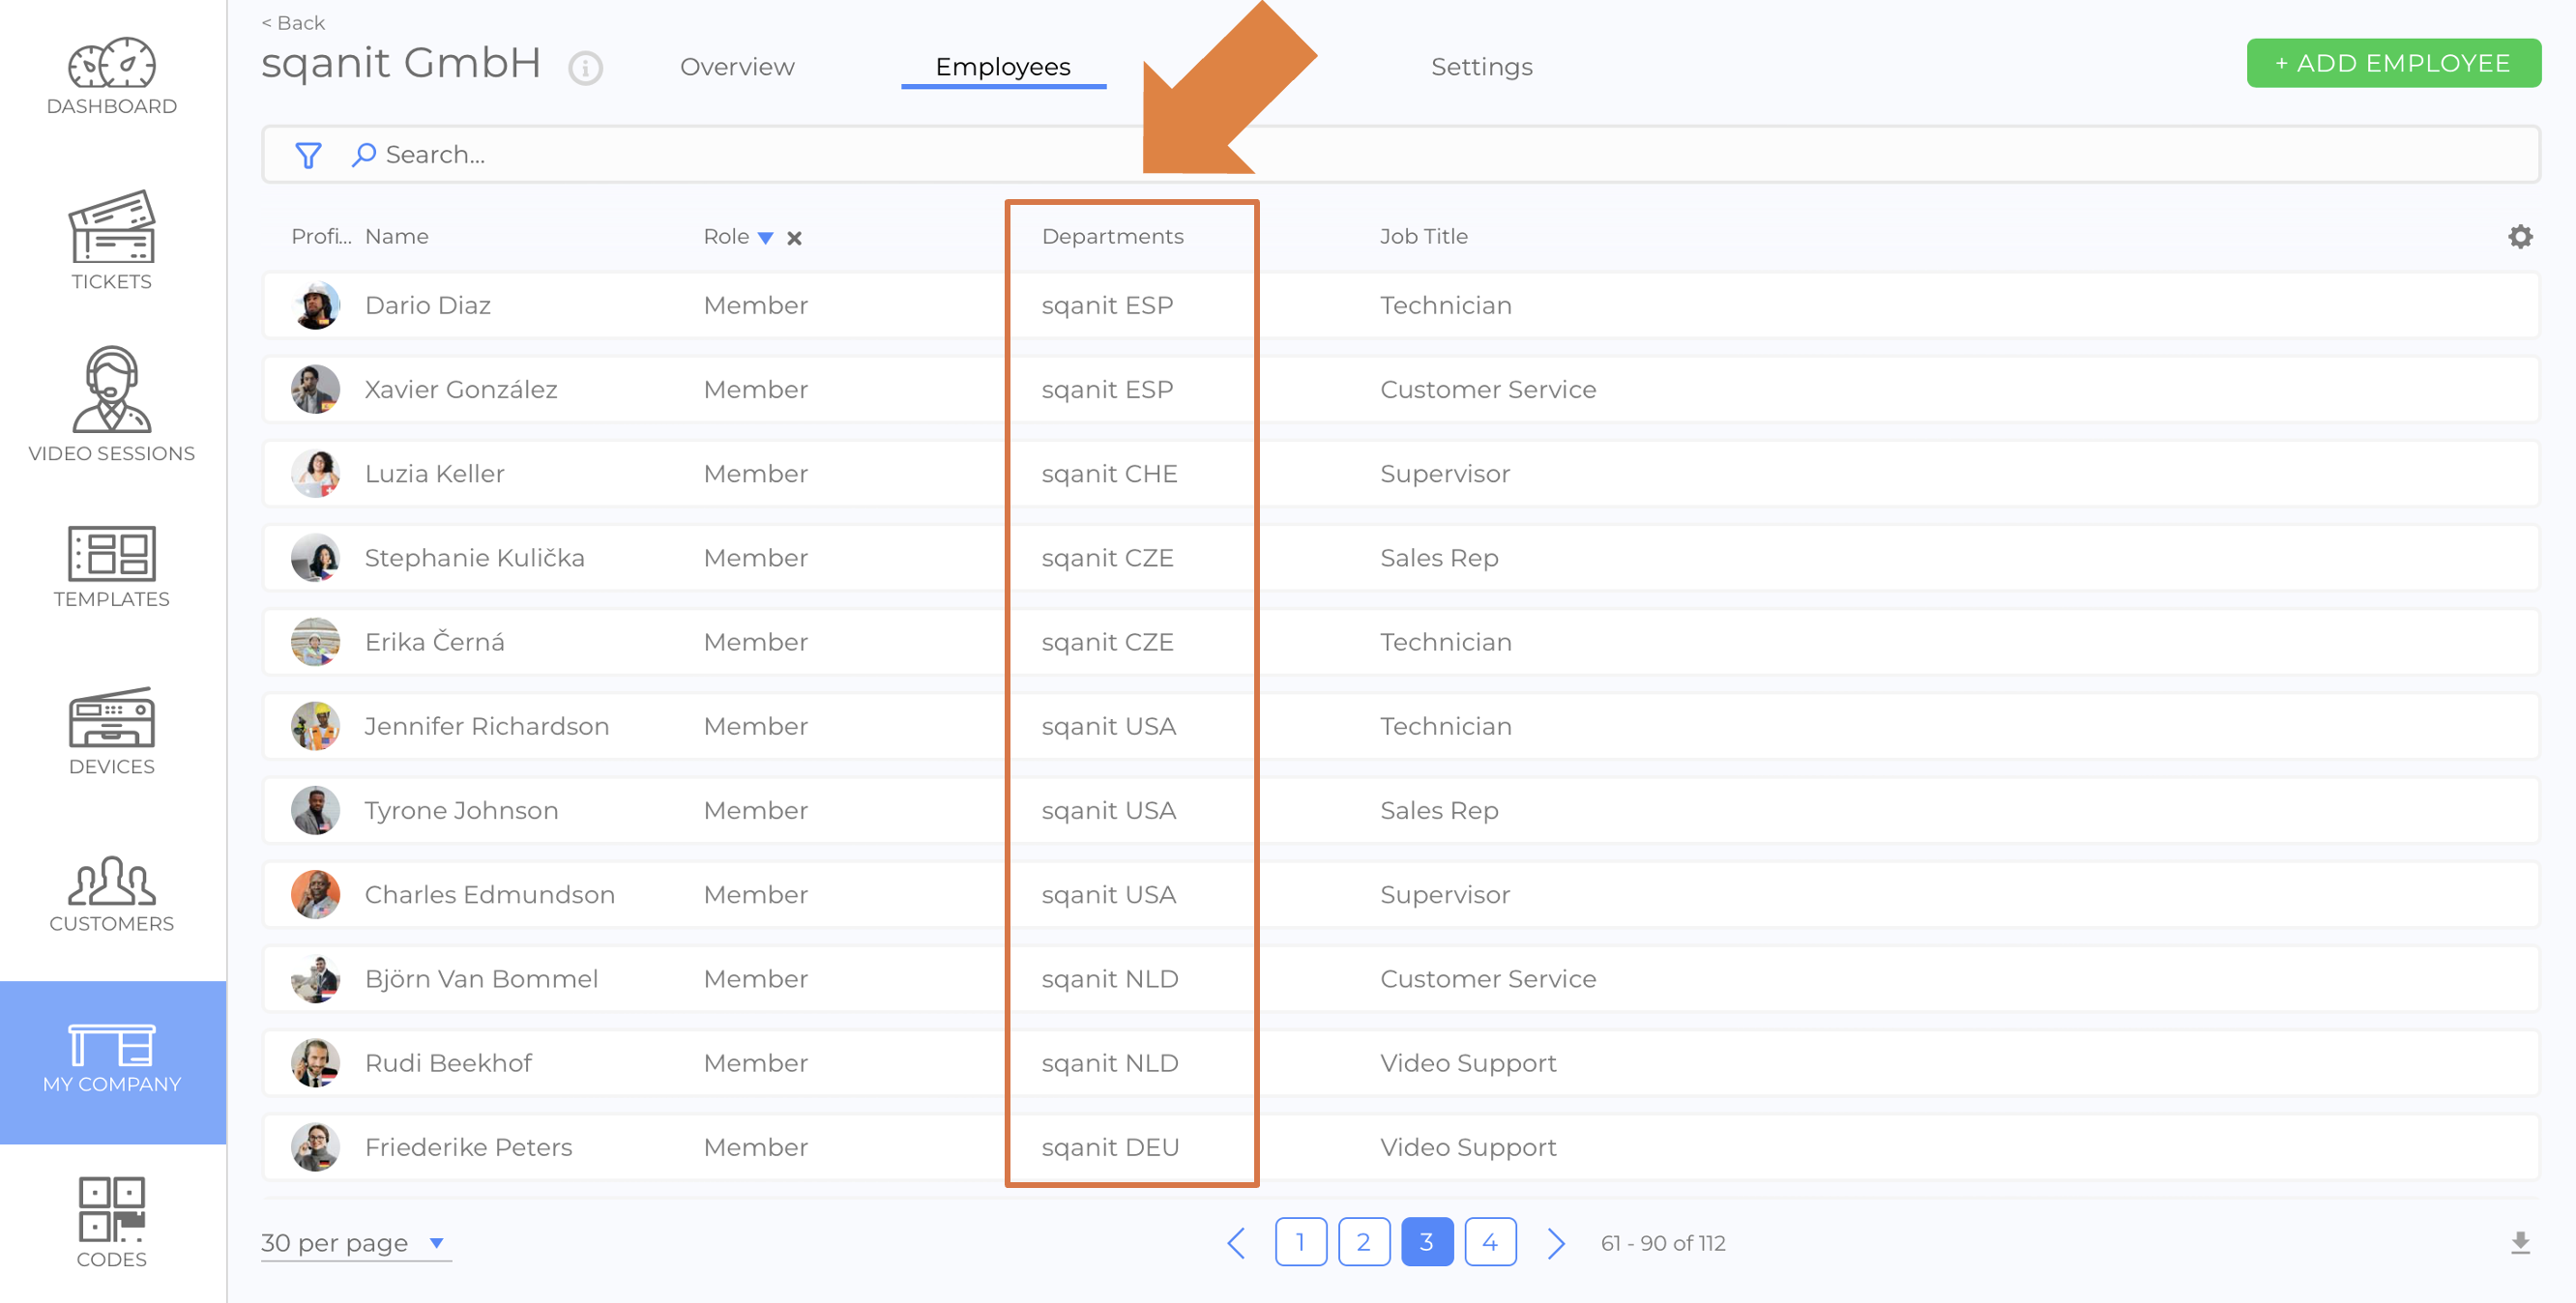
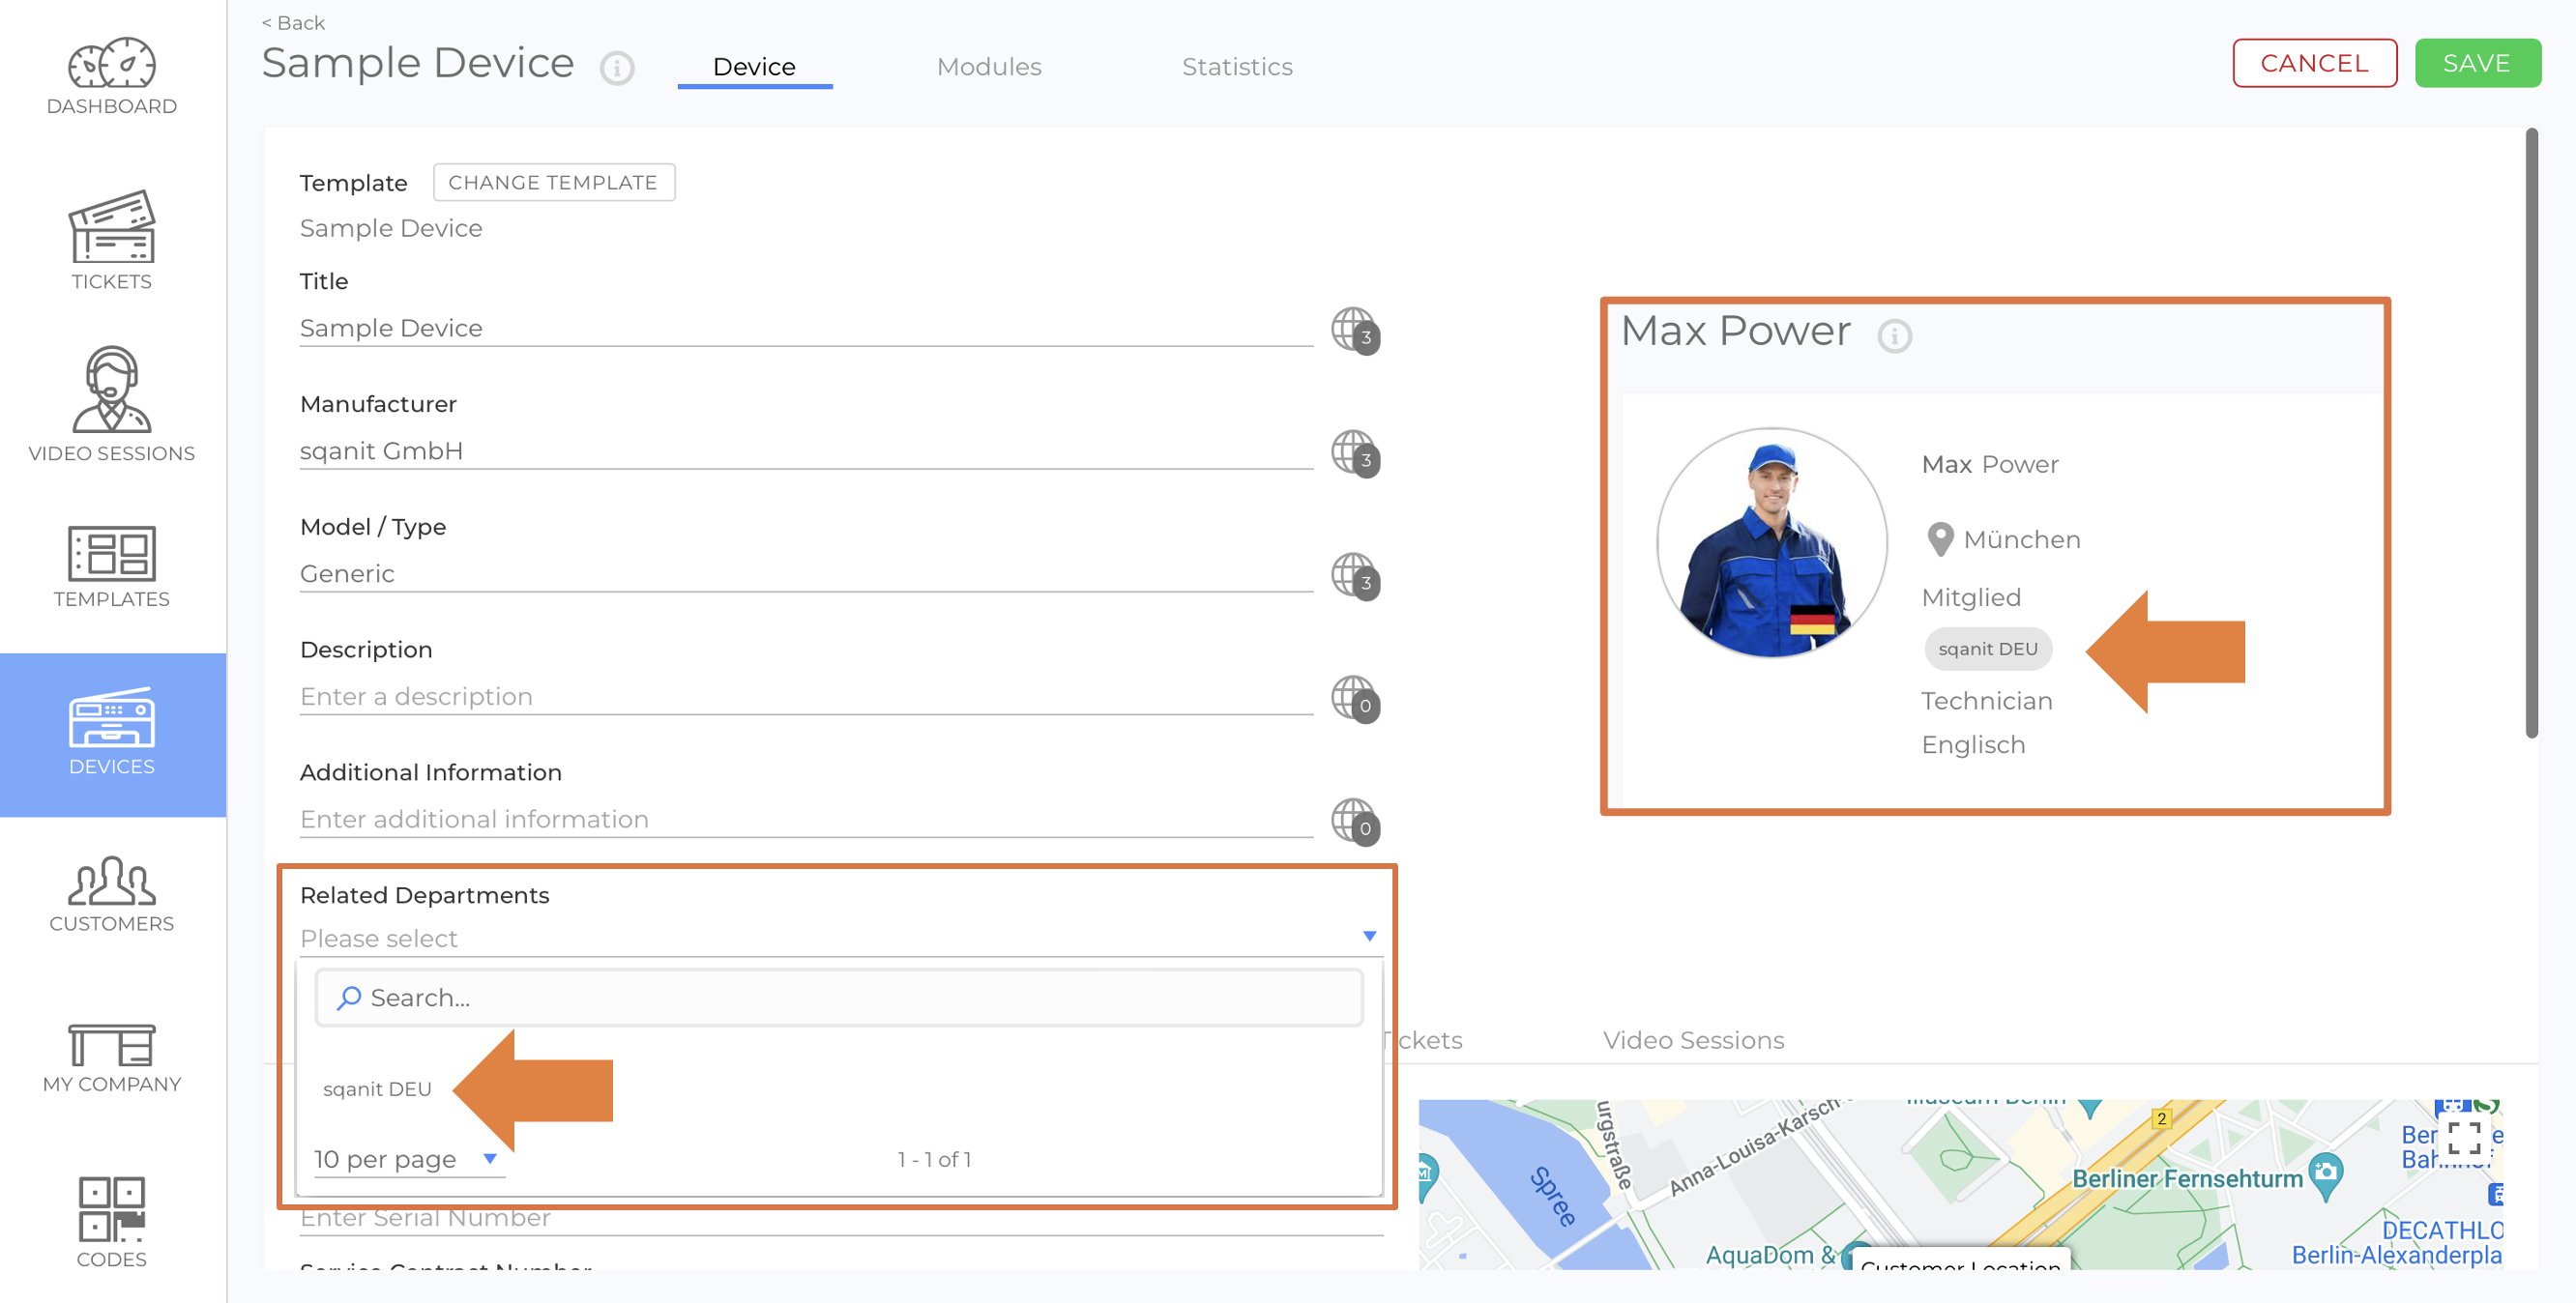
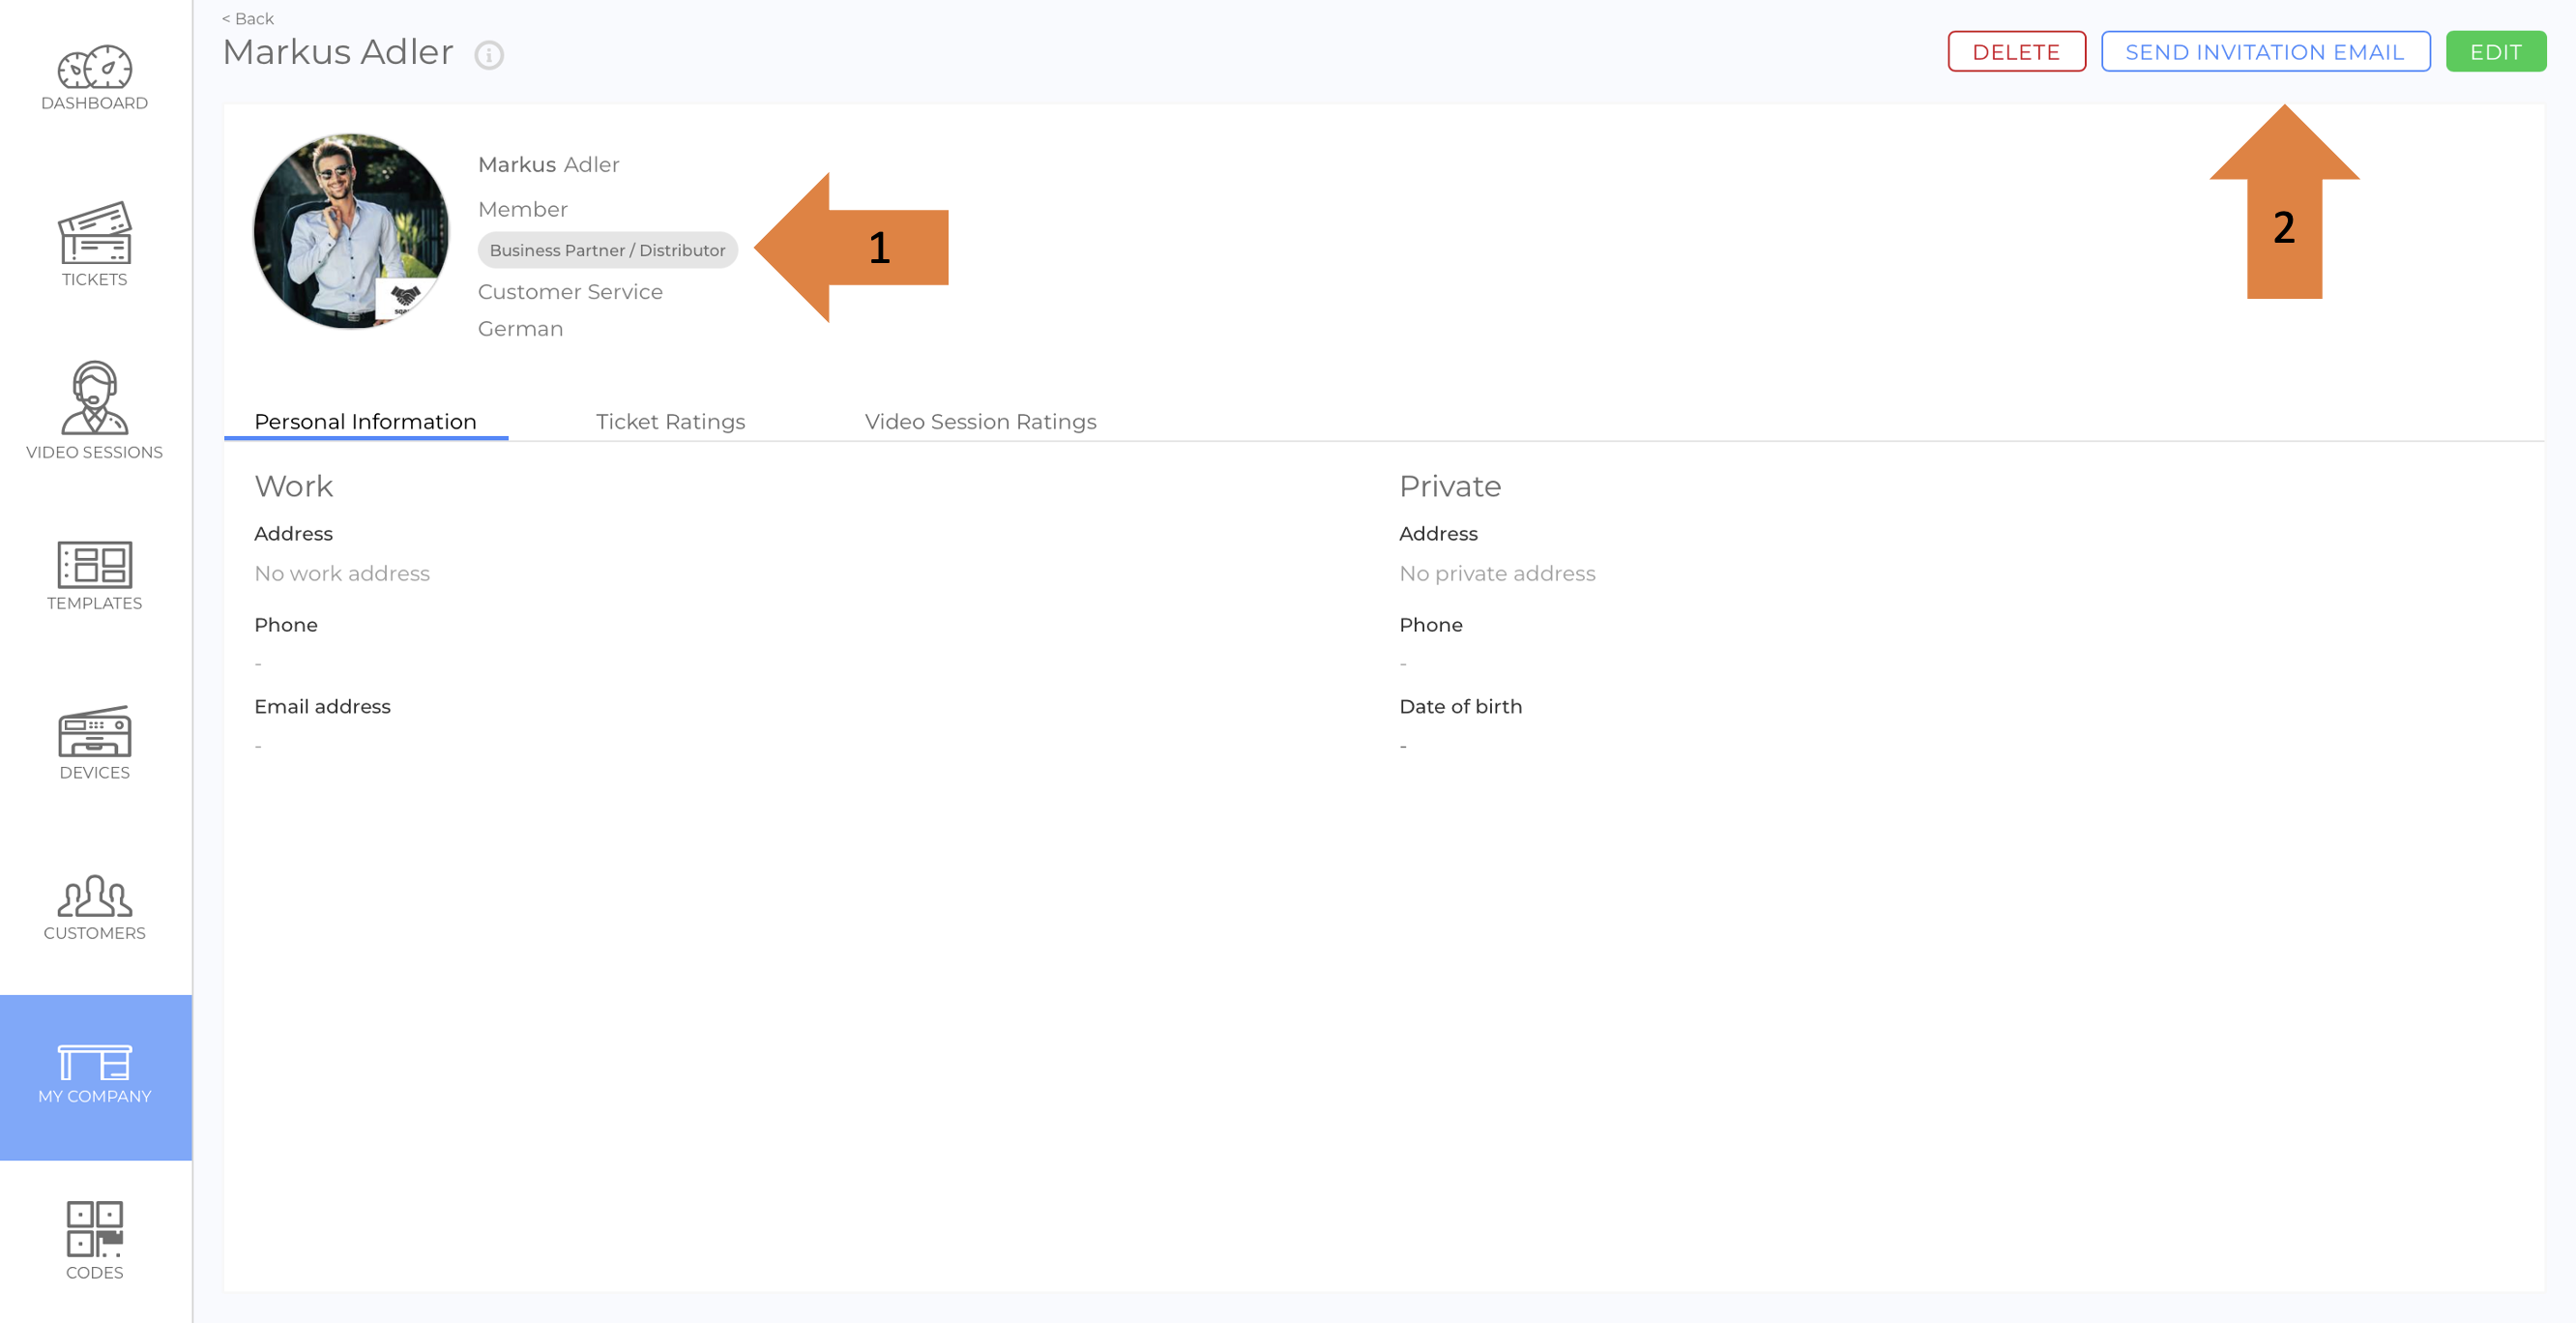
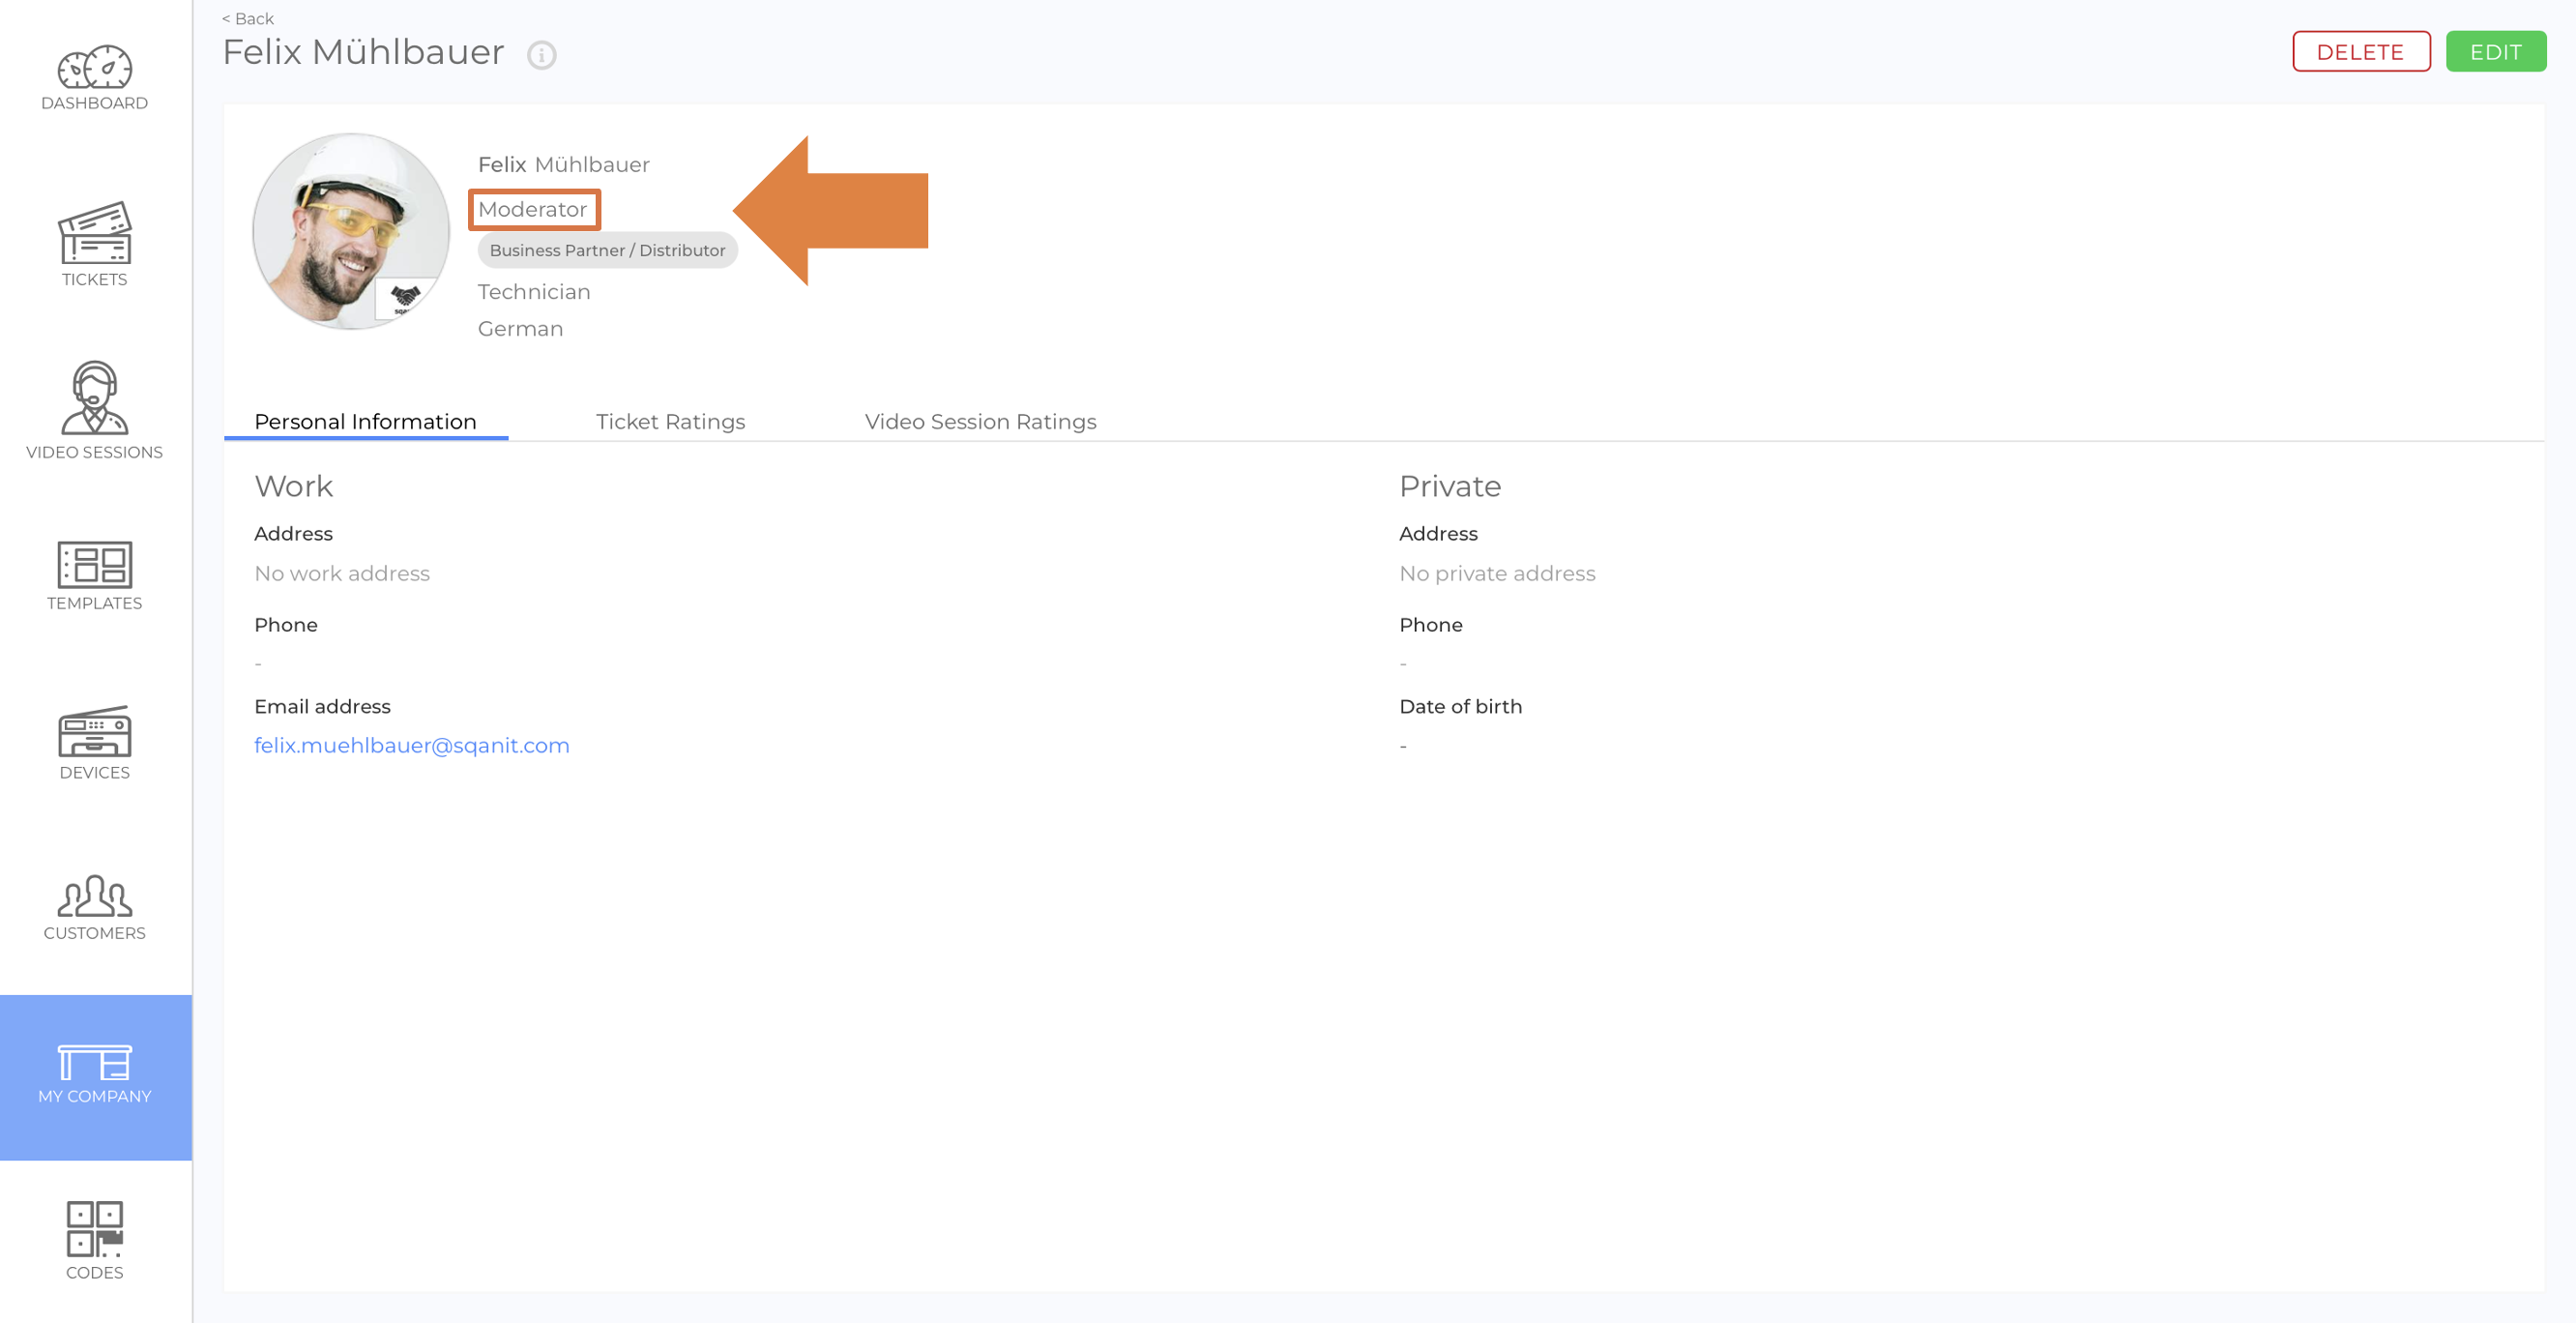
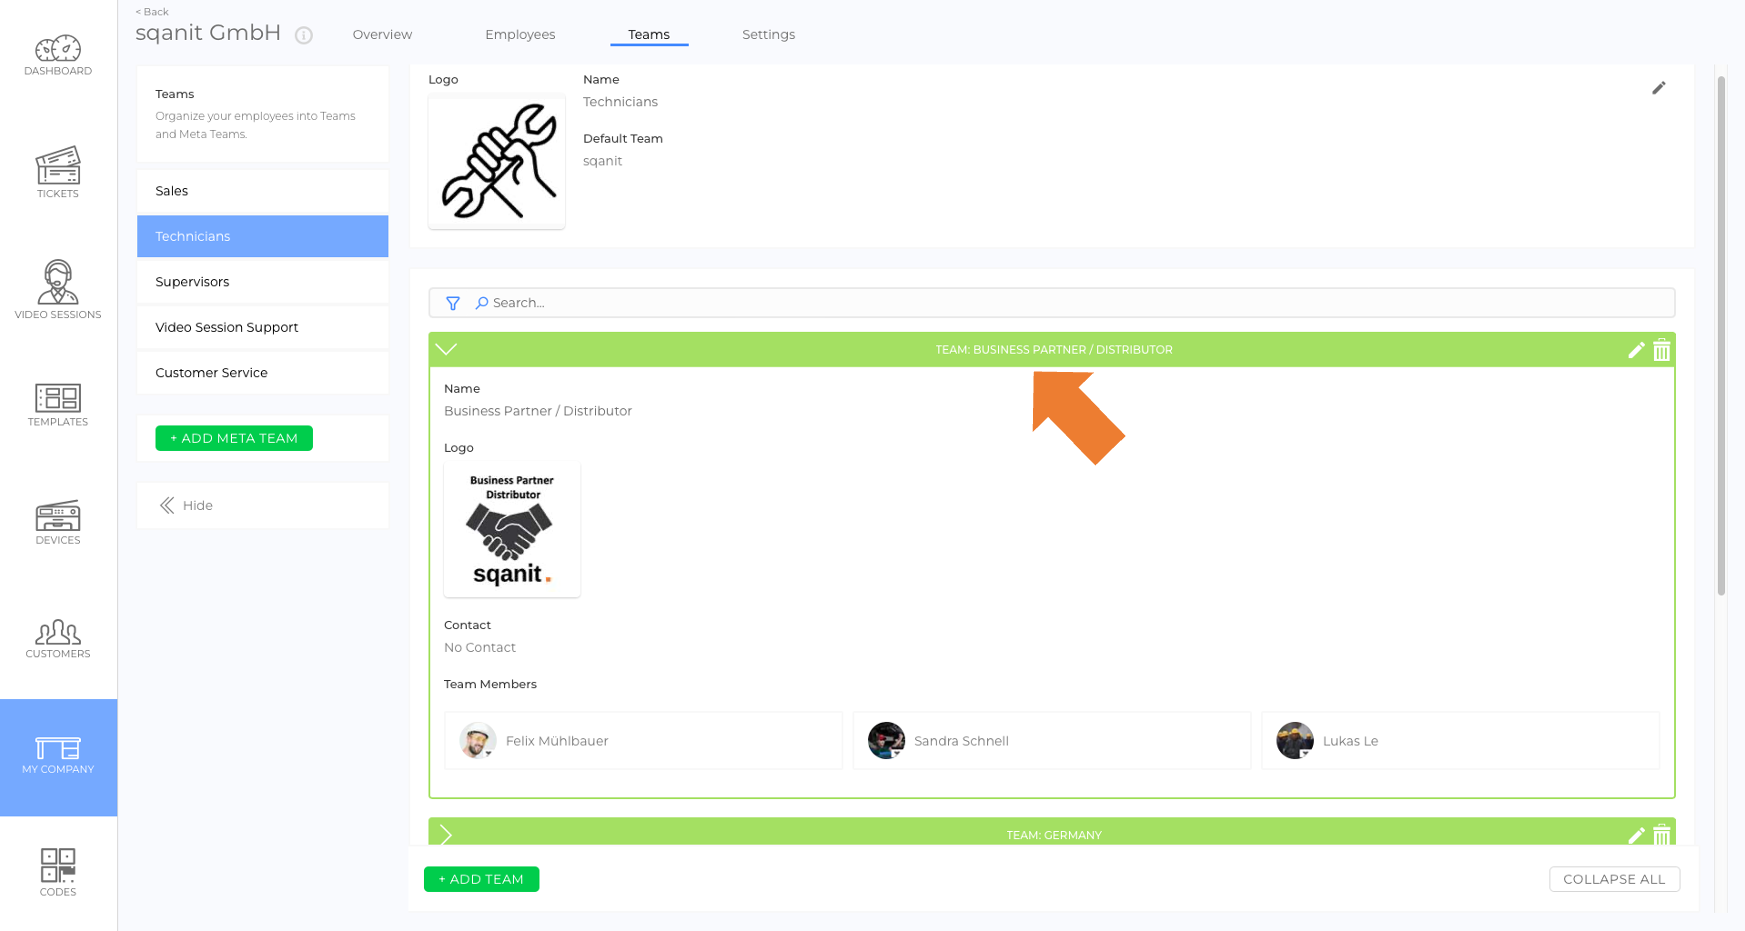
- Employees are assigned to one or multiple departments or none at all. (picture)(picture)(picture)
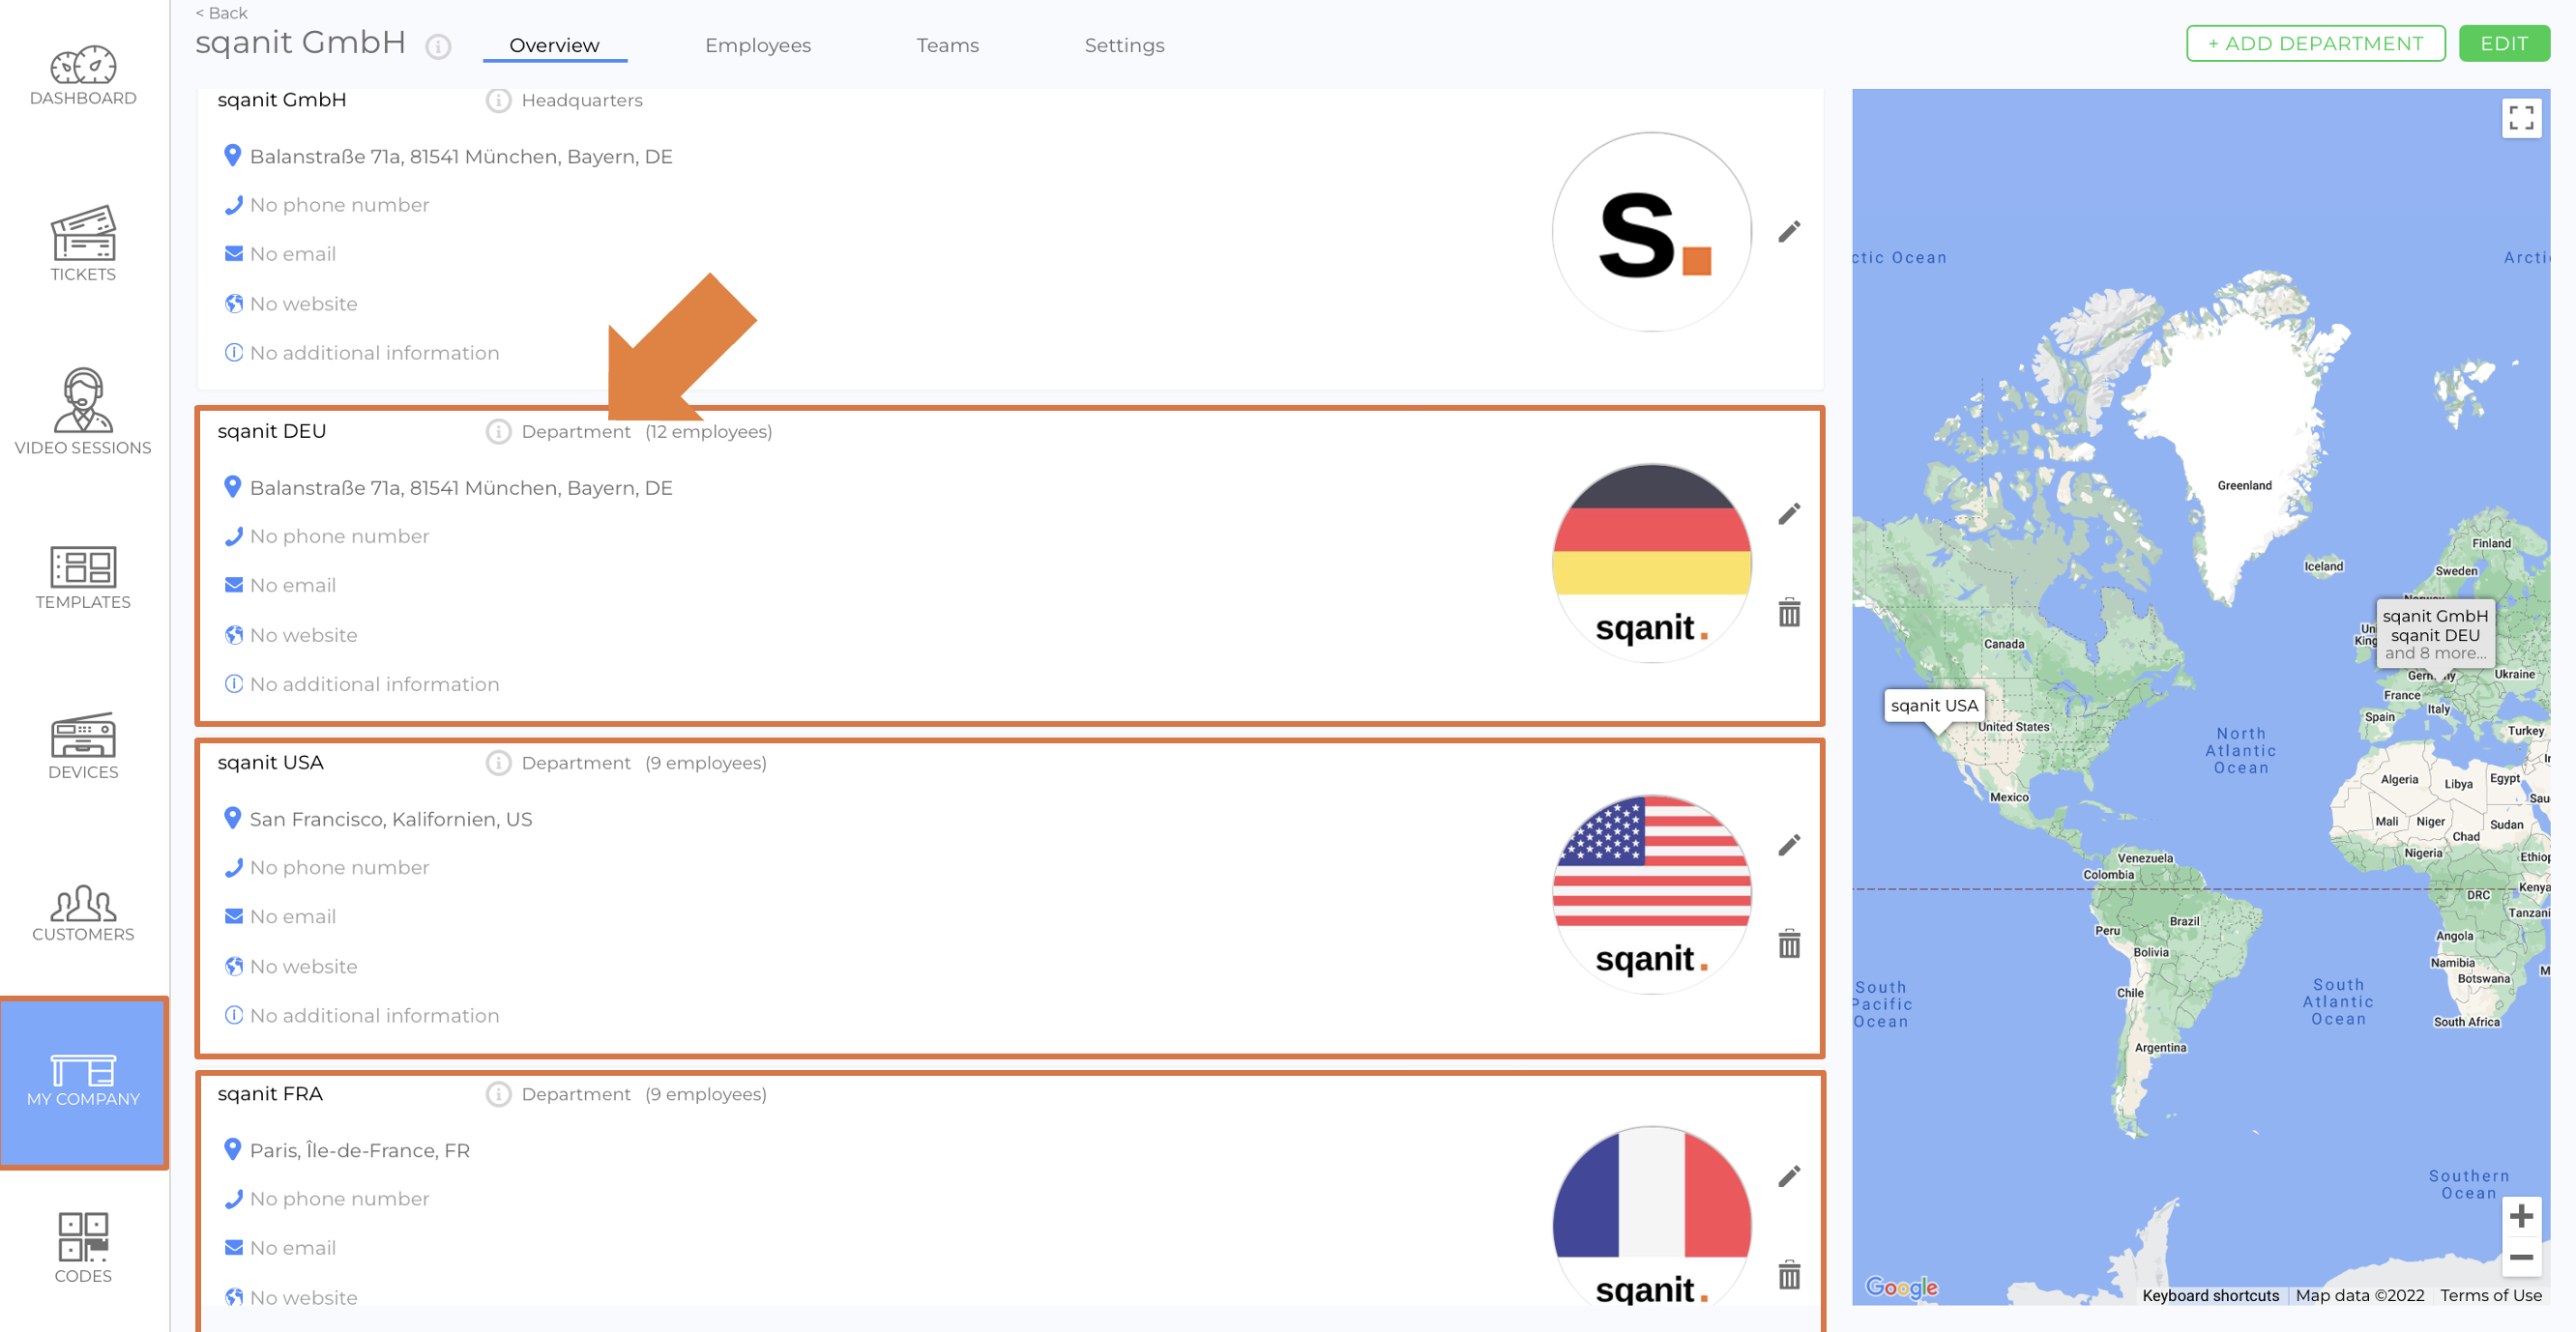
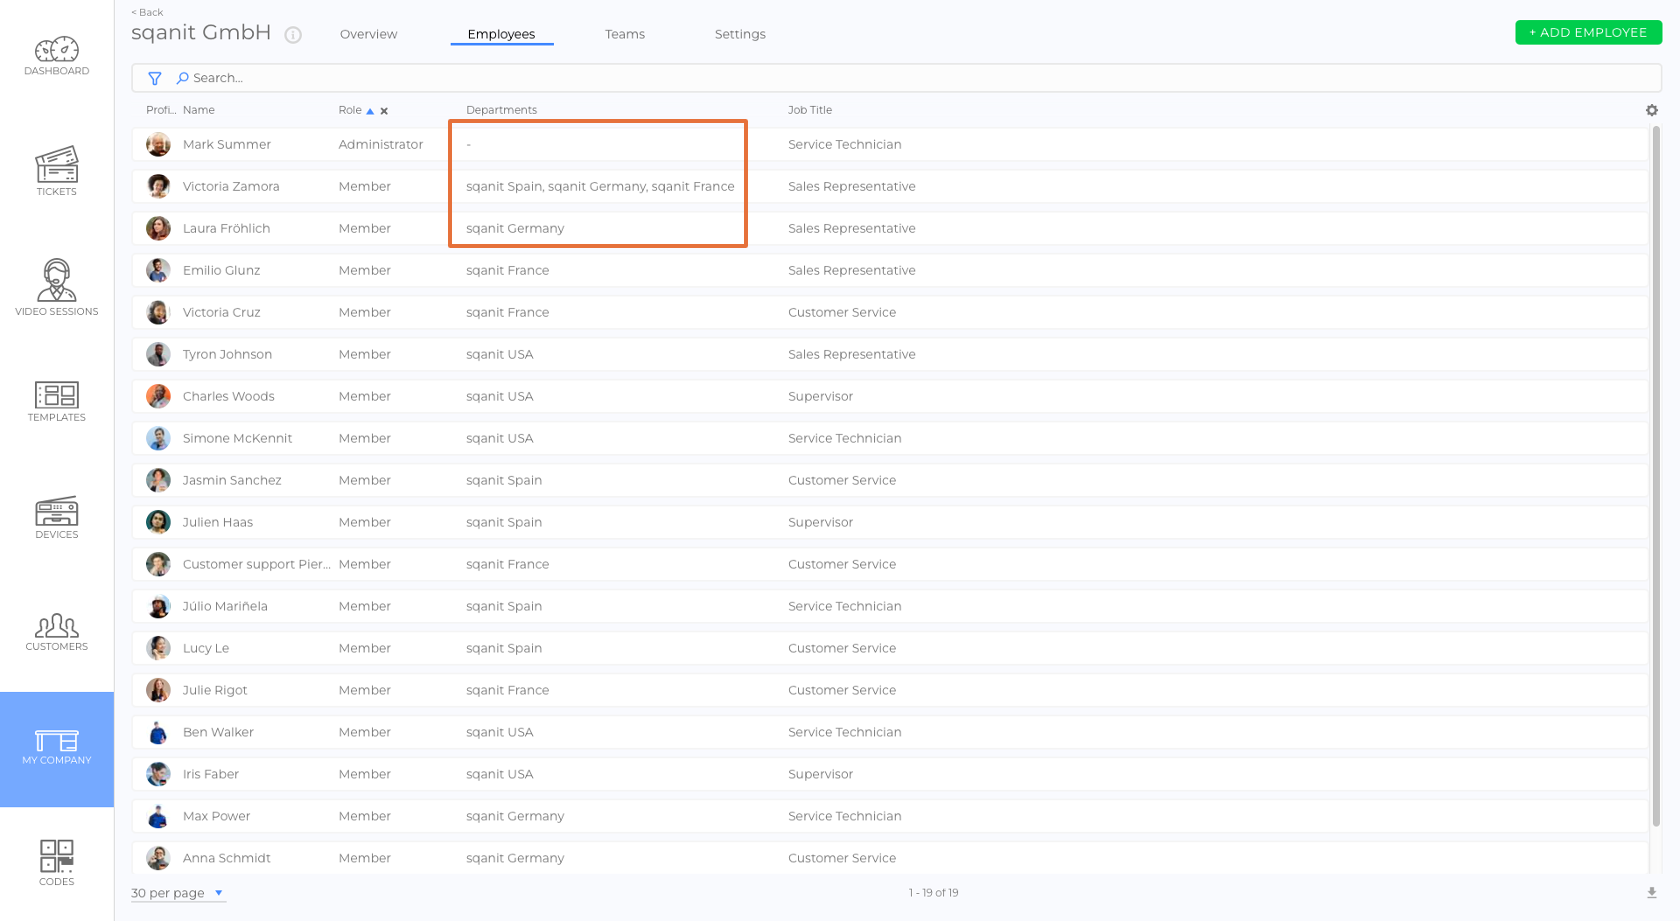
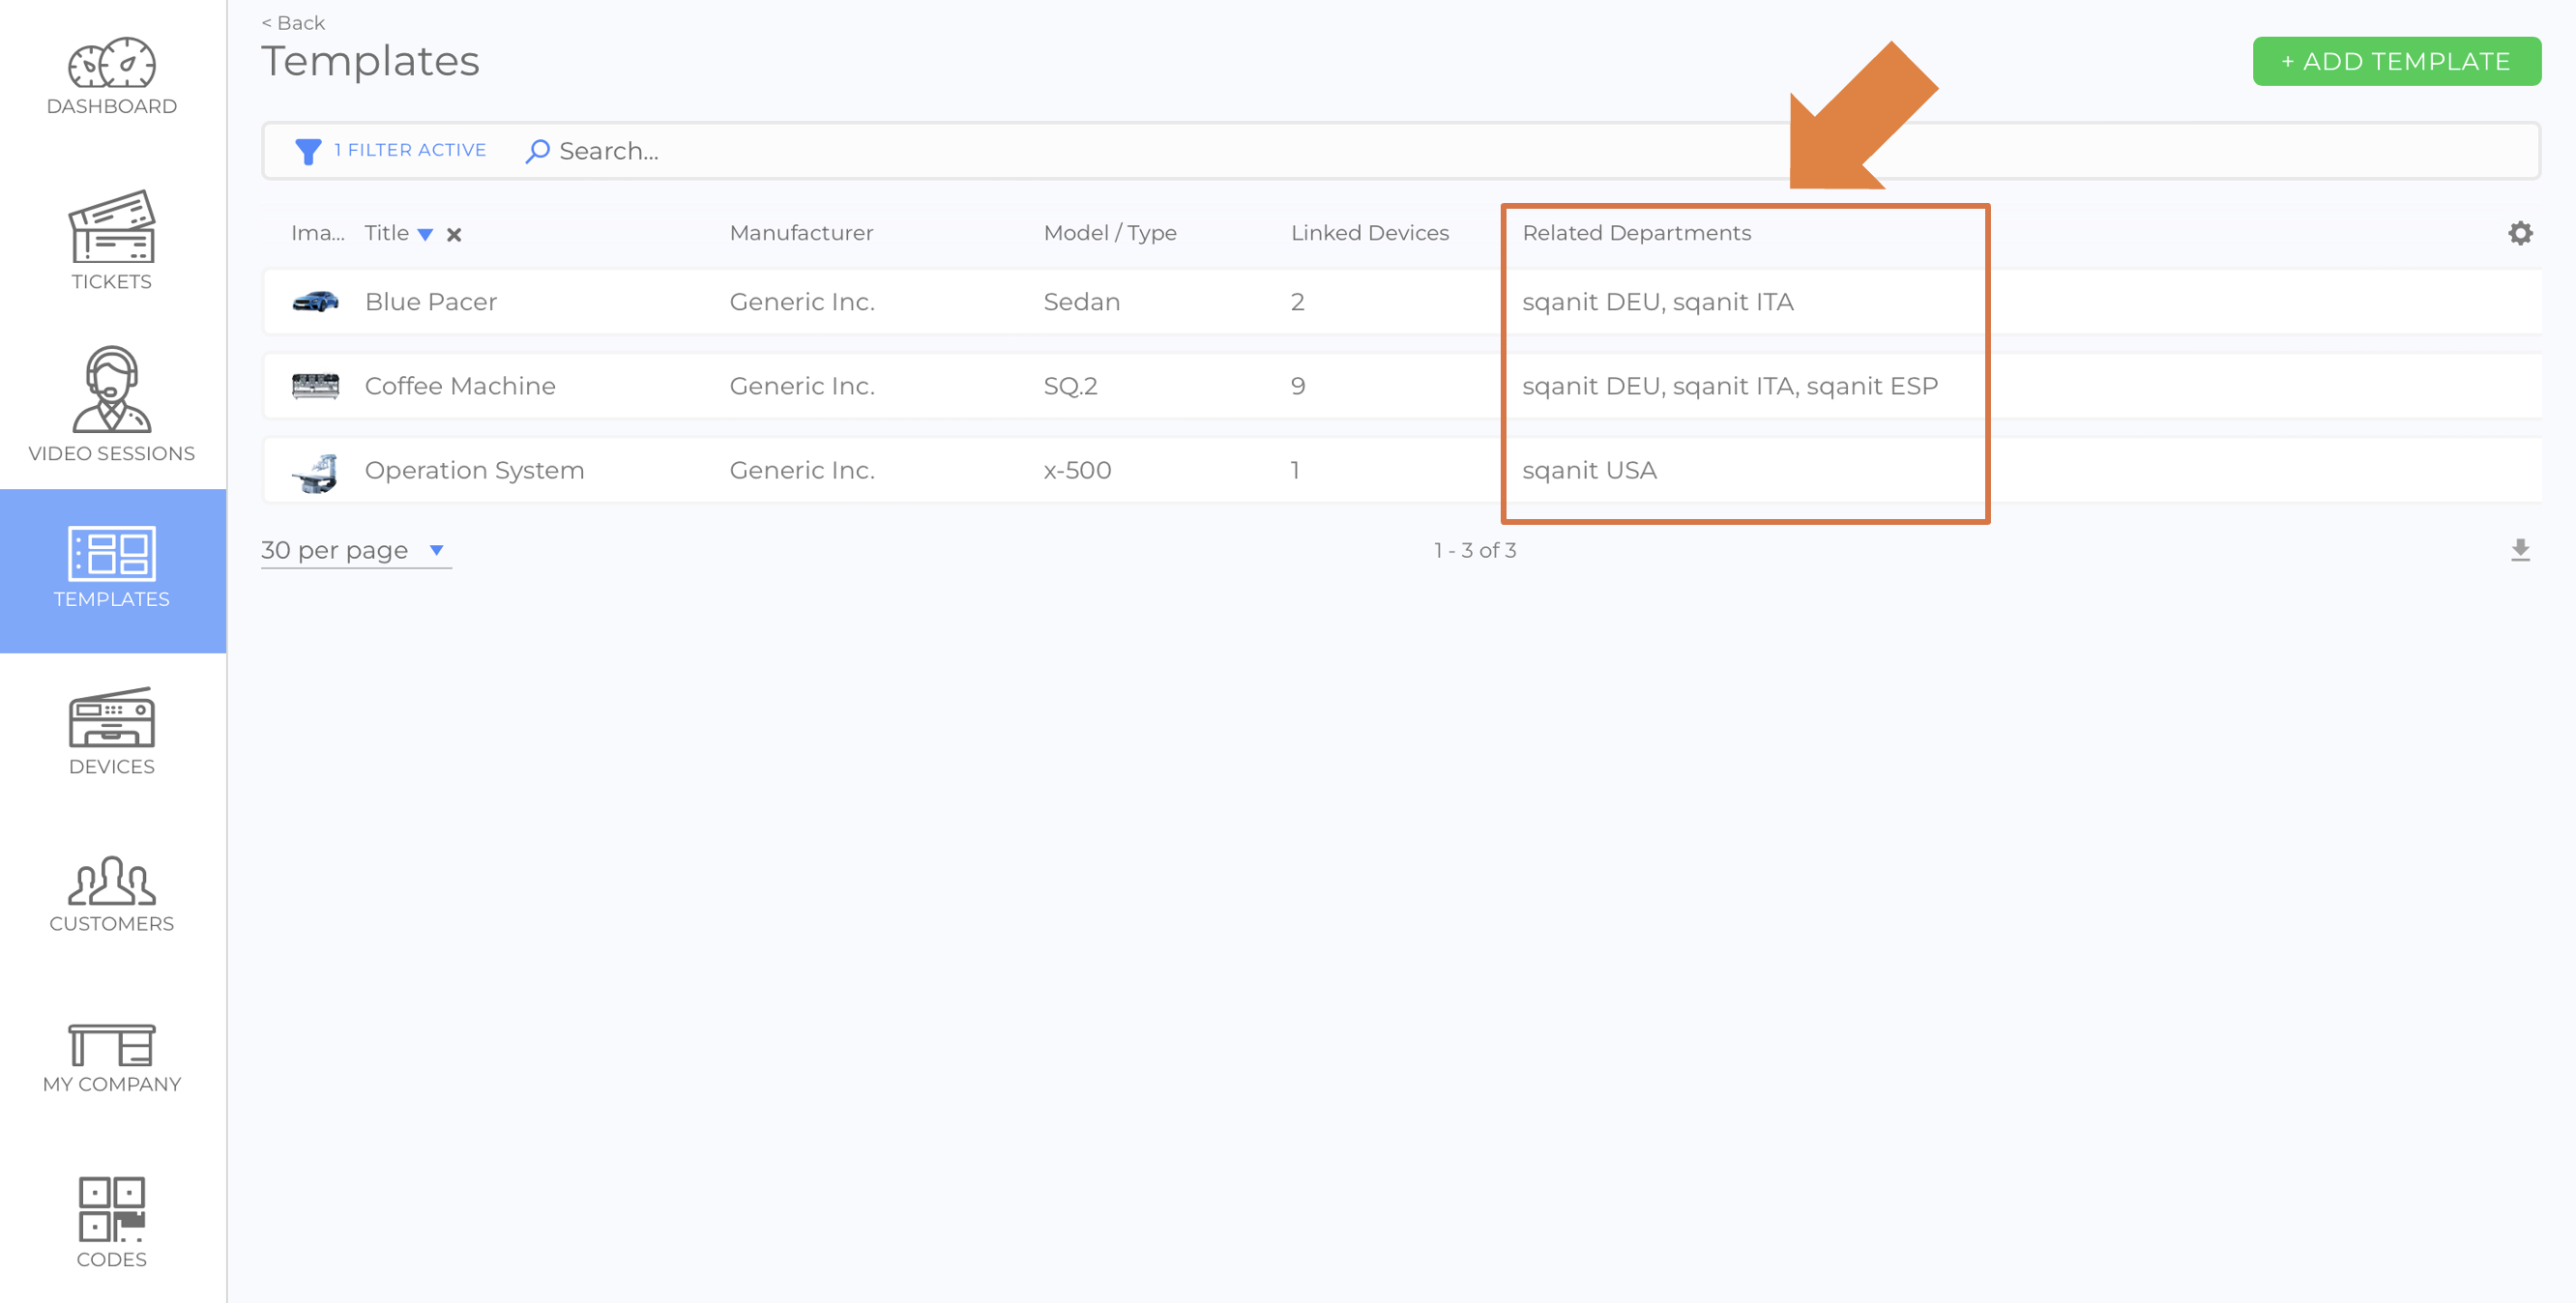
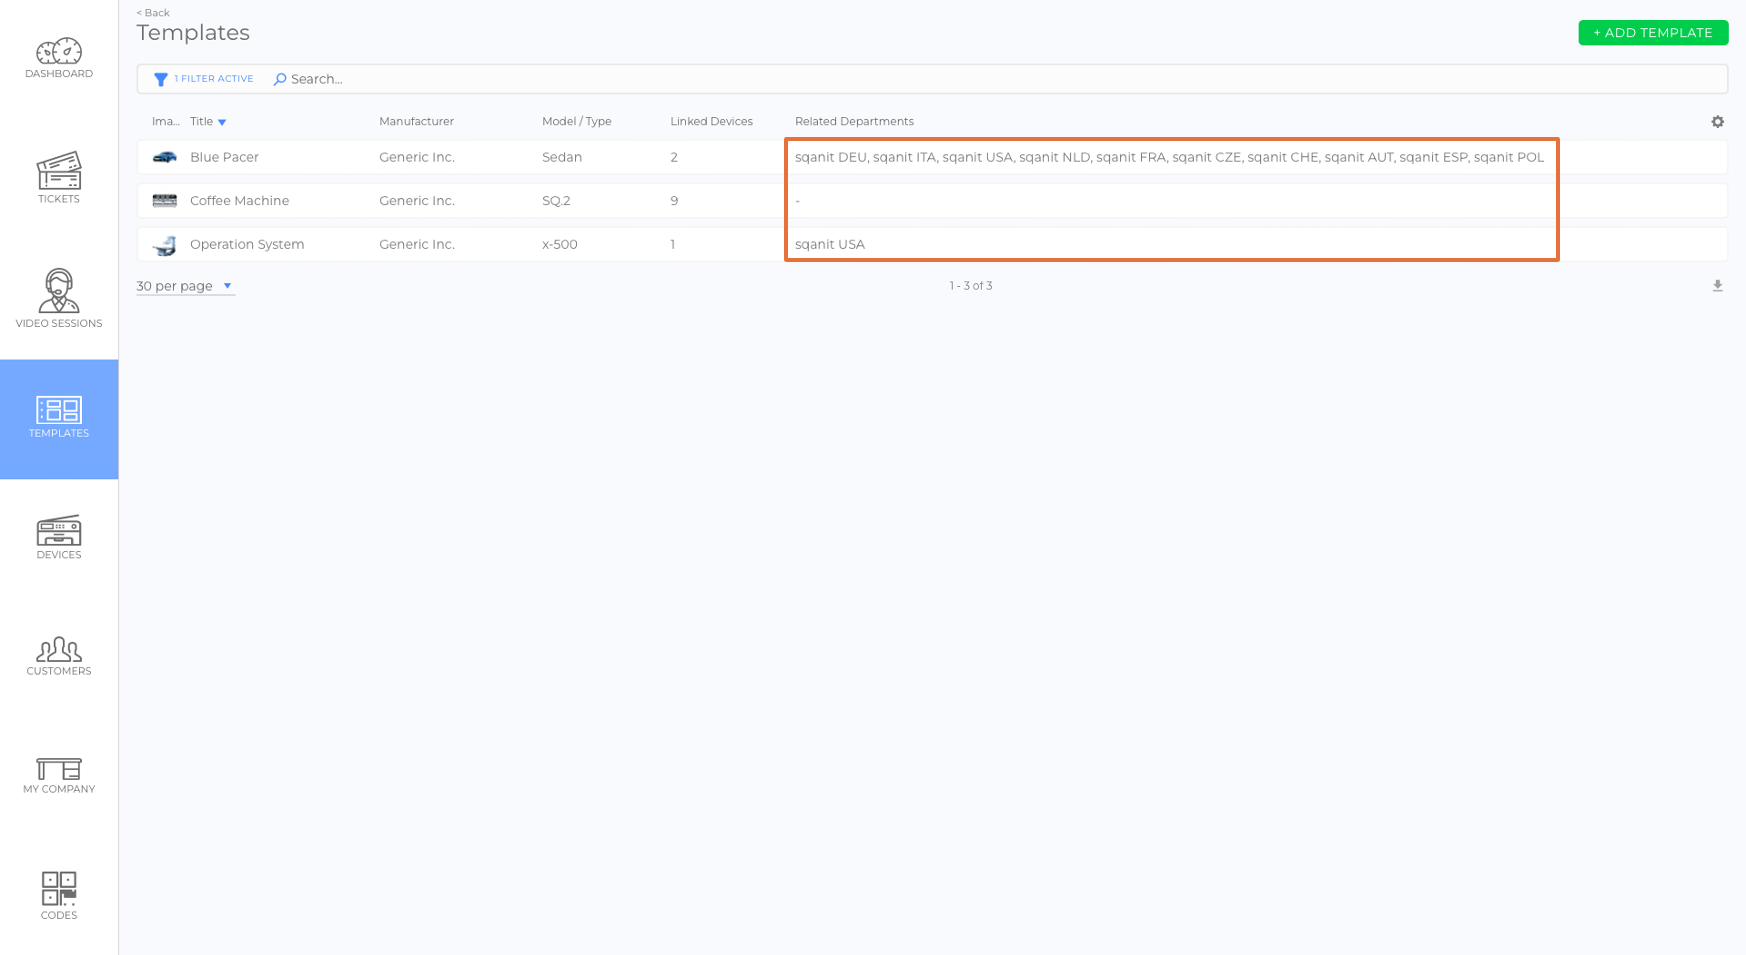
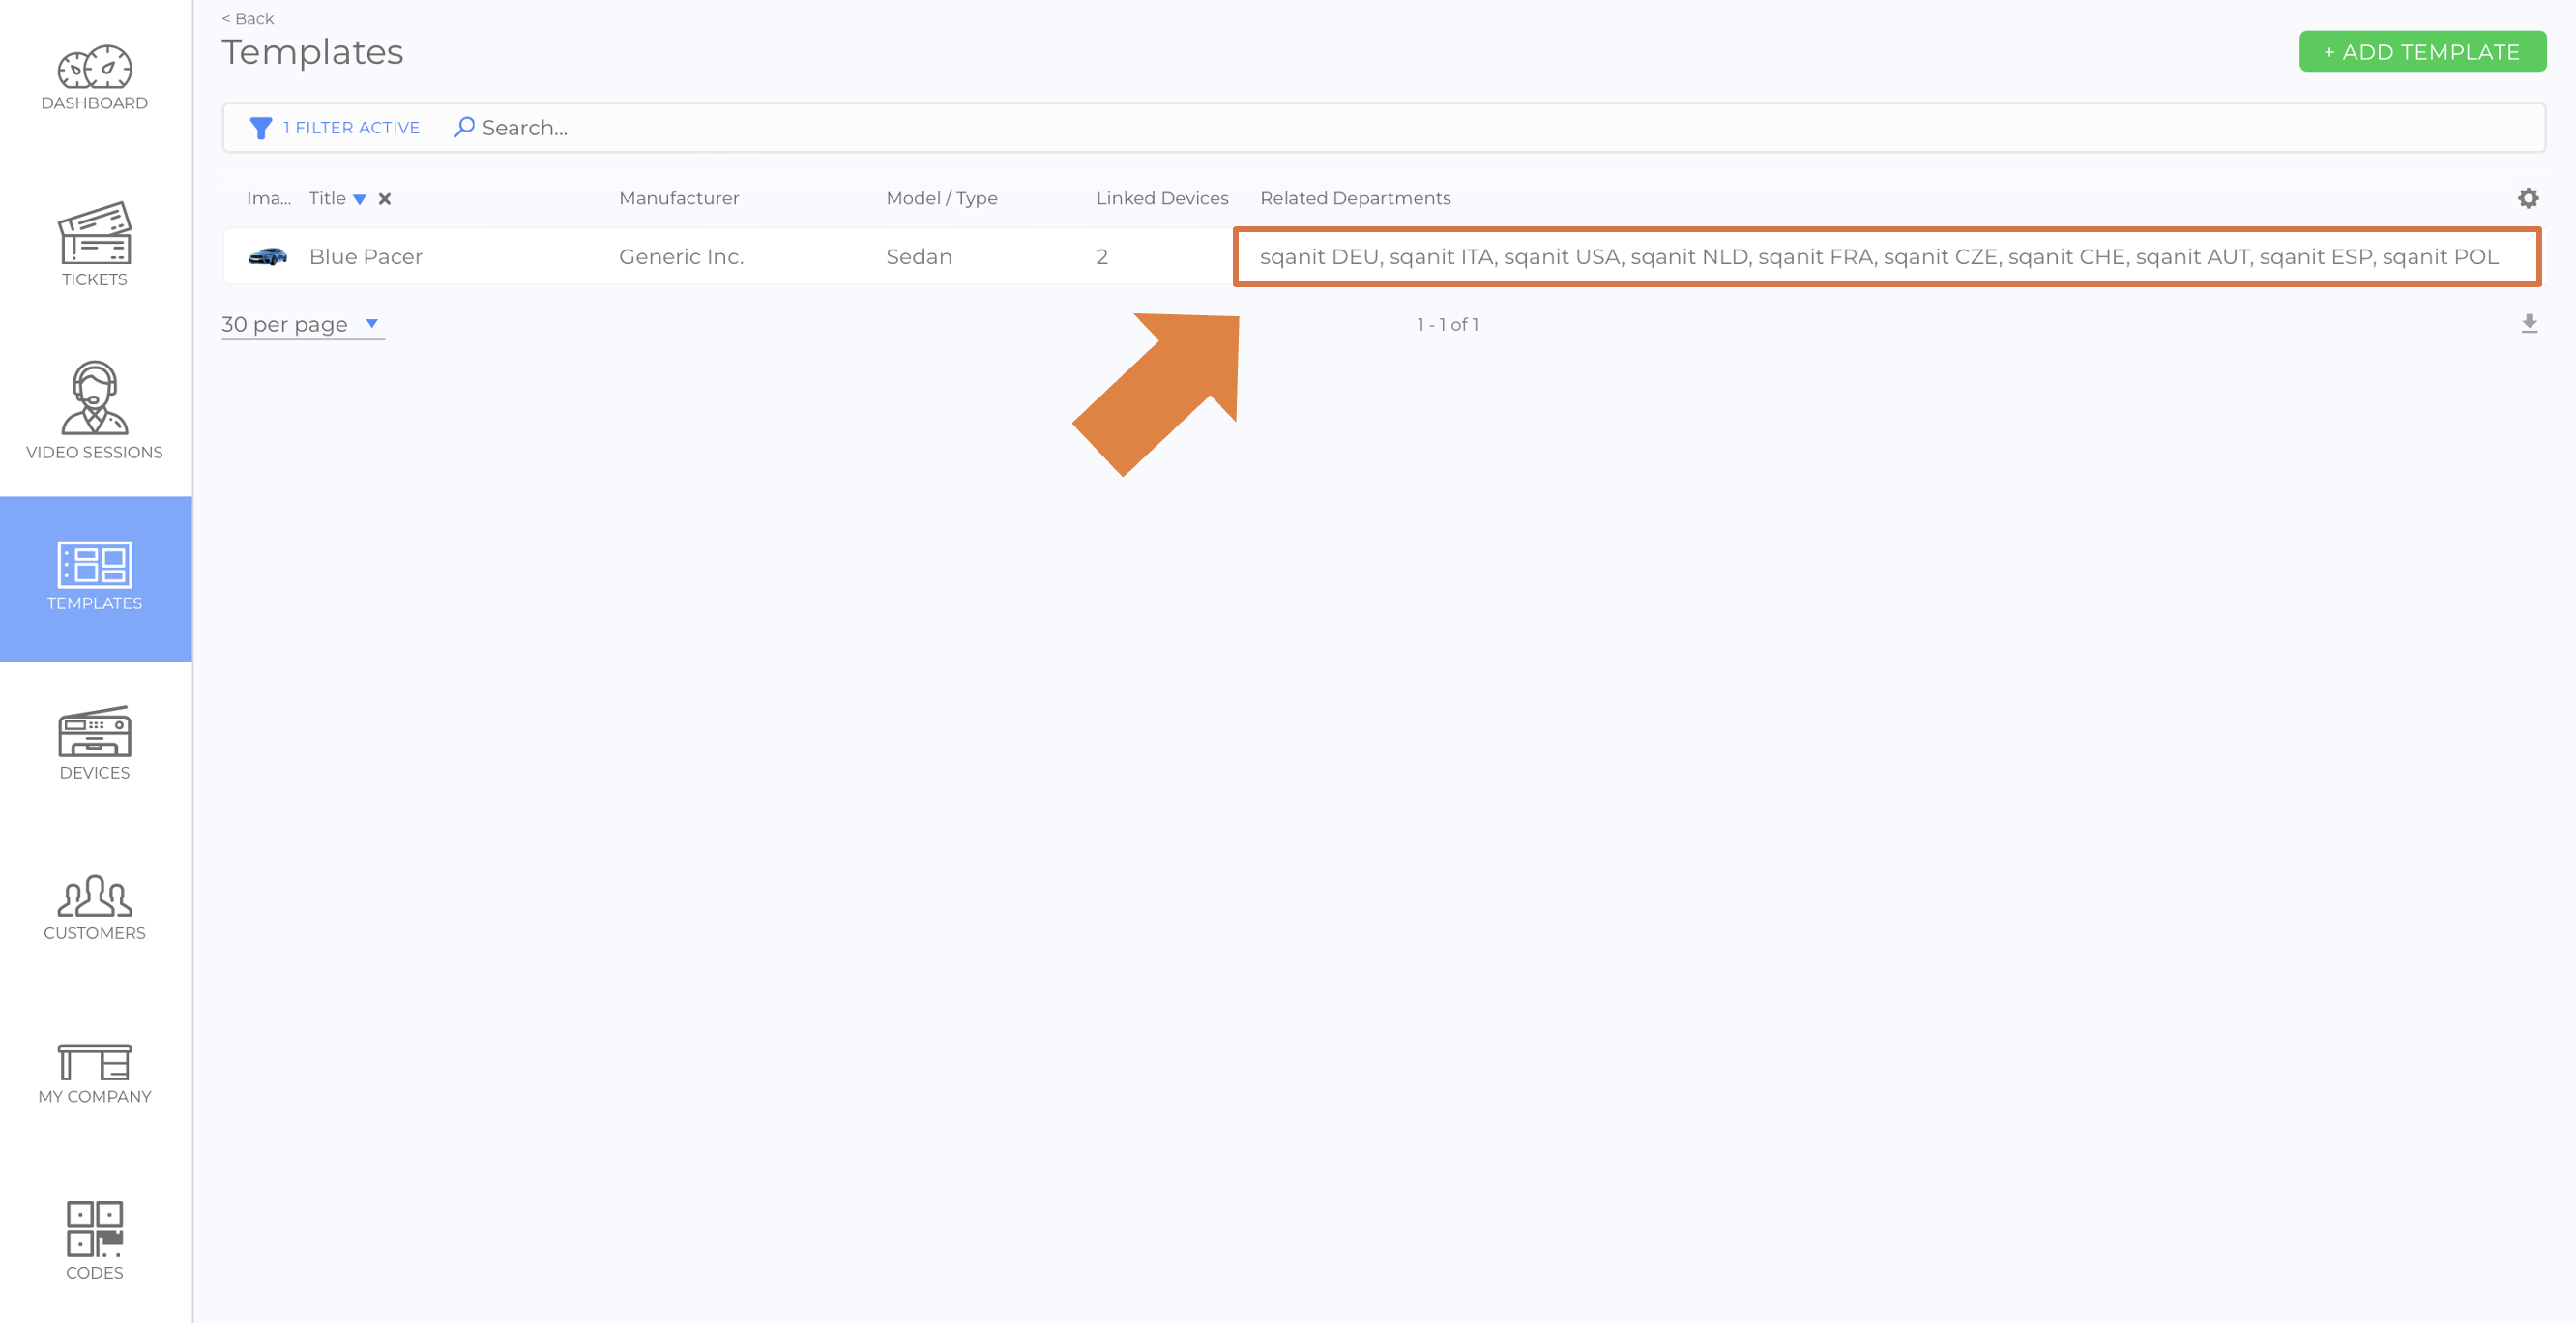
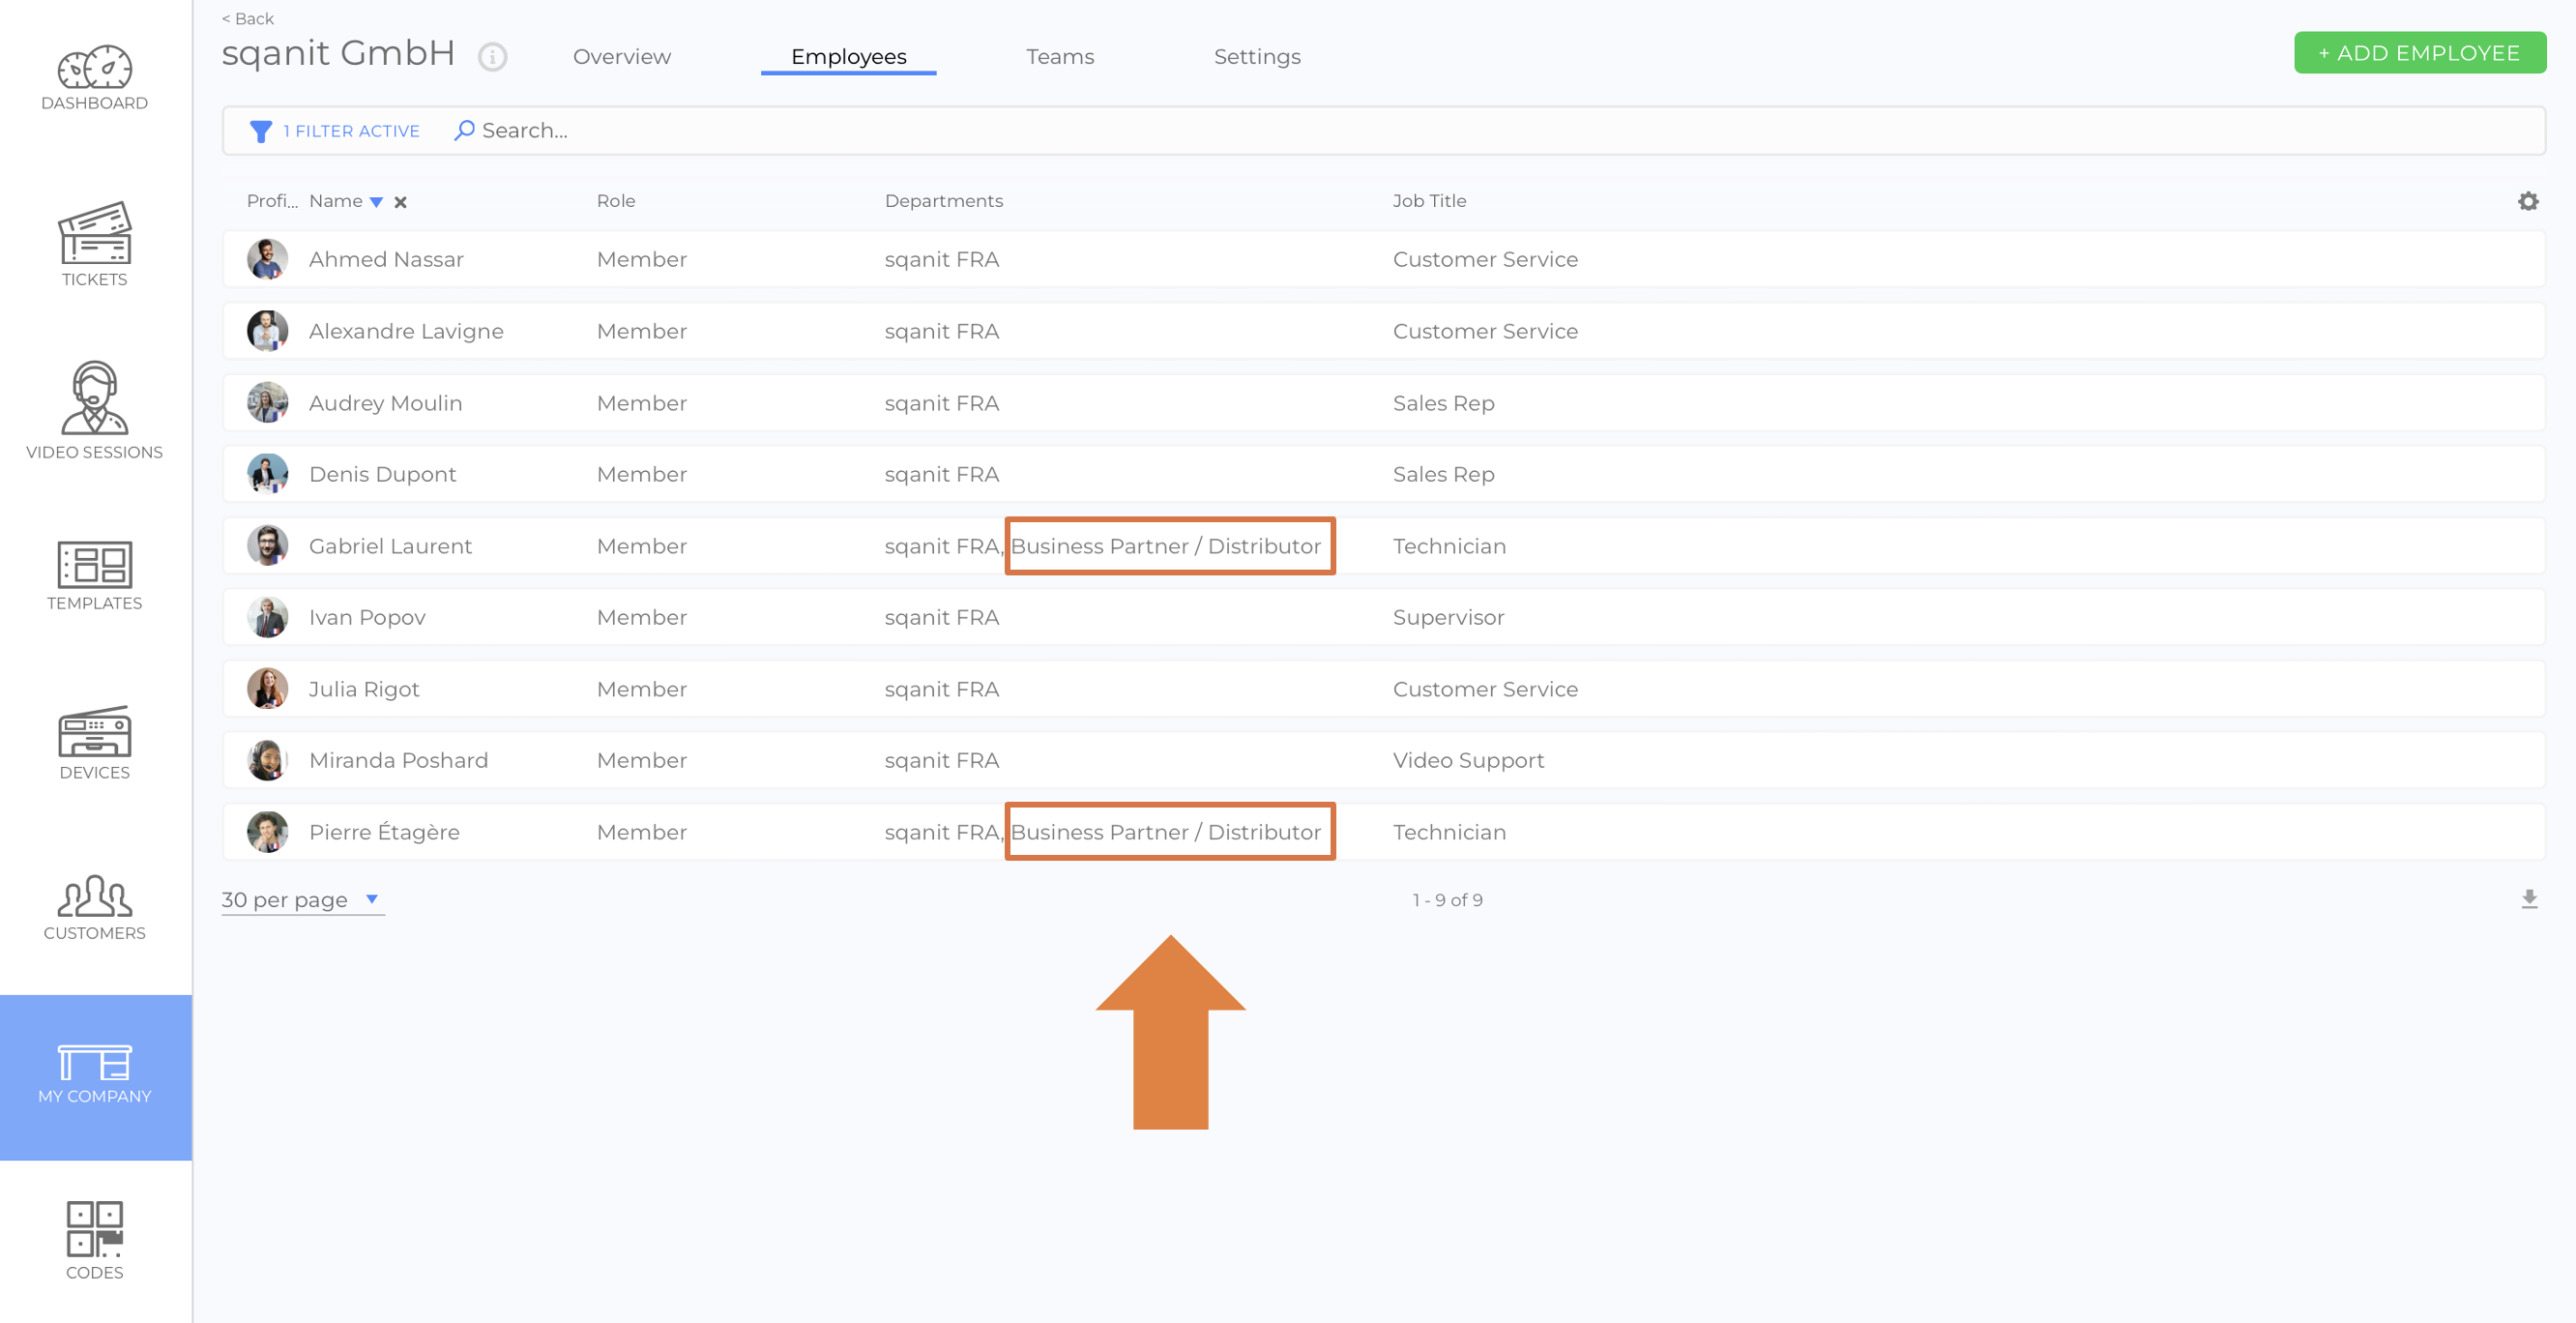
- Templates, devices, codes, and customers are assigned to one or multiple departments or none at all. (picture)(picture)(picture)
- Access Restrictions: Depending on the selected isolation mode (picture), users will either:
- See only entities related to their department(s).
- See both entities related to their department(s) and entities that are not assigned to any department.
- Users without department assignments (e.g., global managers) have access to all data.
Implementation Strategies for Department Isolation
Option 1 - Basic Department Isolation
Goals:
✔ Employees see only the data related to their department(s).
✔ Global managers have access to all data.
✔ Templates remain unrestricted (accessible to all departments).
Steps:
- Activate Basic Department Isolation:
- Setting: "Show related entities & entities without any relations" (picture).
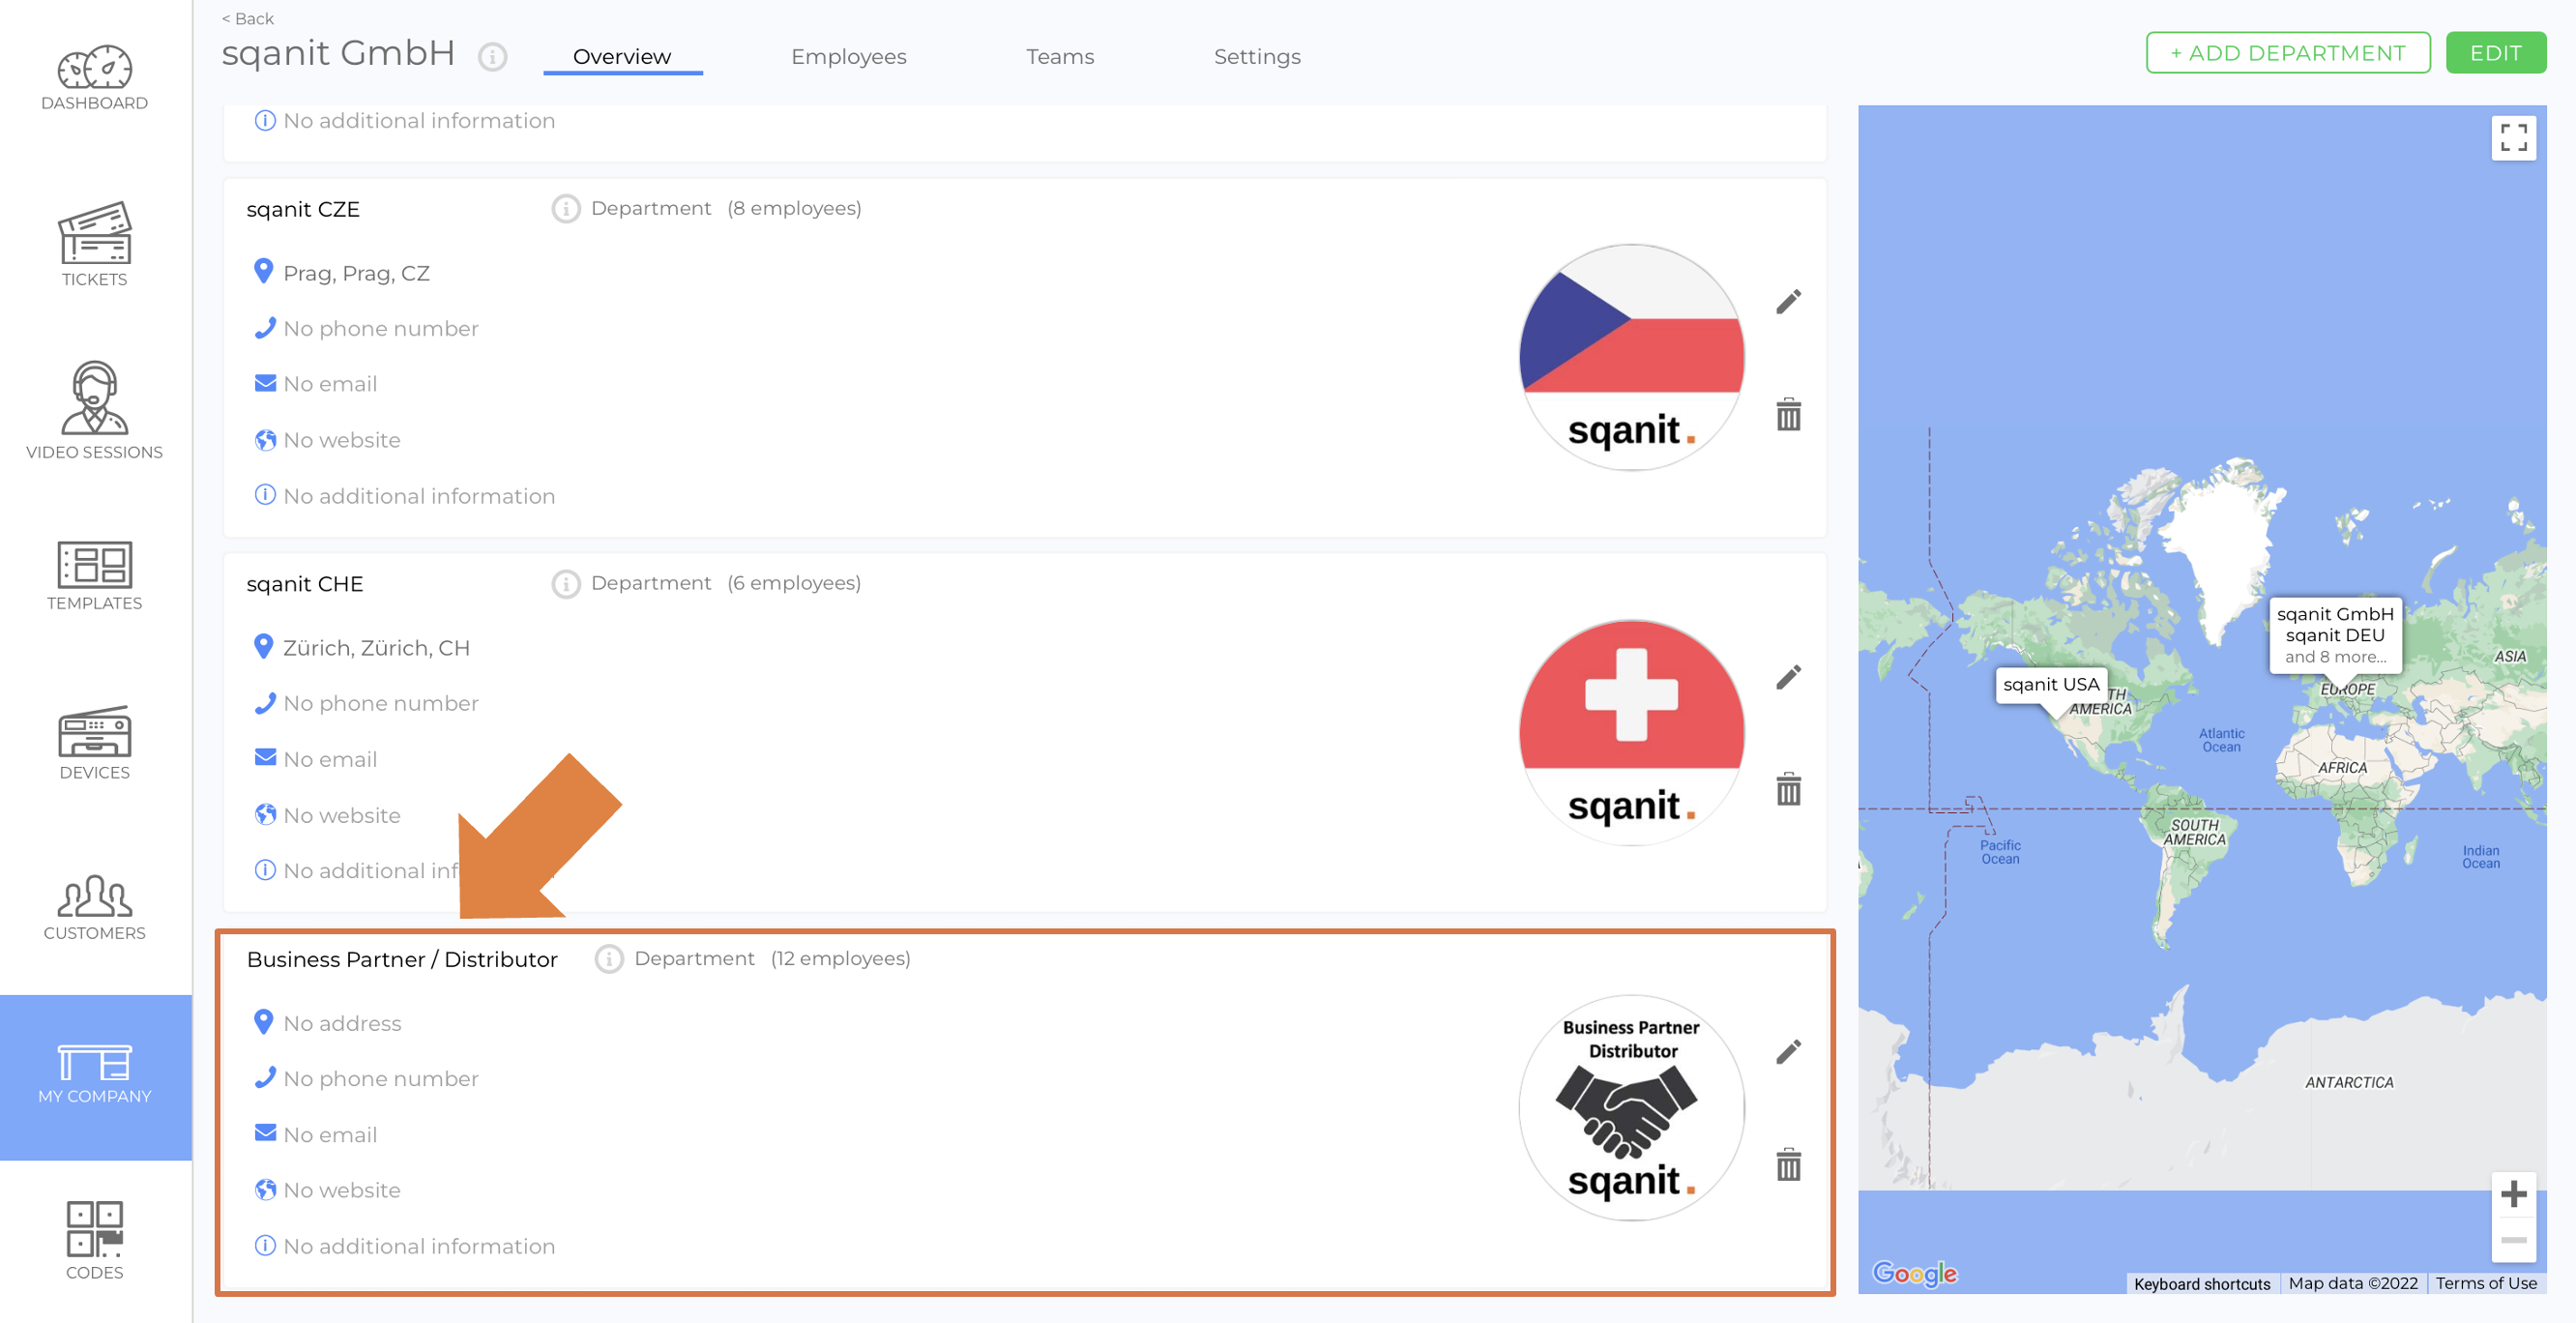
- Create departments. (article)
- Assign employees to their respective departments. (picture)
- Keep global managers unassigned to departments for full access.
- Assign customers, devices, and codes to their respective departments.
- Leave templates unassigned so all employees can access them.
Option 2 - Strict Department Isolation
Goals:
✔ Employees only see data assigned to their department(s).
✔ Global managers have access to all data.
✔ Templates must be assigned to departments for employees to access them.
Steps:
- Activate Strict Department Isolation:
- Setting: "Show related entities only" (picture).
- Create departments. (article)
- Assign employees to their respective departments. (picture)
- Keep global managers unassigned to departments for full access.
- Assign customers, devices, and codes to their respective departments.
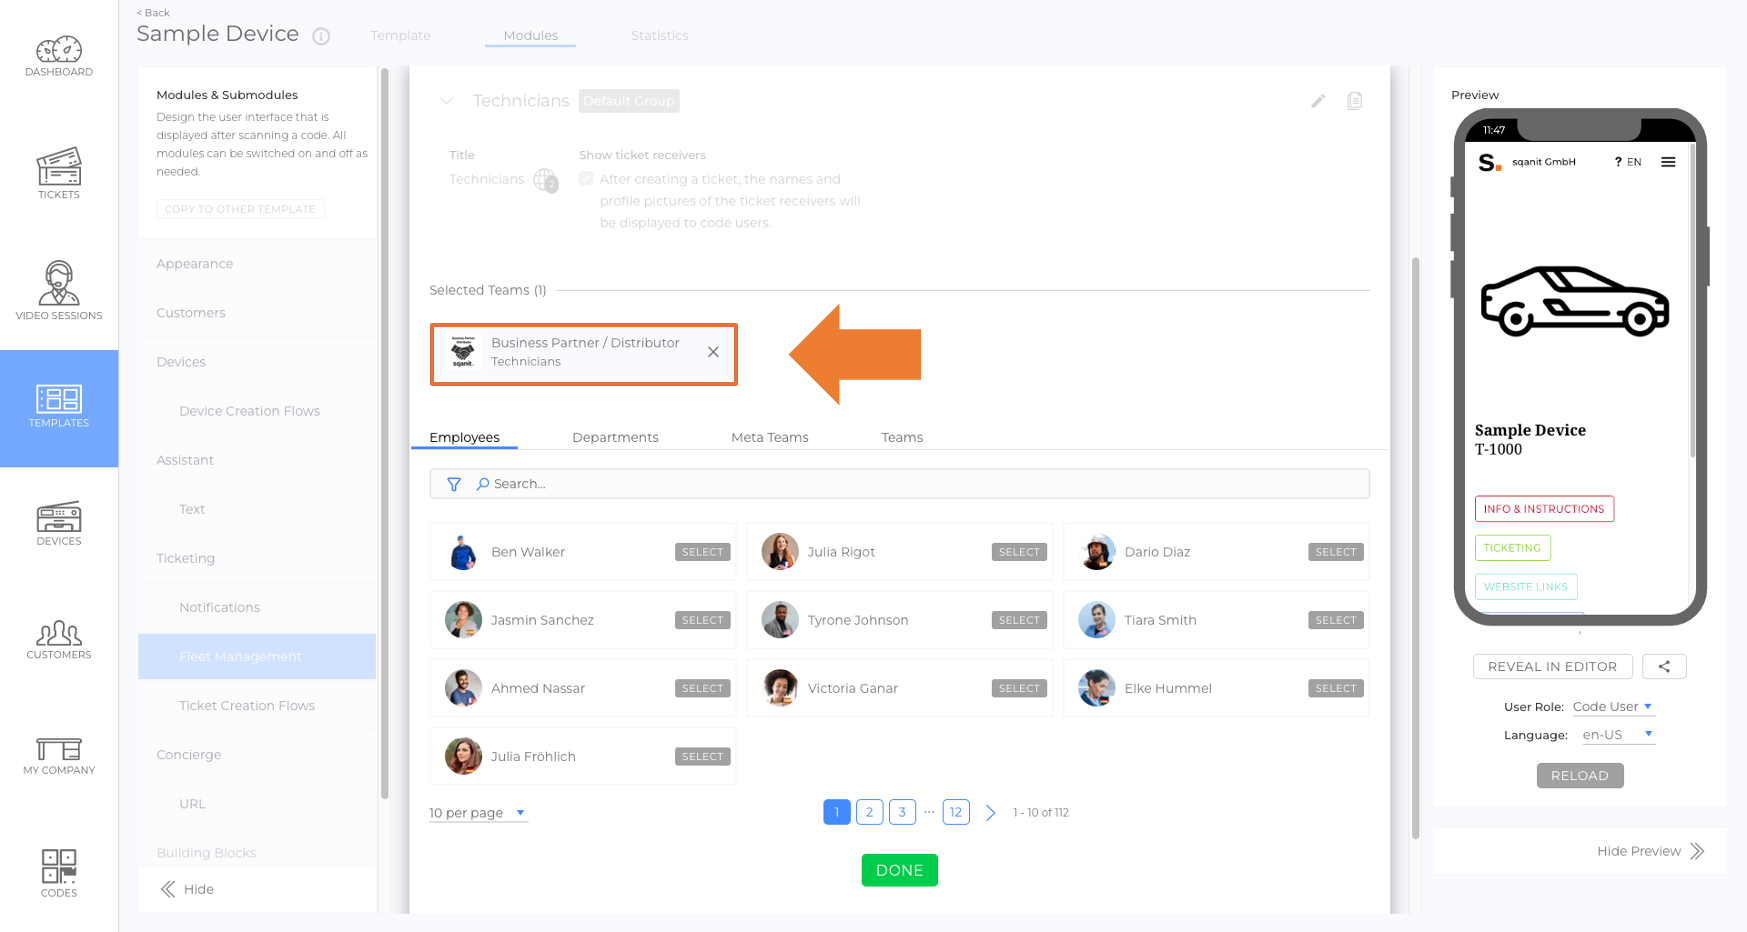
- Assign templates to all departments so employees can access them. (picture)
Alternative: Use a "Template" department specifically for that purpose and assign it to every employee.
❗ Important: Strict Department Isolation is not suitable for integrating external service providers into the platform.
Key Rules & Permissions
✔ Employees, teams, templates, devices, codes, and customers can be assigned to departments.
✔ Only Administrators can assign employees to departments.
✔ Members can assign departments only to devices and codes.
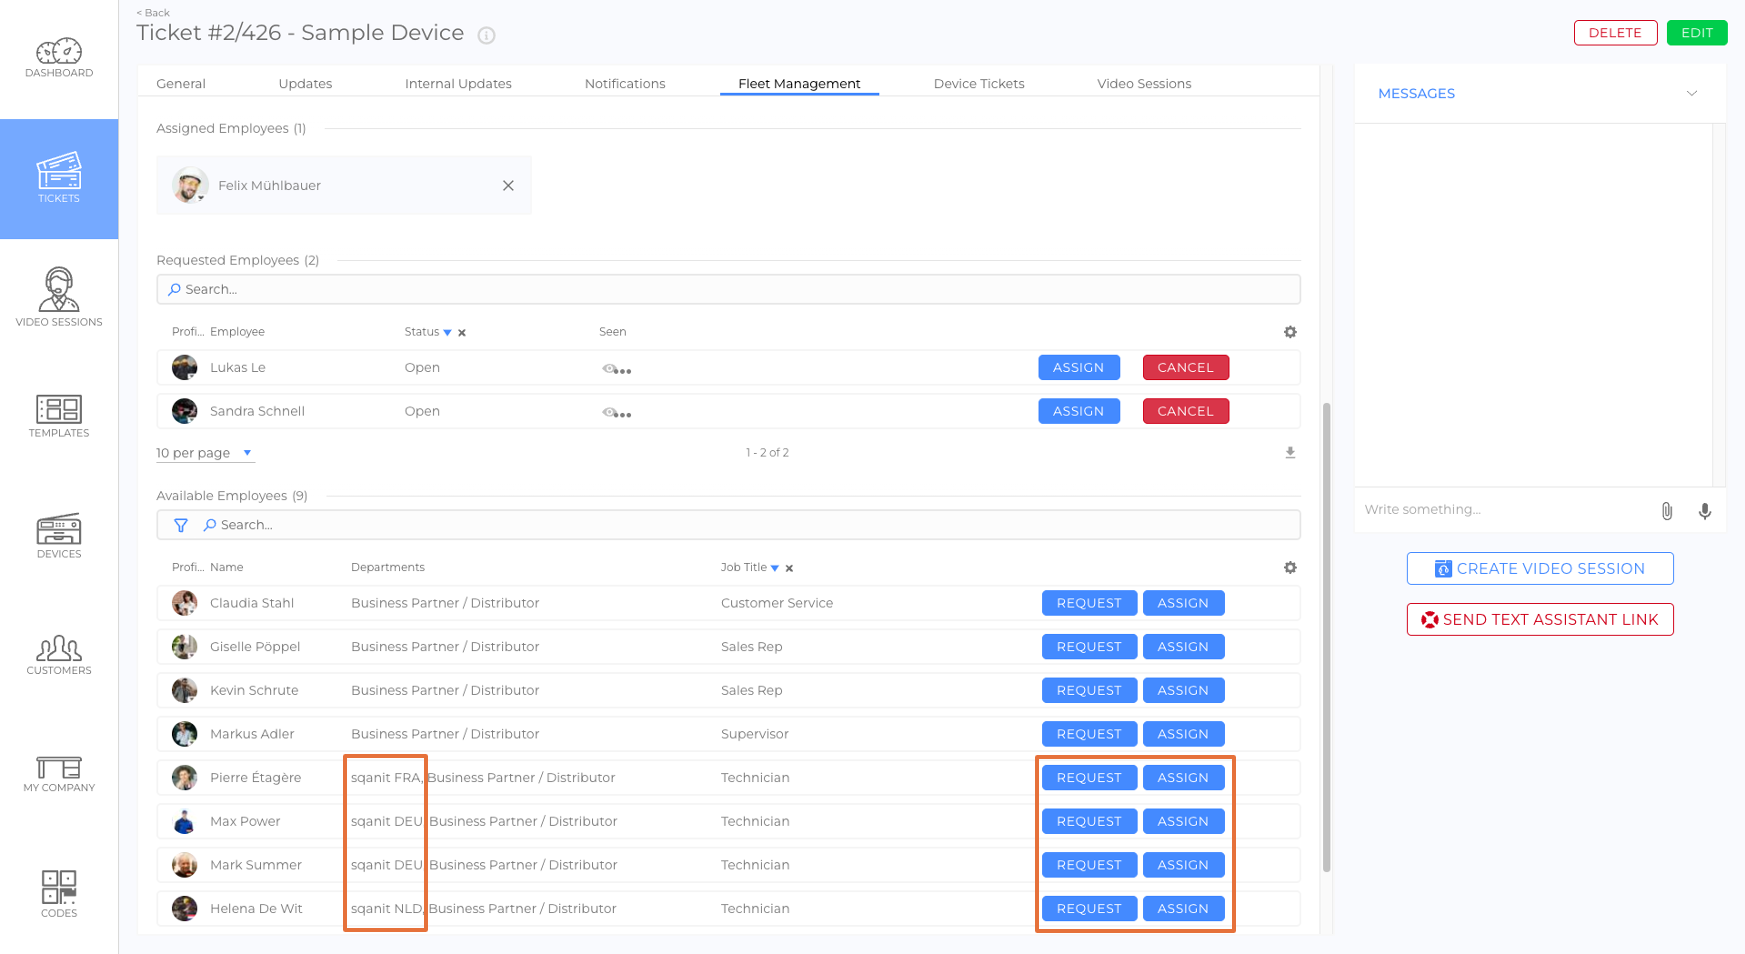
✔ Employees (any role) can only assign departments to which they belong. (picture)
✔ Users without department assignments can assign any department.
✔ New entities inherit the department(s) of their creator.
- Example: If an employee from the "Italy" department creates a new device, the new device is automatically assigned to "Italy".
Department Synchronization
If customers, devices, and codes are assigned to different departments, inconsistencies may occur. To prevent this, the system automatically synchronizes department assignments when entities are linked.
Synchronization Hierarchy:
Customer → Device → Code
Examples of Synchronization Behavior
- A department is added/removed from a customer:
All linked devices and codes inherit the new configuration, overwriting their previous settings.
- A device is linked to a new customer:
The device and its linked code inherit the customer’s department settings.
- A device and customer are unlinked:
The device and code retain their current department settings.
- A department is added/removed from a device:
The linked code inherits the updated configuration.
The linked customer remains unchanged.
- A department is added/removed from a code:
No changes occur to the linked device or customer.
Working with External Service Providers
Goals:
✔ Integrate external users to process service cases.
✔ Prevent unauthorized access to company data.
✔ Enable handover of service cases to internal employees.
Implementation Steps
- Follow the "Strict Department Isolation" steps outlined earlier.
- Create a department specifically for external users. (picture)
- Tip: Name the department after the external company.
- Create new employees and assign them to the external user department. (article)
❗ Important:
- Assign employees before sending invitations to ensure correct access restrictions. (picture)
- At least one external user should be a moderator, so they can hand over tickets and video sessions if needed. (picture)
- Select one internal employee to act as the handover contact for service cases and add them to the external user department. (picture)
- Select all relevant devices and add the external department to their assigned departments.
- Done! External users can now be added to Fleet Management Groups or Meta Teams. (picture) (picture)
How It Works for External Users
- External users receive service requests when new cases arise for devices assigned to their department.
- External users can process requests or handover cases to internal employees: A moderator from the external user team must select an internal employee from the Fleet Management list and assign the request. (picture)
Good to Know
- Employees, templates, devices, customers, and codes can be assigned to one or multiple departments.
- New entities automatically inherit the department(s) of their creator.
- Strict Department Isolation is recommended when working with external service providers.
- Synchronization rules ensure that department assignments stay consistent across related entities.
- Users without department assignments always have full access to all data.
 We use cookies on our website to give you the most relevant experience by remembering your preferences and repeat visits. By clicking “Accept All”, you consent to the use of ALL the cookies. However, you may visit "Cookie Settings" to provide a controlled consent.
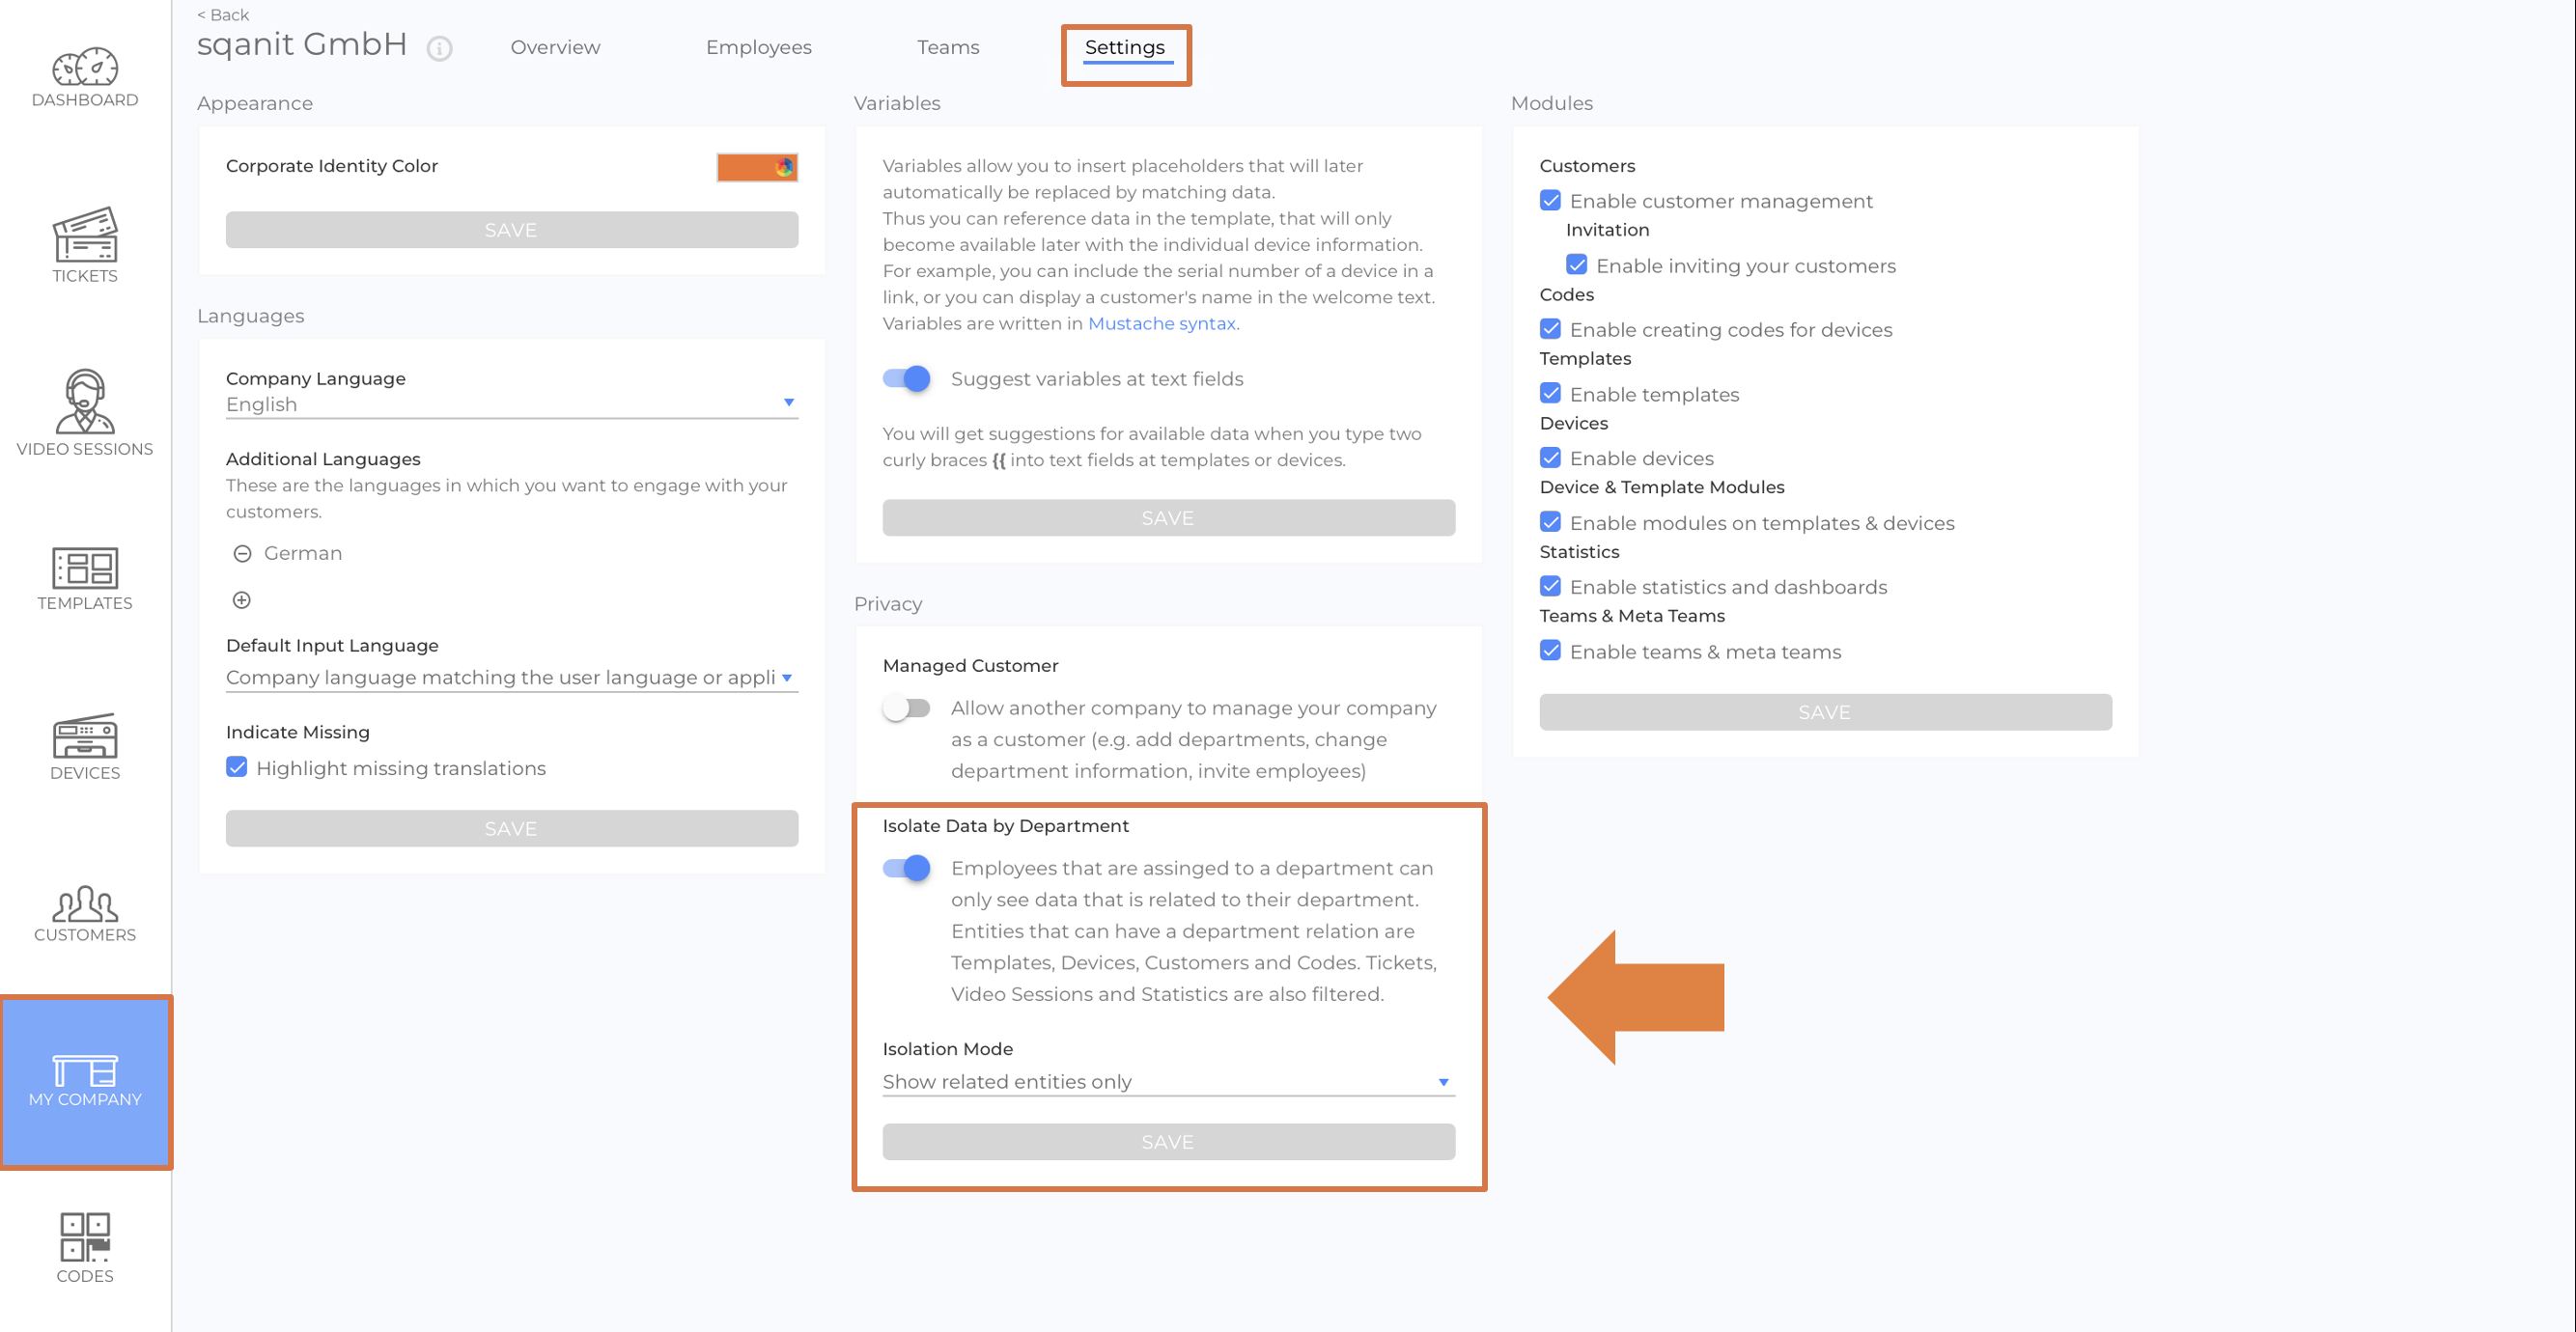