Introduction
The Devices Tab provides an overview of all devices on the platform. This tab enables service providers to efficiently manage devices, track their locations, and access detailed information. Users can filter and sort devices, view them on a map, and navigate to the Device Details View for more in-depth management.

Key Features of the Devices Tab
Asset Management
The Devices View functions as a central hub for asset management, offering a structured overview of all devices. Users can:
- Access essential details such as device status, customer assignment, and location.
- Navigate to the Device Details View for deeper insights and individual device management.
- Keep tab on the number of devices created and where they are around the world using the map.
Note: Customer Login Users can only view and manage devices linked to their account, ensuring relevant and controlled access.
Devices can be assigned labels and shared via a Share Button. Labels are displayed in the device view, can be edited or removed, and enable targeted filtering and grouping of devices.
Within the Label submodule in the template area, administrators can control which labels are available for specific devices or device types. The device detail view also includes a Labels tab showing all assigned labels with their status (e.g., active, internal) and allowing direct management.
The Share Button lets users generate a direct access link to the device and share it as a URL or QR code, either temporarily (30 minutes) or permanently.
Device Display Options
On the Devices View, users can choose how they view devices via a drop-down menu. The following options are available:
- Overview: Displays the device list alongside a map, showing device locations. (picture)
- Map: Expands the map to full-screen, displaying only device locations.
- List: Focuses on the device list, removing the map for a detailed, column-based view.
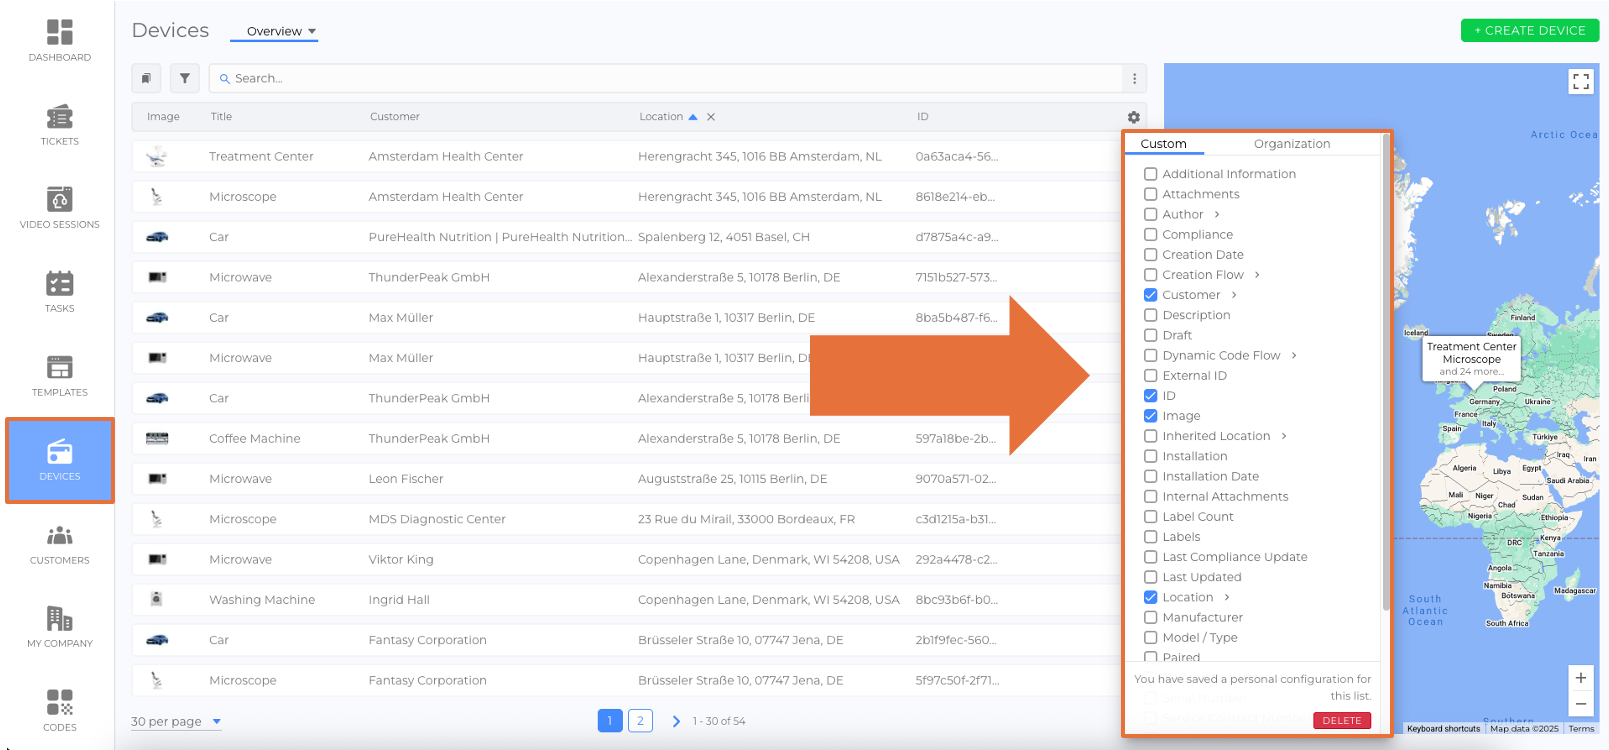
Sorting and Filtering
Devices can be sorted by attributes such as Title, Customer, Location, and Last Update. Filters allow users to refine results based on specific criteria. (picture)(picture)
For details on sorting, filtering, and customizing list views, refer to the article Lists (article).
Map Search Area Highlight
When performing a radius search on the map, if no devices are found within the specified area, the map displays a circle highlighting the searched region. This visual indicator helps users understand the selected search radius and adjust their parameters more efficiently. The map automatically centers on the searched area to provide clear visual feedback even when no results are returned.
How to Add a New Device
There are multiple ways to create a new device in the Back Office:
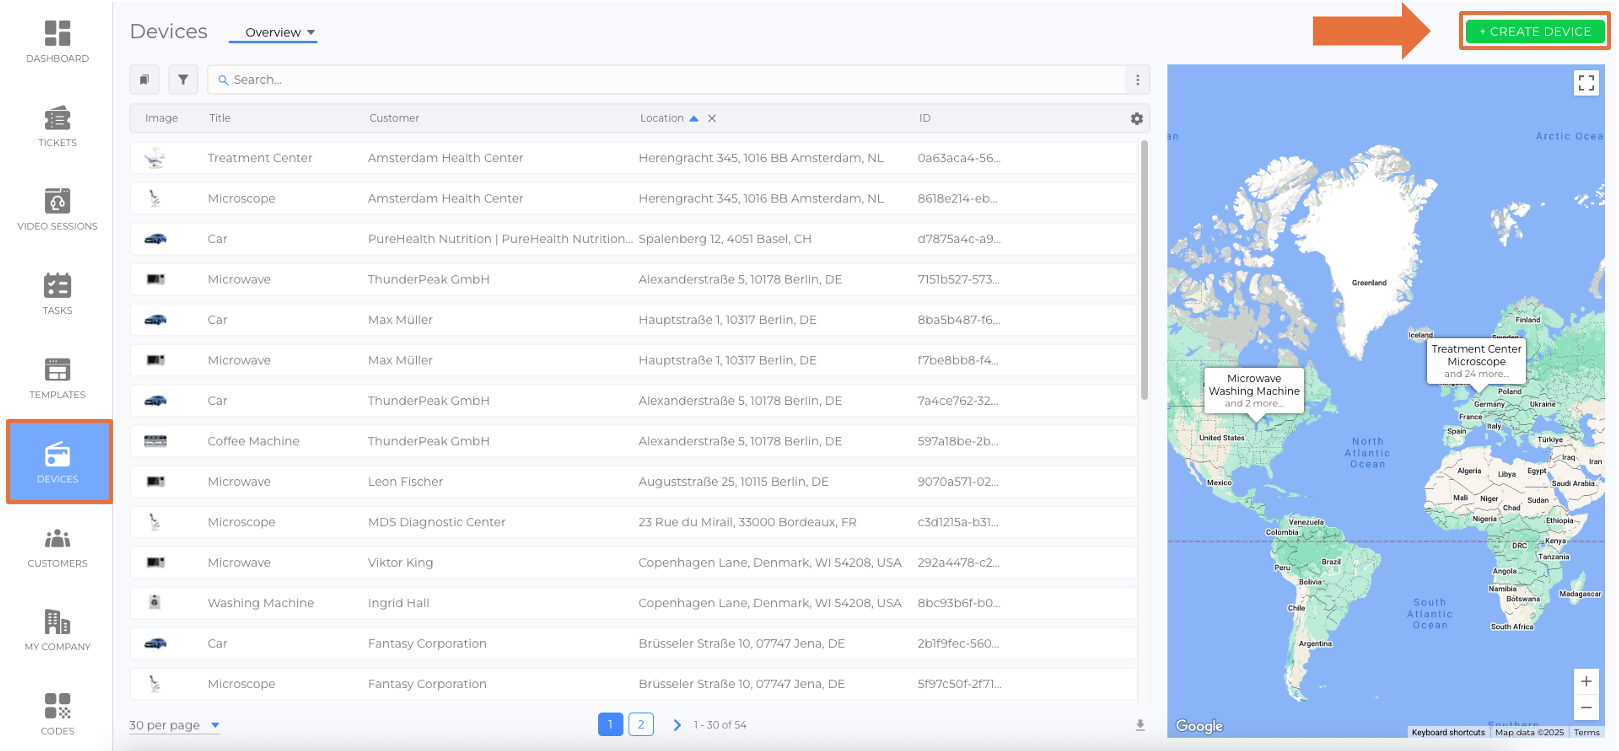
Option 1: Create a Device from the Devices View
- Select Devices in the side menu of the application.
- Click + Create Device (picture).
- Follow the device creation flow to create the new device.
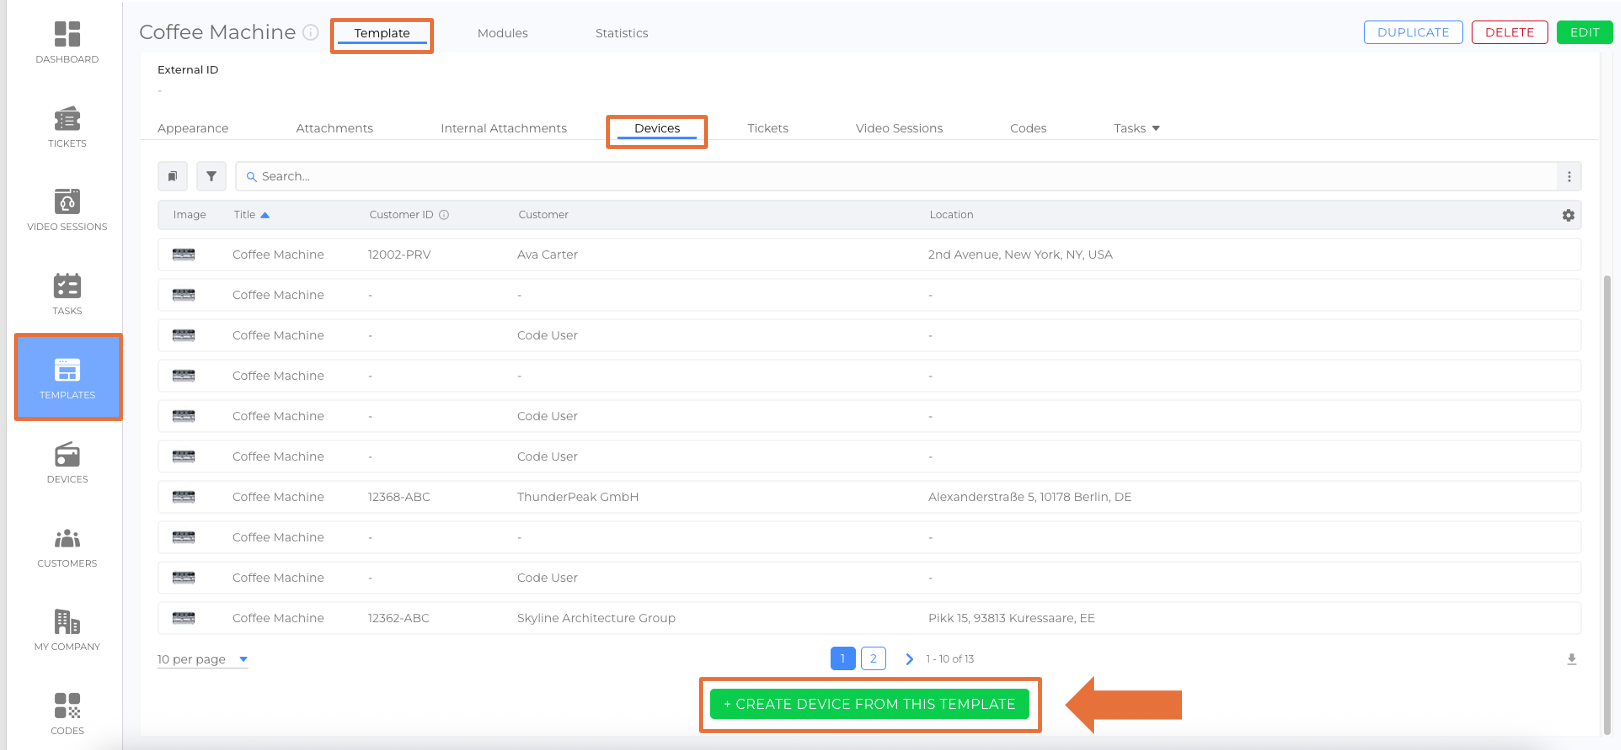
Option 2: Create a Device from a Template View
- Select Templates on the side menu of the application.
- Select a template to access the Template Details View.
- Open the Devices Tab within the template.
- Click + Create Device From This Template (picture).
- Complete the device creation flow to generate a new device based on the selected template.
Option 3: Create a Device from the Customer Details View
- Select Customers in the side menu of the application.
- Select a customer to access the Customer Details View.
- Open the Devices Tab within the customer profile.
- Click + Create Device.
- Complete the device creation flow to generate a new device based on the selected template.
Note: The device will automatically be linked to this customer.
Devices can also be added via the Mobile Application:
Option 4: Create a Device from the Devices Tab (Mobile)
- Log in to the Mobile Application.
- From the Mobile Dashboard, select the Devices Tab.
- Click the + button.
- Select a Template.
- Select a Device Creation Flow.
Option 5: Create a Device via a Dynamic Code (Mobile)
- Scan a Dynamic Code.
- Complete the Dynamic Code Creation Flow.
For details, refer to the article Dynamic Codes (article).
Integration with Google Wallet
After a device has been successfully created, it can optionally be linked with Google Wallet. This enables the device to receive notifications directly in the Wallet app. Linking can be done from the device settings via Link with Google Wallet.
Good to Know
- Navigation to the Device Details View: Clicking on any listed device opens its Device Details View, where users can access and manage device-specific settings.
- Dynamic Map Updates: The map in the Overview displays only the devices currently listed on the page and updates accordingly.
- Sorting and Filtering Enhancements: Users can customize displayed attributes and apply filters to streamline management.
 We use cookies on our website to give you the most relevant experience by remembering your preferences and repeat visits. By clicking “Accept All”, you consent to the use of ALL the cookies. However, you may visit "Cookie Settings" to provide a controlled consent.
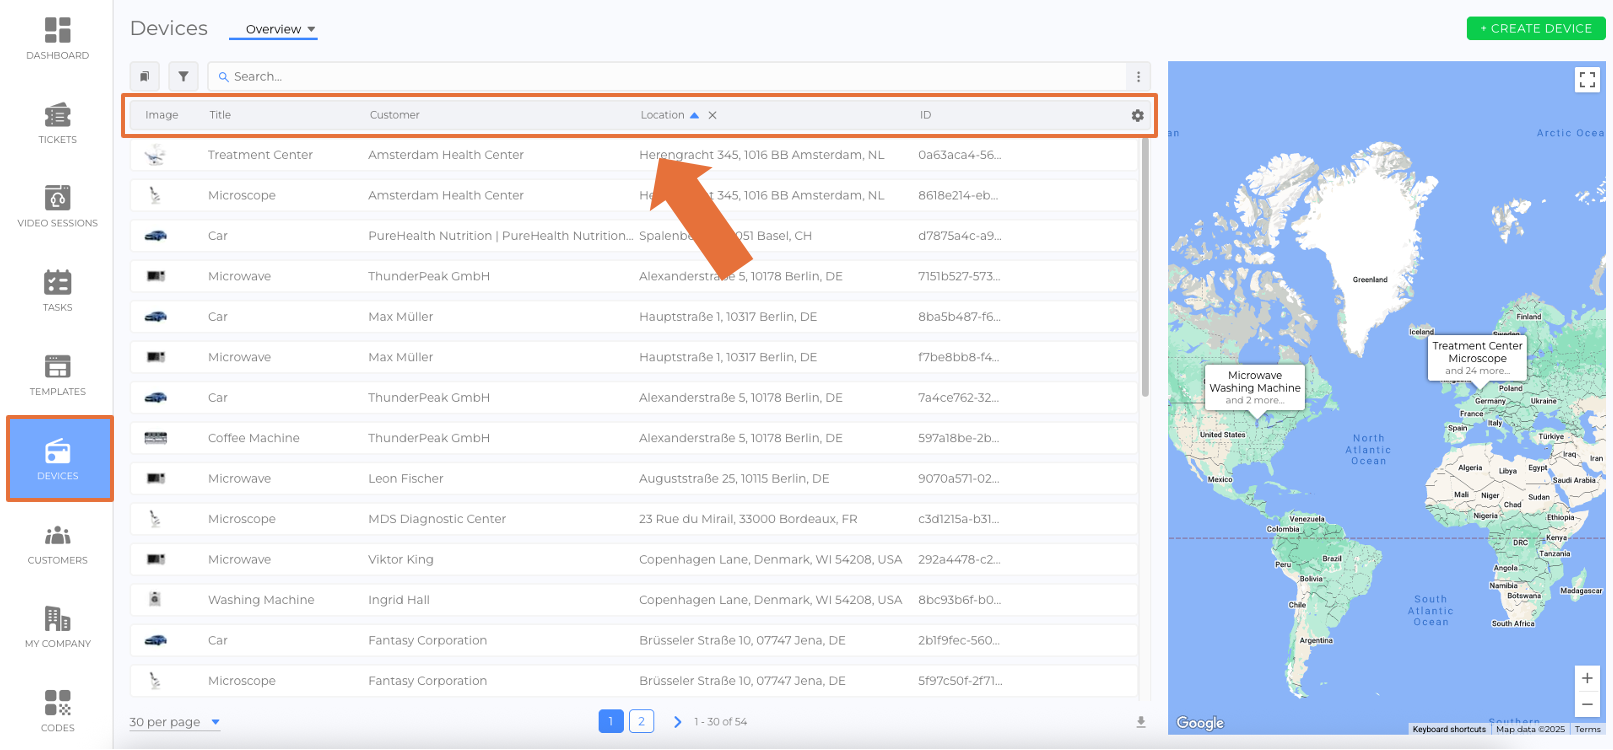