Introduction
Video sessions are a powerful tool for enabling remote support and guidance. With advanced features like recordings, augmented reality (AR) tools, and live interaction, video sessions allow employees to assist code users efficiently without requiring on-site visits.

Creating Video Sessions
Video sessions can be created by both service employees and code users, but there are differences in how they are initiated:
Code Users
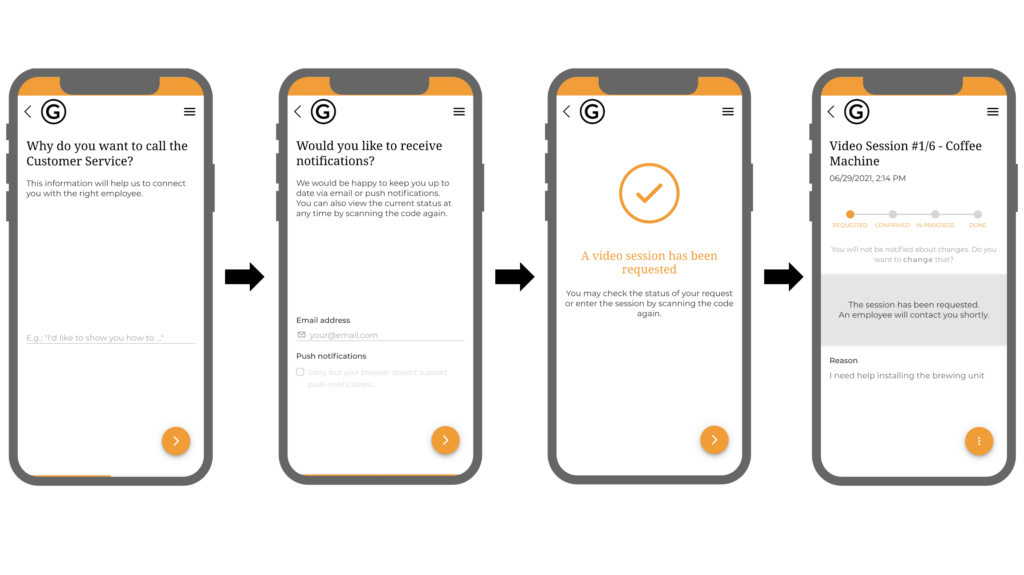
Code users must request video sessions, and these requests need to be confirmed by a service employee before a call can begin.
Ways to Request a Video Session:
- Video Session Module Button: If the video session module button is available, click it. Then, if a camera and plus button is displayed, click it to start a video session request flow. (picture)
- Text Assistant: IVideo session request flows may also be accessible via action buttons in the Text Assistant (article).
Note: The ability to request video sessions depends on settings made by the service provider organization. Code users may not have permission to request video sessions.

What Happens After a Request?
- Responsible employees are immediately notified of the request.
- They can review details like the device, reason for the request, and linked tickets before confirming.
Service Employees
Service employees can create video sessions directly, and these sessions are immediately set to "CONFIRMED," allowing the call to be initiated without delay.
Ways to Create a Video Session:
In the Back Office:
- Video Sessions Tab: Click +CREATE VIDEO SESSION. (picture)
- Device Details View: Navigate to the Video Sessions Tab within the device details view and click +CREATE VIDEO SESSION.
- Messenger (Ticket Details View): Click +CREATE VIDEO SESSION while communicating with code users. (picture)
In the Mobile Application:
- Navigate to the Mobile Dashboard and select the Video Sessions Module.
- Click the button with a video camera and plus symbol. (picture)
- Select the device for which the video session should be created.
Video Session Statuses
The status of a video session indicates its progress.

| Status | Meaning |
|---|---|
| REQUESTED | A code user has requested a video session. The session must be confirmed before a call can be initiated. |
| CONFIRMED | The session has been approved by a service employee. Both sides can now start the call. |
| IN PROGRESS | The call is currently ongoing. |
| DONE | The call has ended, but the session remains open for review. |
| CLOSED | The session is finalized. Code users must submit a new request for another session unless reopened by a service employee. |
| CANCELLED | The session has been canceled by either the code user or the service employee. |
Note: The status changes automatically at key points (e.g., "IN PROGRESS" when a call begins).
Before the Video Session
Steps for Service Employees:
- Review the Request:
- Confirm the Request:
- Enable Recording (Optional):
Starting a Video Session
Once the session is set to "CONFIRMED," both the service employee and the code user can initiate the call by clicking START.
- Service Employee Camera Settings:
- The camera is off by default but can be enabled before or during the call (picture).
Tools Available During Video Sessions
| Feature | Description |
|---|---|
| Recording | Sessions can be recorded (with consent). Recordings are uploaded after the session and accessible to both parties. (picture) |
| Screenshots | Screenshots can be taken and edited collaboratively. These are automatically saved to the session details. (picture) |
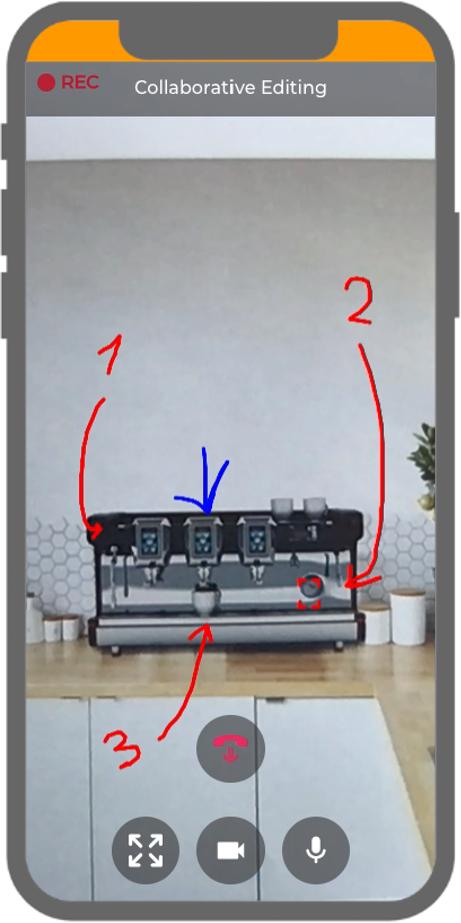
| Drawings | Both parties can draw on the video. Drawings are temporary and disappear after a few seconds. (video) (video) (video) |
| Tracking | Employees can highlight and track elements in the video. Highlighted elements remain highlighted even when the frame moves. (video) |
| Mirroring | Employees can flip the video to view it in a mirrored perspective. (video) |
After the Video Session
- Status Update: The session status changes to "CLOSED" automatically.
- Data Upload: Recordings, screenshots, and any additional session data are uploaded and saved to the Video Session Details View.
- Follow-Up:
- Code users must create a new request for additional calls unless the session is reopened by the service employee.
- Reopening a session allows another call to be conducted under the same session. (picture)
Good to Know
- The ability of code users to request video sessions depends on the settings configured by the service provider organization.
- Only employees assigned to the video session can manage or conduct calls.
- All session-related data, such as recordings and screenshots, are accessible via the Video Session Details View.
